Owner’s manual




Why does my LG dryer keep saying check filter?
On the LG DLGX3071R dryer, the Check Filter message is a normal reminder to clean the lint screen before starting a cycle. It does not mean the dryer has detected a failure; the reminder typically clears once the cycle begins.
What to do first (quick checklist)
- Remove the lint screen and clean off all lint.
- Rinse the screen with warm water if you see a film (fabric softener residue), then let it dry fully.
- Reinstall the screen so it seats flat and fully.
- Start a cycle; confirm the message clears.
- Review the indicator behavior in the DLGX3071R owner's manual.
When the message is a sign of an airflow problem
If drying times are getting longer or the dryer feels hotter than normal, treat the reminder as a prompt to check airflow.
Common airflow restrictions
- Lint buildup in the lint screen housing
- Crushed, kinked, or overly long vent duct
- Clogged exterior vent hood or stuck damper
- Heavy lint buildup inside the blower housing
Parts that can help if the lint screen is damaged
A torn or warped lint screen can let lint bypass the filter and restrict airflow inside the dryer. If your screen does not fit tightly or has holes, replace it with the correct part for this model: dryer lint filter 5231EL1003B.
Why it matters
Good airflow helps the DLGX3071R dry faster, prevents overheating, and reduces wear on heat-related components such as thermostats and sensors.
| Symptom | Most likely cause | Best next step |
|---|---|---|
| Message shows, drying is normal | Normal reminder | Clean screen; start cycle |
| Long dry times | Vent restriction | Inspect and clean venting |
| Screen won’t seat or is torn | Damaged lint screen | Replace lint filter |
Last updated: February 2026
What is the average lifespan of an LG dryer?
Most LG dryers, including the LG DLGX3071R, typically last 10 to 15 years with normal household use and basic maintenance. Consistent airflow care (lint and vent cleaning) and fixing wear parts early are the biggest factors in reaching the high end of that range.
What affects dryer lifespan the most
- Vent restriction (crushed duct, long runs, clogged exterior hood) increases heat and wear
- Lint buildup in the lint screen housing and blower area reduces airflow
- Overloading strains the drum, belt, rollers, and motor
- Ignoring noise (squeal, thump, rumble) lets small wear turn into bigger damage
- Heat problems (cycling too hot or not heating) can stress thermostats and the burner system
Maintenance schedule we recommend
| Task | How often | Why it helps |
|---|---|---|
| Clean lint screen | Every load | Keeps airflow strong and drying times short |
| Check vent airflow at outside hood | Monthly | Prevents overheating and long dry times |
| Clean vent duct run | Every 6 to 12 months | Reduces strain on motor and heat system |
| Listen for new noises | Ongoing | Catches roller/belt/idler wear early |
Parts that commonly limit lifespan (and what symptoms look like)
If your DLGX3071R is getting loud or stopping mid-cycle, these wear items are common culprits:
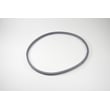
- Belt 4400EL2001F: drum won’t turn, burning rubber smell, intermittent tumbling
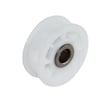
- Dryer idler pulley 4560EL3001A: squealing, belt slipping, drum not starting smoothly
- Dryer drum support roller 4581EL2002L: thumping or rumbling as the drum turns
Why it matters
A dryer that takes longer to dry or runs hotter than normal wears out faster and costs more to operate. Keeping airflow clear and replacing drum-drive wear parts early helps the LG gas burner and motor run under normal load.
For model-specific care and cleaning steps, follow the DLGX3071R owner's manual.
Last updated: February 2026
How do I fix the D80 code on my LG dryer?
The D80 code on an LG DLGX3071R dryer means the dryer is detecting severely restricted exhaust airflow (about 80% blocked). Fix it by cleaning the lint path and the entire vent run, correcting crushed or long venting, then retesting airflow; the code clears after airflow returns to normal.
What to do first (fastest fixes)
- Unplug the dryer (or switch off the breaker) before opening panels.
- Clean the lint screen and the lint screen housing thoroughly.
- Pull the dryer out and inspect the vent hose for kinks, crushing, or sagging.
- Disconnect the vent hose and run a timed dry cycle for 2 to 3 minutes to compare airflow.
- Go outside and confirm the exterior hood flap opens strongly and is not blocked.
Deep clean checklist (most common root cause)
Restricted airflow is usually lint buildup somewhere between the blower outlet and the outside hood.
- Clean the entire vent pipe to the outside (all elbows and long runs).
- Remove any plastic or foil accordion venting; use rigid or semi-rigid metal duct.
- Keep the vent run as short and straight as possible.
- Make sure the outside hood is the correct type (no screen that traps lint).
- If airflow is still weak with the vent disconnected, clean internal lint buildup around the blower area.
Parts that can contribute (when airflow is fine but drying is still poor)
If the venting is clear but loads still overdry or stop early, check the moisture sensing system.
| Symptom | Likely area | What we recommend |
|---|---|---|
| D80 returns quickly after vent cleaning | Vent run or exterior hood | Rework vent routing; shorten and straighten |
| Clothes take too long to dry, airflow feels weak | Blower or lint blockage inside cabinet | Inspect blower area; clean internal lint |
| Auto cycles end too soon or act erratic | Moisture sensing | Clean sensor bars; inspect wiring and sensor |
Helpful model-matched parts to inspect if needed:
- Dryer lint filter 5231EL1003B (lint screen fit and sealing)
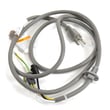
- Dryer moisture sensor 6500EL3001A (sensing bars and circuit)
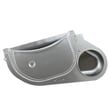
- Dryer blower wheel 5835EL1002A (air movement if damaged or clogged)
Why it matters
Restricted venting makes the dryer run hotter and longer, increases drying times, and can trigger repeated airflow codes. Restoring proper exhaust airflow protects drying performance and helps prevent overheating shutdowns.
For model-specific airflow checks and cleaning access points, follow the DLGX3071R owner's manual.
Last updated: February 2026