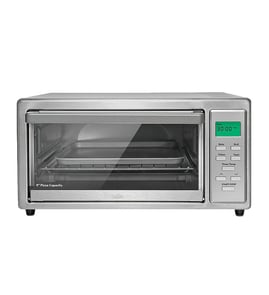

Can you use aluminum foil in a black and decker toaster oven?
Yes, you can use aluminum foil in a Black & Decker toaster oven like model TRO200VA, but only in limited, safe ways: use it on or around the food, and keep it off the crumb tray, oven floor, walls, and fully covering the rack. For parts and model lookups, use Sears PartsDirect.
Safe ways to use foil in a toaster oven
- Line a baking pan or small tray with foil (foil stays on the pan, not on the oven surfaces).
- Wrap food loosely (leave space for heat to circulate).
- Create a small foil “tent” over food to reduce over-browning.
- Place foil under food only if it is on a pan and not blocking airflow.
What not to do (common causes of overheating)
- Do not put foil on the crumb tray.
- Do not lay foil directly on the oven floor or against the side walls.
- Do not cover the rack edge-to-edge with foil (it blocks heat flow).
- Do not let foil touch the heating elements.
Quick safety checklist
| If you do this | What can happen | Better option |
|---|---|---|
| Foil on crumb tray or oven floor | Heat buildup, poor cooking results | Use a foil-lined pan |
| Foil touching elements | Scorching, damage risk | Keep foil at least 1 inch away |
| Rack fully covered with foil | Blocked airflow, uneven cooking | Tent food or use a pan |
Why it matters
Toaster ovens like the Black & Decker TRO200VA rely on tight airflow and reflected heat. Foil placed on interior surfaces can trap heat and disrupt circulation, which leads to uneven cooking and overheating.
If you need foil-free alternatives
- Use a small toaster-oven-safe pan or sheet.
- Use parchment paper on a pan (keep it away from elements).
- Keep the crumb tray clean so airflow stays consistent.
Last updated: February 2026
How to use black decker toaster?
For the Black & Decker TRO200VA toaster oven, we set the function and temperature (or toast shade), set the timer, then let the unit heat and cook until the timer ends. Always use the crumb tray and keep food centered on the rack for even results.
Quick start steps (toast, bake, broil)
- Place the toaster oven on a flat, heat-resistant counter with clearance around vents.
- Insert the crumb tray before you start.
- Put the rack in the correct position (higher for broil, middle for toast, lower for bake).
- Select the cooking function (toast, bake, broil, keep warm if equipped).
- Set temperature (bake/broil) or toast shade (toast).
- Turn the timer to start; many toaster ovens only heat when the timer is running.
What each control usually does
| Control | What it’s for | Common tip |
|---|---|---|
| Function selector | Chooses toast/bake/broil | Match the mode to the food type |
| Temperature knob | Sets heat level for baking/roasting | Preheat 5 to 10 minutes for baking |
| Toast shade | Sets browning level | Start mid-range, adjust next batch |
| Timer/toast timer | Starts heating and sets cook time | Use shorter times for thin foods |
Tips for better results
- Toast: Keep slices centered; use a mid shade first, then adjust darker or lighter.
- Bake: Preheat for casseroles, cookies, and frozen snacks; use an oven-safe pan that fits without touching the walls.
- Broil: Use the top rack position; watch closely because broiling browns fast.
- Cleanup: Empty the crumb tray after it cools; wipe the interior with a damp cloth (no harsh abrasives).
Safety checks that prevent common problems
- Unplug before cleaning or moving the unit.
- Keep foil away from heating elements and vents.
- Do not operate with the crumb tray removed.
- If it will not heat, confirm the timer is set and the outlet works.
Why it matters
Using the correct rack position, mode, and timer on the TRO200VA improves browning and cooking accuracy, reduces smoke from crumbs, and helps protect heating components from overheating.
For replacement parts and diagrams for the Black & Decker TRO200VA, start with the model parts list, or search by model on Sears PartsDirect.
Last updated: February 2026
Is it worth fixing a toaster oven?
Yes, fixing a Black & Decker toaster oven like model TRO200VA is worth it when the problem is simple (power issue, loose wire, worn switch, timer/thermostat symptoms) and the repair cost stays well below the price of a replacement; for major heat damage or repeated failures, replacement is the better value.
Quick decision checklist
- Fix it if it intermittently loses power, will not heat evenly, or the controls feel worn but the oven body is in good shape.
- Replace it if you see melted plastic, burn marks, a burning smell, or the cord/plug is damaged.
- Fix it if you can diagnose the issue with basic electrical checks (continuity, loose connections).
- Replace it if the repair requires extensive internal rewiring or multiple parts.
- Fix it if you like the size/features and the unit is otherwise clean and solid.
Typical cost and effort comparison
| Scenario | What it usually involves | Best choice |
|---|---|---|
| No power | Outlet check, cord/connection inspection, internal fuse/thermal cutoff testing | Often fix |
| Heats but will not toast evenly | Cleaning crumbs/grease, checking heating circuit and control | Often fix |
| Timer/knob issues | Control inspection, switch/timer testing | Often fix |
| Visible heat damage or smoke | Insulation/wiring damage, multiple components affected | Usually replace |
What we recommend checking first (safe, fast steps)
- Unplug the toaster oven and let it cool completely.
- Check the outlet by plugging in a lamp or phone charger.
- Inspect the power cord and plug for cuts, looseness, or discoloration.
- Shake out crumbs; heavy buildup can cause overheating and poor performance.
- If you are comfortable with electrical testing, use a meter to check continuity on suspect components and wiring (a common next step is covered in how to use a multimeter to test electrical parts video).
Why it matters
Toaster ovens are simple appliances, so many failures are isolated to a control, connection, or protective device. When the fix is straightforward, you save money and avoid replacing an appliance that still has plenty of usable life.
Parts and model matching
For the best results, match parts by the full model number TRO200VA when you search; you can start with the model parts list and expand your search on Sears PartsDirect.
Last updated: February 2026
Are black and decker toaster ovens any good?
Yes. Black & Decker toaster ovens like model TRO200VA are a solid choice for everyday toasting, reheating, and small-batch baking because they deliver good performance for the price. The main tradeoffs are more basic temperature precision and more variation in toasting results compared with higher-end countertop ovens.
What “good” usually means for a toaster oven
Most owners judge a toaster oven on speed, even browning, and how consistently it holds heat. For Black & Decker units in this class, you can expect:
- Good value for basic cooking tasks (toast, leftovers, frozen snacks)
- Fast preheat and simple controls (timer, function selector, temperature dial)
- Some hot spots; rotating the pan helps even browning
- More noticeable dial variance; using an oven thermometer improves results
Common pros and cons (what we see most often)
Here’s a practical way to weigh it out before you buy parts or troubleshoot performance.
| Category | Typical experience | What to do about it |
|---|---|---|
| Toasting | Can be uneven side-to-side | Use the center rack position; flip/rotate halfway |
| Temperature | Dial can run warm or cool | Verify with an oven thermometer; adjust setpoint |
| Capacity | Great for small pans and quick meals | Measure your pan size before relying on “fits a pizza” claims |
| Convenience | Simple, quick, compact | Keep the crumb tray clean to reduce smoke/odor |
Quick checks if your toaster oven seems “not good”
If your TRO200VA feels inconsistent, these steps usually improve results right away:
- Clean the crumb tray and interior (once fully cool and unplugged)
- Confirm the rack is fully seated and level
- Avoid foil touching heating elements (it can cause overheating and poor airflow)
- Test a simple item (plain bread) on the same setting twice to judge consistency
- If heat seems weak or intermittent, inspect the cord and outlet; then consider electrical testing
For safe electrical troubleshooting basics, we recommend how to use a multimeter to test electrical parts video.
Why it matters
A toaster oven that runs a little hot, has hot spots, or browns unevenly can still be “good” for daily use, but it changes how you cook: you rely more on rotating food, verifying temperature, and keeping airflow clear. Those habits also help extend heating element and control life.
If you need to look up parts by model number or explore replacement options, start with the model TRO200VA parts list, or search by model at Sears PartsDirect.
Last updated: February 2026
How many years should a toaster oven last?
A toaster oven typically lasts about 5 years with normal home use and routine cleaning. For your Black & Decker TRO200VA, lifespan is driven mostly by heat stress, grease buildup, and how often it runs, not the label on the front.
Typical lifespan ranges
Most countertop toaster ovens fall into these real-world ranges:
- Normal use (once daily or less): about 5 years
- **Heavy use (multiple cycles daily): 3 to 4 years
- Light use (occasional): 6+ years
- Poor ventilation or frequent overheating: shortens life quickly
- Grease and crumb buildup: accelerates wear on wiring, thermostat, and controls
What makes a toaster oven wear out faster
Heat and contamination are the big killers for units like the TRO200VA.
| Factor | What it does | What to do |
|---|---|---|
| Grease film inside | Traps heat, can cause smoking and hot spots | Degrease interior regularly |
| Crumbs in tray/bottom | Can scorch and overheat nearby parts | Empty crumb tray often |
| Tight clearance | Raises internal temperatures | Leave several inches around the oven |
| Long high-heat runs | Stresses heating circuits and controls | Use only the time needed |
Quick care checklist (helps reach the 5-year mark)
- Unplug and cool completely before cleaning.
- Empty and wash the crumb tray after messy foods.
- Wipe the interior to prevent baked-on grease.
- Keep vents clear; do not push it against a wall.
- Stop using it if it will not shut off reliably.
Why it matters
A toaster oven that overheats or has unreliable controls can damage internal wiring and create unsafe operating conditions. Keeping it clean and well-ventilated reduces heat stress and helps it reach its normal service life.
Helpful resources
- For safe DIY electrical testing steps, use: how to use a multimeter to test electrical parts video.
- To confirm you are shopping parts for the correct unit, use: how to find your appliance model number (and what it means for parts).
- To search by model number and order what you need, use Sears PartsDirect.
Last updated: February 2026