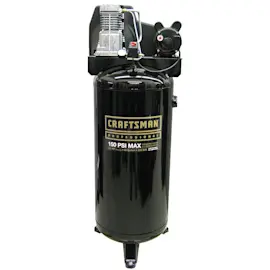
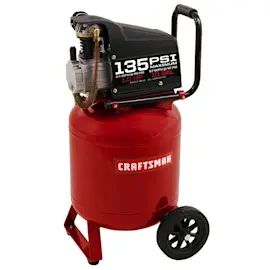
Owner’s manual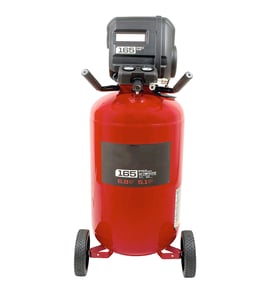



What is the average lifespan of an air compressor?
Most homeowner air compressors like the Craftsman 919165020 typically last 8 to 12 years with normal DIY use and basic maintenance. With heavier use or poor ventilation, lifespan is shorter; with consistent care (clean air filter, drain tank, fix leaks), it lasts longer. See the maintenance schedule in the owner's manual.
Typical lifespan by compressor type
Lifespan depends more on duty cycle, heat, moisture, and maintenance than the brand name.
| Compressor type | Typical lifespan | Best fit for |
|---|---|---|
| Oil-free, portable (DIY) | 5 to 10 years | Nailers, inflators, light spraying |
| Tank-mounted, homeowner (like many Craftsman units) | 8 to 12 years | Garage and jobsite use |
| Oil-lubricated, shop style | 10 to 20 years | Frequent tool use, better rebuild potential |
| Rotary screw (industrial) | 15 to 25 years | Continuous, high-demand air |
What shortens lifespan fastest
These are the most common “life reducers” we see on tank-mounted compressors:
- Running in a hot, dusty, or poorly ventilated area (the manual calls for clearance for airflow)
- Letting moisture sit in the tank (internal rust risk)
- Ignoring air leaks at fittings, regulator, drain valve, or check valve
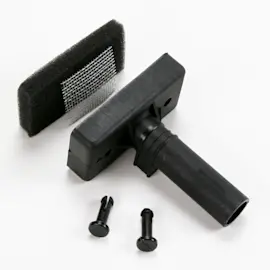
- Restricted intake from a dirty air filter
- Frequent hard starts from electrical issues (undersized extension cord, low voltage)
Maintenance that adds years
Your Craftsman 919165020 manual highlights routine items such as air filter inspection/replacement, safety valve inspection, and check valve replacement. Use this checklist:
- Drain the tank after use to remove moisture
- Keep the air filter clean and unobstructed
- Check for leaks and tighten fittings as needed
- Verify the safety valve operates correctly
- Use extra air hose instead of long extension cords (reduces voltage drop and overheating)
Why it matters
A compressor often “fails early” from heat, moisture, or leaks, not because the motor or pump is worn out. Preventing rust in the tank and keeping airflow and voltage correct protects the pump, pressure switch, and motor.
Last updated: February 2026
What is the most common cause of air compressor failure?
The most common cause of air compressor failure is poor maintenance that leads to overheating and accelerated wear. On the Craftsman 919165020 air compressor, restricted ventilation openings can cause serious overheating, and neglected basics like draining the tank can create rust that weakens the tank.
Most common failure drivers we see
- Overheating from restricted airflow: blocked ventilation openings, dirty shrouds, or poor placement
- Moisture left in the tank: not draining condensate leads to internal rust and thinning steel
- Air leaks and valve problems: leaking fittings, a stuck check valve, or a leaking safety valve
- Electrical issues: loose connections, blown fuse or tripped breaker, or overload protection tripping
- Using tools that exceed compressor capacity: prolonged excessive use and constant cycling
Quick prevention checklist (high impact)
- Keep all ventilation openings clear; never cover the motor/pump shrouds.
- Drain condensed water from the tank after use to reduce rust.
- Listen for leaks; fix hose/fitting leaks before they force longer run times.
- Use the correct extension cord gauge and keep cord length as short as practical.
- Match air tool demand to compressor output; avoid prolonged, continuous run time.
Troubleshooting map: symptom to likely cause
| What you notice | Most likely cause | What to check first |
|---|---|---|
| Motor won’t run or restart | Overload tripped, power issue, pressure switch/capacitor issue | Breaker/fuse, cord gauge, reset overload (if equipped) |
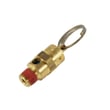
| Safety valve hisses/leaks | Defective safety valve or debris | Pull ring briefly; replace valve if it still leaks |
| Low air delivery | Restricted intake filter, leaks, check valve restriction | Intake filter, hose/fittings, check valve |
| Excessive vibration/noise | Loose mounts, wear, or internal issues | Mounting, fasteners, shrouds, pump condition |
Why it matters
Overheating and moisture are “multiplier” problems: they force longer run times, increase vibration, and speed up wear on the motor, pressure switch contacts, and pump components. Keeping airflow clear and draining the tank prevents many no-start and low-pressure complaints.
For model-specific operating and safety steps (including tank draining and ventilation warnings), follow the 919165020 owner's manual.
Last updated: February 2026
What does 4.0 SCFM at 90 PSI mean?
On a Craftsman 919165020 air compressor, 4.0 SCFM at 90 PSI means the compressor can deliver about 4 standard cubic feet of air per minute while maintaining 90 PSI at the outlet. This rating helps you match the compressor’s airflow to the SCFM requirement of your air tools.
How to use this rating to choose tools
Use SCFM at a stated PSI as the main “can it keep up?” number.
- Find your tool’s required SCFM at 90 PSI (or the closest listed pressure)
- Compare it to the compressor’s 4.0 SCFM at 90 PSI
- If the tool needs more SCFM than the compressor can supply, the tool will run weakly or the compressor will run constantly
- If the tool needs less SCFM, you typically get steadier pressure and less cycling
- Always keep the regulator outlet pressure at or below the tool’s maximum pressure rating
SCFM vs CFM vs PSI (quick definitions)
The Craftsman manual glossary defines these common terms; see the owner's manual.
| Spec | What it tells you | Why it matters |
|---|---|---|
| SCFM | Airflow measured at “standard” conditions | Best for comparing compressors and tool demands |
| CFM | Airflow (may be measured differently by different brands) | Useful, but less consistent than SCFM |
| PSI (PSIG) | Pressure level (force) | Higher PSI does not replace missing airflow |
Why 90 PSI is the common reference point
Many pneumatic tools (impact wrenches, ratchets, nailers, spray guns) are designed around 90 PSI operation. A compressor’s SCFM rating at 90 PSI is a practical benchmark for real-world tool performance.
What happens if SCFM is too low
When airflow demand is higher than supply, you’ll usually notice:
- Pressure drops while the tool is running
- Longer recovery time to reach cut-out pressure
- More frequent starts and stops (more heat and wear)
- Inconsistent spray patterns (for paint or texture tools)
A good next step is our air compressor common questions guide for sizing and everyday usage tips.
Last updated: February 2026
What company makes Craftsman air compressors?
Craftsman air compressors have been made by different manufacturers over the years, depending on the model series and when it was built. For Craftsman model 919165020, the documentation identifies it as a Sears-branded unit (Sears, Roebuck and Co.), and the original manufacturer can vary by model prefix and production era; use the 919165020 owner's manual to confirm the exact identification details for your unit.
Common manufacturers by Craftsman model prefix
These are the most common maker relationships customers run into when researching older Craftsman compressors:
- 919-xxxxx models: commonly associated with DeVilbiss Air Power built units (often referenced in parts and service history)
- 106-xxxxx models: commonly associated with Campbell Hausfeld built units
- Some series were produced under changing corporate ownership and private-label arrangements over time
How to identify who made your specific compressor
The most reliable way is to match the data on the compressor itself to the manual and parts information.
- Check the data plate for the full model number (919165020) and any type/code numbers
- Look for a pump or motor label that lists a manufacturer name
- Match the compressor description in the manual (for this model it is described as a permanently lubricated, tank mounted air compressor)
- Use the model number and part description consistently when ordering or servicing
Quick ID checklist
| What to check | Where to look | What it tells you |
|---|---|---|
| Model number | Tank label/data plate | Confirms the correct parts breakdown |
| Prefix (919 vs 106) | Beginning of model number | Points to the common manufacturer family |
| Pump/motor label | On the pump or motor housing | May name the actual builder |
Why it matters
Knowing the likely manufacturer helps you troubleshoot correctly (pressure switch behavior, check valve layout, pump rebuild approach) and avoid mismatched replacement parts when you service the compressor.
Related DIY help
If you are diagnosing a problem while researching the maker, these guides often line up with the most common failures on older Craftsman units:
Last updated: February 2026
Are air compressor parts interchangeable?
Air compressor parts are not reliably interchangeable, even between similar-looking units. For your Craftsman 919165020 air compressor, parts must match the model’s design and factory-set operating pressures; swapping “close enough” parts can cause poor performance and unsafe pressure control. See the 919165020 owner's manual for model-specific guidance.
What usually is not interchangeable
Even when fittings look the same, internal specs often differ.
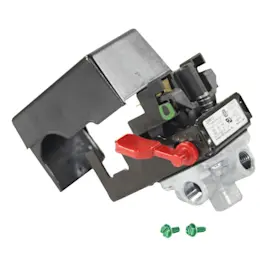
- Pressure switch components (cut-in/cut-out settings and porting)
- Safety valve and pressure relief parts (opening pressure must match factory spec)
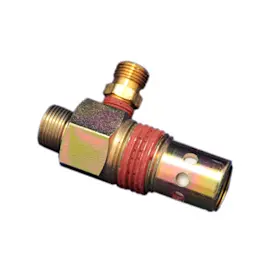
- Tank attachments (ports, check valve style, unloader routing)
- Regulator and gauge styles (thread type, pressure range, calibration)
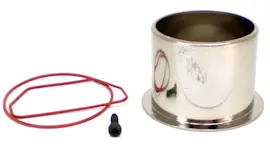
- Pump parts (valves, seals, cylinder parts, mounting pattern)
How we match the right part for Craftsman 919165020
Use the model number and the exact part identification details.
| What to match | Why it matters | What to use |
|---|---|---|
| Model number | Ensures correct design and fit | 919165020 |
| Part number and description | Prevents wrong pressure ratings or port sizes | The parts list tied to this model |
| Electrical requirements | Avoids nuisance trips and overheating | Circuit and cord specs in the manual |
Safe guidelines when considering substitutions
The manual’s safety guidance is clear: do not modify the tank or change factory pressure settings.
- Never drill, weld, or modify the tank or its attachments
- Never substitute parts to change factory-set operating pressures
- Never exceed the maximum pressure rating of hoses, tools, or accessories
- Keep ventilation openings clear to prevent overheating
- Use proper power supply and extension cord gauge (for example, avoid undersized cords)
Why it matters
Air compressors depend on matched components to control pressure, start reliably, and protect the tank and connected air tools. A mismatched check valve, pressure switch, or safety valve can lead to hard starting, air leaks, or unsafe pressure behavior.
Related DIY help
Last updated: February 2026