Installation guide
 Owner’s manual
 Error Codes



What are common problems with GE ranges?
Common problems we see on GE gas ranges like model JGB660EEJ4ES include surface burners that click but won’t light, an oven that won’t heat or heats unevenly, and control or display issues. Many of these come down to ignition parts, airflow/cleaning, or a failing control component; use the owner's manual for model-specific checks and safety steps.
Most common symptoms (and what usually causes them)
- Surface burner won’t light or lights slowly: clogged burner ports, wet/dirty burner cap, weak spark, or a failing spark system.
- Constant clicking from the igniters: moisture or food spill around the igniter area, misaligned cap, or a spark module issue.
- Oven won’t heat (bake) or takes too long: weak bake igniter, gas flow issue, or control problem.
- Broil not working: weak broil igniter or related wiring.
- Temperature seems off: rack placement, blocked vents, door seal issues, or control/sensor-related problems.
- Oven light not working: burned-out bulb or a bad socket.
Quick checks we recommend first
- Confirm gas and power: the range needs electrical power for spark ignition and controls.
- Clean and reseat burner parts: remove the cap, dry everything, clear ports, then reinstall squarely.
- Listen and look:
- Spark present but no flame often points to gas flow or clogged ports.
- No spark often points to the spark module or switch/igniter circuit.
- For oven heat issues: watch the igniter during bake or broil; a weak igniter can glow but still not open the gas valve reliably.
Parts that commonly solve these problems (when diagnosis confirms)
| Symptom | Common fix | Example part for JGB660EEJ4ES |
|---|---|---|
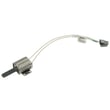
| Oven won’t heat | Replace bake igniter | Range oven burner igniter WB13X40206 |
| Broil won’t work | Replace broil igniter | Range broil igniter WB13X40207 |
| Burners keep clicking/no spark | Replace spark module | Range spark module WB13X24741 |
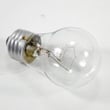
| Oven light out | Replace bulb or socket | 40a15bulb 40A15, range light socket WB08T10026 |
Why it matters
Ignition and gas-flow problems can prevent proper combustion, cause delayed ignition, and make cooking inconsistent. The manual’s safety section also covers what to do if you smell gas; follow those steps exactly. See the installation guide for setup details that can affect performance.
Last updated: February 2026
What is the life expectancy of a GE gas range?
A GE gas range like model JGB660EEJ4ES typically lasts 13 to 15 years. With consistent cleaning, correct burner operation, and timely replacement of wear parts (like igniters and knobs), many ranges reach the upper end of that range.
What affects how long your range lasts
- Heat and grease buildup on burners and inside the oven (accelerates corrosion and ignition issues)
- Ignition system wear (spark module, igniters, wiring connections)
- Control and electrical stress (power surges, moisture, repeated overheating)
- Gas supply quality (pressure issues can cause weak flames and longer ignition times)
- How often you cook (daily heavy use shortens lifespan compared to light use)
Maintenance that extends service life
We recommend these habits for a GE freestanding gas range:
- Clean burner caps and ports regularly so flames stay even.
- Keep the cooktop dry around igniters to prevent constant clicking.
- Avoid lining the oven bottom with foil; it can trap heat and affect airflow.
- Replace failing ignition parts early to prevent no-heat situations.
- Follow the cleaning and maintenance schedule in the owner's manual.
Common “end-of-life” symptoms (and what they usually mean)
| Symptom | Most common cause | Typical fix |
|---|---|---|
| Oven won’t heat or takes too long to light | Weak oven igniter | Replace range oven burner igniter WB13X40206 |
| Burners click but don’t light reliably | Dirty burner cap, weak spark, moisture | Clean cap; check range spark module WB13X24741 if multiple burners act up |
| Knob is cracked or won’t turn smoothly | Worn knob insert | Replace range surface burner knob WB03X24818 |
| Oven light doesn’t work | Burned-out bulb or bad socket | Replace 40a15bulb 40A15 or range light socket WB08T10026 |
Why it matters
A range that is near the end of its typical lifespan often shows up as slow ignition, uneven flames, or inconsistent oven temperatures. Addressing those issues early usually costs less and helps keep cooking performance steady.
Last updated: February 2026
What's the average cost to install a gas stove?
For a GE JGB660EEJ4ES gas freestanding range, the average installed cost is usually $200 to $600 when you already have a compatible gas shutoff valve and 120V outlet in place. If a new gas line, shutoff, venting changes, or permits are needed, total cost commonly rises to $800 to $3,500+.
What drives the price up or down
Installation cost is mostly about the home setup, not the range itself. These items change the quote the most:
- Whether a gas line and shutoff valve already exist behind the range
- Whether the installer must add or replace a flexible gas connector (a new connector is the standard)
- Any required permit or inspection in your area
- Anti-tip bracket installation and verification
- Converting natural gas to propane (or back), which must be done by a qualified installer
- High-altitude setup (over 6,000 ft may require a kit)
Typical cost ranges (quick guide)
| Scenario | What’s included | Typical cost range |
|---|---|---|
| Simple swap | Disconnect old range, connect new range, basic leak test | $200 to $600 |
| Connector and shutoff updates | New connector, minor gas plumbing updates | $400 to $1,200 |
| New gas line or major changes | Running a new line, permits, longer labor time | $800 to $3,500+ |
| Propane conversion | Orifice/regulator conversion by qualified installer | $200 to $600+ (plus parts/labor) |
Installation must-dos for safety (and to avoid callbacks)
These steps are required for proper setup and are called out in the installation instructions:
- Use a NEW flexible connector (reusing an old one can lead to leaks)
- Perform a leak test after connecting gas
- Confirm the range is properly grounded (120V outlet)
- Install and engage the anti-tip bracket
- Avoid using an air curtain style hood that blows air down onto the cooktop
For the exact requirements and clearances for your model, follow the installation guide.
Why it matters
A “cheap” install that skips the anti-tip bracket, reuses an old connector, or doesn’t leak-test can create serious performance and safety problems. Paying for a correct hookup usually prevents repeat service calls and burner ignition issues.
Last updated: February 2026