Installation guide
 Error Codes



What is the size of a standard Whirlpool stove?
A “standard” Whirlpool stove (freestanding range) is typically about 30 inches wide, roughly 27 to 29 inches deep, and about 36 inches tall. Since your Whirlpool RBS275PDS12 is a built-in electric wall oven, the more useful measurement is the cabinet cutout size shown in the installation guide.
A stove and a wall oven install very differently. A stove slides into place; a wall oven fits into a cabinet cutout and must match the opening.
- Standard stove/range width: 30 inches (most common)
- Common “larger” stove/range width: 36 inches
- Depth and height vary by handle, backguard, and leveling feet
- Wall ovens use cutout dimensions, not overall “stove size”
For this Whirlpool wall oven, the installation guide shows these key minimums for a single oven cutout:
- Minimum cabinet width: 27 inches
- Cutout width: 25-1/2 inches
- Minimum cutout height: 27-3/4 inches
- Minimum cutout depth: 28-1/4 inches
| Measurement type | Typical “standard stove” | RBS275PDS12 (built-in wall oven cutout) |
|---|---|---|
| Width | 30 inches | 25-1/2 inches cutout (27 inches min cabinet) |
| Height | ~36 inches | 27-3/4 inches min cutout height |
| Depth | ~27 to 29 inches | 28-1/4 inches min cutout depth |
Using stove dimensions to plan a wall oven install often leads to fit problems. Matching the cabinet cutout width, height, and depth to the RBS275PDS12 requirements helps prevent gaps, door interference, and installation delays.
Last updated: February 2026
What does F1 on a Whirlpool stove mean?
On a Whirlpool oven like model RBS275PDS12, an F1 code points to a problem the control is detecting in the oven’s electronic system, commonly tied to temperature sensing or the control circuit. If an “F” followed by a number appears, the installation instructions direct you to check the service guidance section.
- Press CANCEL/OFF to clear the code and let the oven sit for 1 to 2 minutes.
- If the code returns, turn off power at the breaker for 1 minute, then restore power.
- Confirm the oven is on a dedicated circuit sized for the rating plate (many built-in ovens use 30A or 40A depending on kW rating).
- If the display shows the code during heat-up, stop using the oven until you troubleshoot.
- Review the wiring and grounding requirements in the installation guide.
F1 is usually triggered when the control sees an abnormal signal. These are common, fixable causes:
- Oven temperature sensor out of range (sensor resistance drifting, intermittent connection)
- Loose or overheated wiring connection at the sensor or control
- High-limit thermostat tripped or failing (overheat protection opening)
- Control board/keypad issue (less common, but possible if the code appears immediately at power-up)
| Symptom you notice | What it often points to | Model-matched part to check |
|---|---|---|
| Oven heats poorly, temp swings, F1 during baking | Temperature sensing problem | Wall oven temperature sensor WPW10131825 |
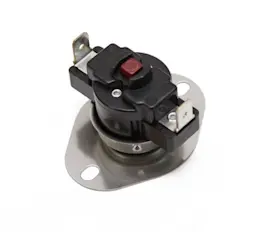
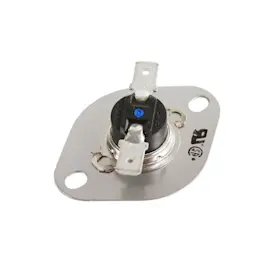
| Oven shuts down after getting hot, then errors | Overheat protection opening | Range high-limit thermostat WP9759243 |
An F1 code is the oven telling you it cannot reliably control temperature or confirm safe operation. Addressing it quickly helps prevent overheating, undercooking, and repeat shutdowns.
For code definitions and related symptoms, use our Whirlpool wall oven error codes resource.
Last updated: February 2026
Is it okay to put a wall oven next to a refrigerator?
It is usually not a good idea to place a Whirlpool RBS275PDS12 wall oven directly next to a refrigerator because oven heat can make the refrigerator work harder and shorten component life. If they must be adjacent, we recommend adding insulation and maintaining the clearances in the installation guide.
- Confirm the cabinet cutout matches the required opening dimensions and minimum clearances.
- Keep the oven location away from strong drafts (windows, doors, heating vents) that can affect temperature control.
- Make sure the oven support surface is solid, level, and flush with the cabinet cutout.
- Verify the electrical junction box location and cable routing are correct for a wall installation.
- Plan for a heat barrier between appliances if the refrigerator will be immediately beside the oven.
If your layout forces the refrigerator next to the wall oven, these steps reduce heat transfer:
| Item to address | Best practice | What it prevents |
|---|---|---|
| Side clearance | Leave as much space as the cabinet design allows | Heat soak into the refrigerator cabinet |
| Heat barrier | Add an insulated filler panel between units | Compressor run time increases |
| Venting | Keep oven venting paths unobstructed | Overheating and uneven baking |
| Door swing | Ensure both doors open fully without contact | Hinge damage and seal wear |
A refrigerator sheds heat through its condenser system; placing it next to a high-heat appliance can raise surrounding temperatures. That typically increases compressor run time, energy use, and can reduce cooling performance, especially during baking or self-clean cycles.
If you already have this setup and notice temperature problems, check for common oven issues that can increase heat output or cycling:
- Oven temperature seems inaccurate or swings widely (a failing sensor can contribute).
- Oven runs excessively long to reach set temperature.
- Error codes appear on the display.
For model-relevant troubleshooting, use Whirlpool wall oven error codes.
Last updated: February 2026
Do wall ovens need to be hardwired?
Yes. For the Whirlpool RBS275PDS12 electric wall oven, we install it as a direct-wire connection to an approved junction box (not a cord-and-plug connection). The installation instructions also require proper grounding and following local electrical codes.
A hardwired (direct-wired) installation connects the oven’s supply leads to your home wiring inside a junction box.
- Power is turned off at the breaker before any wiring work
- The oven cable is fed through the cabinet opening to the junction box
- Connections are made with an approved conduit connector and twist-on connectors
- Grounding is required; neutral and ground handling depends on local code and wiring system
- Junction box placement is planned so the oven can slide fully into the cutout
The installation guide outlines the junction-box wiring steps and shows different connection methods depending on local code.
| Home wiring situation | What changes | Why it matters |
|---|---|---|
| Local codes permit bonding ground to neutral | Bare ground and white neutral from the oven may remain factory-crimped and tie into neutral | Simplifies the connection while meeting allowed code paths |
| Local codes do not permit bonding ground to neutral | Bare ground and white neutral are separated; ground goes to a grounded wire/point, neutral goes to neutral | Prevents improper neutral-ground bonding |
| Four-wire electrical system | Neutral and ground are kept separate; ground connects to the green grounding wire | Reduces shock risk and meets modern grounding practice |
We recommend these checks so the oven fits and powers correctly:
- Confirm the cabinet cutout dimensions and minimum clearances
- Make sure the oven support surface is solid, level, and flush
- Place the junction box within the recommended location range for your installation type
- Use a qualified technician for electrical work and grounding
- If your home has aluminum wiring, follow the special guidance in the installation instructions
A wall oven draws high current and must be grounded correctly. Direct wiring to a junction box helps protect against overheating, nuisance shutdowns, and electrical shock, and it ensures the oven can be secured properly in the cabinet.
Last updated: February 2026
Is Whirlpool a good wall oven?
Yes. Whirlpool wall ovens like model RBS275PDS12 are a solid, dependable choice for most kitchens because they are built around proven electric-heating designs and widely available service parts. Overall satisfaction usually comes down to proper installation, correct temperature performance, and keeping door seals and safety devices in good shape.
A good electric wall oven consistently heats to the set temperature, holds that temperature, and operates safely in a properly built cabinet cutout.
Common “good oven” indicators:
- Preheats in a reasonable time and maintains steady bake temperatures
- Broil element heats evenly for browning
- Door closes tightly with minimal heat leakage
- Controls operate predictably (no frequent error codes)
- Replacement parts are readily available for normal wear items
For RBS275PDS12, the installation guide emphasizes a solid, level support surface, correct cabinet cutout clearances, and proper electrical grounding. Poor installation can cause performance complaints that look like an oven problem.
Use this checklist from the installation guide:
- Keep the oven away from strong drafts (windows, doors, heating vents)
- Ensure the support surface is solid, level, and flush with the cabinet cutout
- Place the junction box correctly (often within 3 inches below the support surface for wall-cabinet installs)
- Follow grounding and neutral wiring requirements for your local code
When customers say an oven is “not good,” it is often a temperature accuracy or heating complaint. These model-matched parts are commonly involved:
- Wall oven temperature sensor WPW10131825 (temperature regulation and accuracy)
- Range high-limit thermostat WP9759243 (overheat protection that can interrupt heating)
- Range oven door gasket WP4455381 (heat retention and even baking)
| Symptom | What it often points to | Example part for RBS275PDS12 |
|---|---|---|
| Oven temperature swings or is inaccurate | Sensor or calibration issue | WPW10131825 |
| Oven stops heating after getting hot | High-limit thermostat opening | WP9759243 |
| Long preheat, uneven baking, hot exterior | Door not sealing | WP4455381 |
A wall oven is only as “good” as its temperature control, heat retention, and safe installation. When those three are right, Whirlpool wall ovens deliver consistent baking and broiling results for everyday cooking.
Last updated: February 2026