Owner’s manual
 Error Codes



How to clean coils on GE top freezer refrigerator?
On the GE GTH21KCXAWW top-mount (top freezer) refrigerator, clean the condenser area by unplugging the refrigerator, removing dust with a vacuum and soft brush, then restoring power. Your owner's manual notes there is no need for routine condenser cleanings, but cleaning is still helpful if you have heavy dust or pet hair.
- Unplug the refrigerator before cleaning.
- Pull the refrigerator straight out to avoid damaging the power cord or (if equipped) the icemaker water line.
- Use a flashlight so you can see the coil area and the condenser fan area.
- Avoid bending coil fins; gentle brushing works best.
- Keep water and spray cleaners away from electrical parts.
- Unplug the refrigerator.
- Locate the condenser area (commonly behind the toe grille at the bottom front or at the back near the bottom).
- Vacuum loose dust using a brush attachment.
- Use a coil brush to loosen packed lint and pet hair; vacuum again.
- Clean the floor under the unit and the air path around the condenser.
- Plug the refrigerator back in and confirm the unit is running normally.
| Use | Avoid |
|---|---|
| Vacuum with brush attachment | Scouring pads or abrasive brushes |
| Coil cleaning brush | Bleach or harsh cleaners near components |
| Dry microfiber cloth for nearby surfaces | Spraying water directly into the condenser area |
A clean condenser area helps the refrigerator shed heat efficiently. That supports steadier temperatures, reduces run time, and can help prevent warm-fridge complaints caused by restricted airflow.
- Homes with pets that shed
- Dusty basements, garages, or high-traffic kitchens
- If the refrigerator seems to run constantly or feels unusually warm around the base
Last updated: February 2026
How to order GE appliance parts?
To order replacement parts for your GE GTH21KCXAWW top-mount refrigerator, match your model number, then select the exact part from the parts list for this model and place your order. Use the GTH21KCXAWW owner's manual to confirm part locations and names before buying.
- Confirm the full model number on the rating label: GTH21KCXAWW
- Identify the failed part by symptom (no light, no ice, leaking water, warm temps)
- Cross-check the part description and where it installs using the GTH21KCXAWW owner's manual
- Choose the exact replacement from the parts list for this model
- Order by part ID and part number to avoid mix-ups
If your issue matches one of these symptoms, these model-matched parts are commonly replaced:
| Symptom | Likely part | Example from this model’s parts list |
|---|---|---|
| Interior light out | Lamp assembly | Refrigerator lamp assembly 40A15 (WR02X12530) |
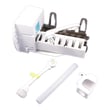
| No ice or poor ice production (icemaker equipped) | Ice maker kit | Electronic i WR30X10093 (WR30X10061) |
| Water not dispensing or not filling icemaker | Water inlet valve | Water valve WR57X10033 (WR57X10075) |
GE refrigerators often have similar-looking parts across model series, but mounting points, wiring connectors, and water line fittings can differ. Ordering by the exact model (GTH21KCXAWW) and verifying the part description prevents returns and delays.
- Double-check the part ID and part number match your selection
- Review your refrigerator’s symptom to confirm you are targeting the correct system (lighting, ice maker, water supply, cooling)
- If you are replacing an electrical part, unplug the refrigerator before inspection or installation
Last updated: February 2026
How do I find the right GE part number?
To find the right GE part number for your GE GTH21KCXAWW top-mount refrigerator, match the part to your exact model number first, then use the parts diagram to identify the correct item and its part number. Your model number is the key to getting the right fit and connections.
- Locate the model/serial tag inside the refrigerator compartment (commonly on the side wall or near the crisper area).
- Confirm the model number is GTH21KCXAWW (letters and numbers must match exactly).
- Use the exploded-view diagrams and parts list for your model to pinpoint the part location and name.
- Cross-check the part description (for example, lamp assembly vs. light bulb) before ordering.
- If multiple similar parts appear, compare how it mounts and how it connects (wire plugs, tubing size, screw holes).
If you already know what you need, these are examples of model-matched parts shown for GTH21KCXAWW:
| What you are replacing | Example part name | Part ID | Manufacturer part number |
|---|---|---|---|
| Interior light | Refrigerator lamp assembly 40A15 | 40A15 | WR02X12530 |
| Water not dispensing or no ice (water supply issue) | Water valve WR57X10033 | WR57X10033 | WR57X10075 |
| Ice maker not producing ice (if equipped) | Electronic i WR30X10093 | WR30X10093 | WR30X10061 |
GE uses model-specific variations in wiring, brackets, and water line fittings. Using the exact model number (GTH21KCXAWW) and the diagram-based part listing prevents ordering a part that looks similar but will not mount correctly or connect to your harness or tubing.
Your best reference for model identification, feature set, and service information is the owner's manual.
Last updated: February 2026
What is the most common problem with a GE refrigerator?
The most common GE refrigerator complaint is not cooling properly, and on a GE GTH21KCXAWW top-mount refrigerator that usually traces back to airflow issues (blocked vents, dirty condenser area), control settings, or a failed cooling component. Use the owner's manual to confirm normal operation and basic checks.
- Refrigerator or freezer not cold enough
- Frost buildup that restricts airflow
- Unusual noises (fan, buzzing, clicking)
- Ice maker not making ice (if equipped)
- Water leaking or pooling
- Interior light not working
- Confirm airflow: keep food packages away from the air vents; the manual notes food too close to the vent can cause freezing or poor circulation.
- Check the room temperature: the manual recommends not installing where temps drop below 60°F or rise above 100°F.
- Verify clearances for ventilation: typical guidance for this model is 1/8 inch sides, 1 inch top, 1 inch back for proper air circulation.
- Reset power safely: reset the breaker or replace a blown fuse if the unit is dead.
- Unplug before service: the manual advises unplugging before cleaning or repairs; turning controls to “0” does not remove power to the light circuit.
| What you notice | Likely cause | What we do next |
|---|---|---|
| Warm fridge and freezer | Cooling system issue | Check condenser airflow; if needed, consider sealed system service |
| Freezer cold, fridge warm | Airflow/damper issue | Inspect vents and the freezer louver area |
| Clicking/humming, not cooling | Compressor start/cooling issue | Professional diagnosis; compressor replacement is a major repair |
| Runs a lot, weak cooling | Dirty condenser area or poor ventilation | Clean condenser area and confirm clearances |
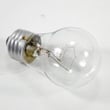
- If the interior light is out, the manual points to a burned-out or loose bulb; the model uses a lamp assembly such as the refrigerator lamp assembly 40A15.
- If you have no water to the ice maker (on some models), a failed inlet valve is a common cause; see the water valve WR57X10033.
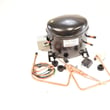
- If cooling performance is poor and a technician confirms a compressor failure, the comp. repl. WR87X20798 is a listed replacement.
A “not cooling” problem can spoil food quickly and can also be caused by simple airflow and installation issues. Doing the quick checks first helps you avoid unnecessary part replacement and narrows the repair to the right system.
Last updated: February 2026