 Installation guide
 Owner’s manual
 Error Codes


What is the lifespan of a Whirlpool stove?
A Whirlpool stove typically lasts 15 years. For your Whirlpool WFC150M0JB0 free standing electric range, consistent cleaning, correct cookware sizing, and avoiding overheating conditions help you reach that normal service life; our WFC150M0JB0 owner's manual covers day-to-day use and care.
Typical lifespan and what affects it
Most electric ranges reach their full lifespan when heat is controlled and spills are kept from baking onto surfaces.
- Cooking habits: frequent high-heat cooking shortens component life
- Cleaning routine: prompt cleanup prevents corrosion and heat damage
- Electrical supply: loose connections can overheat wiring and terminals
- Cookware fit: oversized pans can create excess heat on some cooktops
- Door use: slamming or leaning on the door stresses hinges and trim
Quick care checklist for WFC150M0JB0
These steps match common Whirlpool range care practices and the cooktop-use guidance in the manual.
| What to do | How often | What it helps prevent |
|---|---|---|
| Clean spills after the cooktop cools | After each use | Pitting, staining, heat damage |
| Keep cookware within about 1/2 inch overhang | Every use | Excess heat and discoloration |
| Verify elements sit level (coil models) | Monthly | Uneven heating and hot spots |
| Avoid storing heavy items on the oven door | Always | Hinge wear and door misalignment |
When a repair makes sense vs. replacement
If the range is heating inconsistently or baking temperatures drift, a common fix is replacing the oven temperature sensor, such as the range oven temperature sensor WPW10181986.
Repair is usually worth it when:
- the oven heats but temperatures are inaccurate
- surface elements work normally
- the cabinet and insulation are in good shape
Replacement is usually better when:
- multiple major systems fail (oven heat plus controls plus wiring)
- repairs are frequent and performance is declining
Why it matters
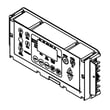
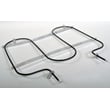
A 15-year lifespan is realistic for Whirlpool electric ranges, but heat management and basic maintenance reduce stress on high-cost parts like the control assembly, wiring, and heating elements.
Last updated: February 2026
How can I tell what model my stove is?
For your Whirlpool WFC150M0JB0 electric range, the model number is printed on the model/serial rating plate. You’ll typically find it on the frame behind a top corner of the oven door or on either side of the storage drawer opening; match the exact letters and numbers to order the right parts.
Where to look on a WFC150M0JB0 range
Check these common label locations first:
- Open the oven door and look on the front frame behind a top corner of the door
- Pull out the storage drawer and check either side of the drawer opening
- Look for a sticker or metal plate labeled “Model” and “Serial”
- Wipe dust or grease off the plate so every character is readable
- Write the model number exactly as shown (letters and numbers matter)
For diagrams and the exact label location illustrations, use the WFC150M0JB0 installation guide.
How to record the model number correctly
Model numbers can be easy to misread. Use this quick checklist:
- Copy the full model number (example: WFC150M0JB0)
- Copy the serial number too (helps confirm production details)
- Watch for common mix-ups: 0 (zero) vs O (letter), 1 vs I
- Take a clear photo of the rating plate before ordering parts
Quick check table
| What you see | What it means | Why it matters |
|---|---|---|
| Model number | Exact appliance identity | Ensures part compatibility |
| Serial number | Production code/date info | Helps confirm correct revision |
| Rating plate location | Door frame or drawer frame | Fastest way to verify model |
Why it matters
We use the model number to match your range to the correct wiring, controls, and fit-critical parts (like a control assy, terminal block, or oven temperature sensor). Even one wrong character can lead to ordering a part that will not mount or connect correctly.
If you need operating details after you find the model number, use the WFC150M0JB0 owner’s manual.
Last updated: February 2026
How do you clear the error code on a Whirlpool oven?
On the Whirlpool WFC150M0JB0 electric range, we clear most error codes by pressing Cancel to reset the display. If the code returns, do a power reset at the breaker for about 1 minute, then restore power and press Cancel again; recurring codes point to a condition that needs troubleshooting.
Quick reset steps (try in this order)
- Press Cancel once to clear the display.
- If the display is flashing after a power loss, press Cancel to stop the flashing; reset the clock if needed.
- Turn OFF the range circuit breaker for 1 minute.
- Turn the breaker ON and wait for the control to power up.
- Press Cancel again and try a simple bake cycle.
For control behavior and display messages specific to this model, use the WFC150M0JB0 owner's manual.
If the error code comes back right away
A repeating letter-and-number code usually means the control is detecting a real fault, not a one-time glitch. Common next checks include:
- Make sure Control lock is off (press and hold CONTROL LOCK for 3 seconds).
- Cancel any Delay Start settings and retry.
- If the oven temperature seems inaccurate or the code relates to temperature sensing, inspect the oven sensor wiring and consider replacing the range oven temperature sensor WPW10181986.
- If the keypad seems unresponsive or random beeping occurs, the console or control may need service.
What each reset does
| Reset method | What it clears | When to use it |
|---|---|---|
| Cancel key | Display messages and many active faults | First step for any code |
| Breaker reset (1 minute) | Temporary control glitches after a surge or power loss | If Cancel does not hold |
| Control lock off | Prevents the oven from starting | If oven will not operate |
Why it matters
Clearing the code gets you cooking again quickly, but a code that reappears protects the range from overheating, bad temperature control, or an electrical issue. Addressing the cause helps prevent repeat shutdowns and uneven baking.
Last updated: February 2026
How to replace Whirlpool oven temp sensor?
To replace the oven temperature sensor on your Whirlpool WFC150M0JB0 electric range, we disconnect power, remove the sensor mounting screws inside the oven, pull the sensor forward to access the connector, swap in the new sensor, then restore power and test baking performance.
Before you start (safety and access)
- Turn the oven off and let it cool completely.
- Unplug the range or switch OFF the circuit breaker (240V).
- Pull the range forward only if you need extra slack; protect the floor.
- Have a Phillips screwdriver and work gloves ready.
- Keep the wiring from falling back through the rear insulation.
For diagrams and exact component locations for this model, use the WFC150M0JB0 owner's manual.
Step-by-step: replacing the sensor
- Disconnect power at the breaker or unplug the cord.
- Open the oven door and locate the sensor probe (typically on the rear oven wall).
- Remove the two mounting screws holding the sensor to the rear wall.
- Gently pull the sensor toward you a few inches to expose the wire connector.
- Separate the connector (do not pull on the wires).
- Connect the new sensor, tuck the connector back carefully, and reinstall the screws.
- Restore power and run a Bake test.
Part to use for this model
| What you need | When to replace | Notes |
|---|---|---|
| Range oven temperature sensor WPW10181986 | Oven overbakes/underbakes, temp swings seem extreme, error symptoms tied to sensing | A failed sensor can make the control “think” the oven is hotter or cooler than it is |
After replacement: quick checks and calibration
- If the oven still seems off, confirm you are using a reliable oven thermometer and allow 20 to 30 minutes to stabilize.
- If food consistently overcooks or undercooks, use the control’s oven temperature adjustment feature (calibration) described in the WFC150M0JB0 owner's manual.
- If the display shows abnormal behavior or heating is still inconsistent, the issue can be in the control or wiring.
Why it matters
The temperature sensor is the feedback device the control uses to cycle the bake and broil elements. When the sensor drifts out of range or fails, the oven can run too hot, too cool, or cook unevenly.
Last updated: February 2026





