Installation guide
 Owner’s manual



How do I find the right GE part number?
For your GE dryer model GTDX180GD0WW, the most reliable way to get the right GE part number is to match the part to your exact model using the parts diagram and parts list, then confirm the part ID and manufacturer part number before ordering. Use the owner's manual to verify features and configurations.
- Find the model tag on the dryer (commonly inside the door opening or on the cabinet opening).
- Confirm the model number is GTDX180GD0WW (exact characters matter).
- Use the model’s parts diagram to identify the part location and name (for example: drum support, blower, thermostat).
- Click the matching part in the list to confirm the part ID and manufacturer part number.
- Compare your old part to the listing (mounting points, connectors, shape) before installing.
Many GE dryers share similar-looking parts across model series. These checks prevent wrong-part orders:
- Same part name, different part ID (example: thermostats can look similar but have different temperature ratings).
- Left vs. right orientation (some brackets and supports are side-specific).
- Gas vs. electric versions (your GTDX180GD0WW is a gas dryer; ignition and gas valve parts differ).
- Revision changes (a newer substitute part number may replace an older one).
| What you are fixing | Example part for GTDX180GD0WW | What it affects |
|---|---|---|
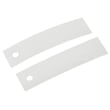
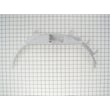
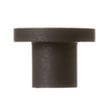
| Squealing, scraping, drum drag | Dryer drum front glide pad WE03X37318 | Drum support and noise |
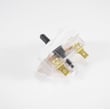
| No heat or overheating symptoms | Dryer high-limit thermostat WE4M137 | Safety temperature limit |
| Poor airflow or loud air noise | Dryer blower wheel WE16X20393 | Air movement and dry time |
Using the correct GE part number for GTDX180GD0WW prevents repeat failures, fit issues, and unsafe operation, especially on gas-heated components like thermostats, igniters, and gas valve assemblies.
Last updated: February 2026
Where is the part number on a GE dryer?
On a GE dryer like model GTDX180GD0WW, the part number you need for ordering is usually found on the model and serial tag, not printed on each individual component. Most often, that tag is inside the dryer door opening on the cabinet frame; some units also place it on the back near the top.
- Open the dryer door and look around the door opening
- Check the cabinet frame just inside the door (often on the left or right side)
- Look along the door opening near the lint screen housing area
- If you do not see it inside the door area, check the back panel near the top edge
The tag typically includes several identifiers. For parts lookup, the model number is the key.
| Label item | What it’s used for | Example for this dryer |
|---|---|---|
| Model number | Finds the correct parts diagrams and lists | GTDX180GD0WW |
| Serial number | Identifies production run details | Varies |
| Rating info | Confirms fuel type and electrical specs | Varies |
Using the exact model number from the tag prevents ordering a similar-looking part that does not fit. GE dryers can share knobs, thermostats, and drum support parts across models, but mounting points and revisions can differ.
Once you confirm the model number, match the failed component by name and location in the diagrams, then order by the listed part ID. Common wear items for this model include the dryer drum front glide pad WE03X37318 and the dryer operating thermostat WE4M216.
For label locations and model identification details, use the installation guide.
Last updated: February 2026
What is the most common problem with a GE dryer?
The most common problem we see with a GE dryer like model GTDX180GD0WW is poor or no heat and long dry times caused by restricted airflow (lint buildup or a crushed, too-long vent). Overheating from bad airflow can also trip safety thermostats and make the dryer stop mid-cycle.
- Clean the lint screen before every load.
- Inspect the vent hose behind the dryer for kinks, crushing, or sagging.
- Confirm the dryer is vented outdoors and uses 4-inch (102 mm) ducting.
- Keep the vent run as short as possible; long runs increase dry time and energy use.
- If you recently moved the dryer, re-check the exhaust outlet for bending or blockage.
On gas dryers, restricted venting raises internal temperatures. That can cause the dryer to cycle heat off early, shut down mid-cycle, or open a safety device such as a high-limit thermostat.
If your GTDX180GD0WW tumbles but does not heat well, a common repair path is to verify venting first, then test heat-control parts.
| Symptom | Most likely area | Example part for this model |
|---|---|---|
| Dryer heats then stops heating | Overheat protection | Dryer high-limit thermostat WE4M137 |
| Dryer runs but takes too long | Airflow path restriction | Lint screen, blower housing, vent duct |
| No heat at all (gas model) | Ignition or gas control | Dryer radiant sensor WE4X448 or gas valve WE11X20711 |
The installation instructions call out key requirements that directly affect drying performance and safety:
- Exhaust the dryer to the outdoors.
- Use 4-inch rigid metal duct for the main vent run.
- Avoid plastic ducting; flexible metal duct must be UL listed and installed correctly.
For the exact venting limits and setup details, follow the installation guide.
Good airflow keeps drying times normal, prevents overheating, and reduces wear on components like thermostats, sensors, and the blower system.
Last updated: February 2026
What is the life expectancy of a GE dryer?
A GE dryer like model GTDX180GD0WW typically lasts 10 to 13 years with normal household use. Keeping airflow strong (clean lint system and venting) and fixing wear parts early often prevents overheating, long dry times, and premature motor or drum-support damage.
Most dryers reach their expected service life based on heat exposure, load size, and airflow restriction.
- Vent maintenance: restricted venting is the fastest way to shorten dryer life
- Usage frequency: multiple loads per day wears drum supports, belt system, and motor faster
- Overloading: strains the drive motor and drum bearings
- Heat stress: repeated overheating can damage thermostats and wiring
- Prompt repairs: replacing small wear parts early helps avoid bigger failures
Use these habits for your GE GTDX180GD0WW gas dryer:
- Clean the lint screen before every load
- Inspect and clean the exhaust duct periodically; keep the run short and unobstructed
- Use 4-inch metal ducting for venting (rigid metal is best)
- Keep the dryer operating area above 50°F for proper control operation
- Stop using the dryer if you notice burning smells, excessive heat, or very long dry times
For model-specific venting and installation requirements, follow the installation guide.
When these parts wear, you may hear squealing/grinding, get poor airflow, or see longer dry times.
| Symptom | Common cause | Example part for GTDX180GD0WW |
|---|---|---|
| Squealing or scraping | Drum support wear | Dryer drum front glide pad WE03X37318 |
| Thumping or rumbling | Drum bearing wear | GE dryer drum bearing, front WE3M26 |
| Weak airflow, long dry times | Blower wheel issue or lint buildup | Dryer blower wheel WE16X20393 |
| Overheating or shuts off on heat | Safety thermostat opening | Dryer high-limit thermostat WE4M137 |
A dryer that is forced to run hot or run long to dry clothes wears out faster and can damage high-cost components like the drive motor and drum. Good airflow and early part replacement help your dryer dry faster and last closer to its 10 to 13 year life expectancy.
Last updated: February 2026