 Owner’s manual


How do I tell what model my GE washer is?
For your GE washer, the model number is printed on the appliance’s rating label; on model GTW490ACJ5WW it’s typically located under the lid. Once you have the model number, you can match it to the correct parts list and troubleshooting info.
Where to look on a GE washer
Check these common label locations (start with the first one):
- Under the lid (lift the lid and look around the opening)
- Back of the control panel (rear edge or underside of the console)
- Side of the main cabinet near the bottom (often on the right or left side)
- If you have a front-load GE washer: inside the door opening or door jamb
What to write down (and why)
Record both numbers exactly as shown:
- Model number (example: GTW490ACJ5WW)
- Serial number (helps confirm production details for service and parts)
- Any suffix letters/numbers (they can affect part compatibility)
Quick reference
| What you find | What it’s used for | Example format |
|---|---|---|
| Model number | Choosing correct parts diagrams and parts | GTW490ACJ5WW |
| Serial number | Service history, manufacturing date code | Varies |
Why it matters
GE often uses similar-looking washer designs across multiple model families (GTW, HTW, etc.). Using the exact model number prevents ordering the wrong items like a lid lock, drain pump, or control knob.
Helpful resources
- Use the label location guidance in the GTW490ACJ5WW owner’s manual.
- If your washer is showing an error, match it using GE gtw top load washer error codes.
Last updated: February 2026
How many years should a washing machine last?
Most washing machines last 10 to 15 years. For a GE top-load washer like GTW490ACJ5WW, reaching the upper end of that range is realistic when loads are sized correctly, the washer is kept clean, and wear items (especially hoses) are replaced on schedule; see the GTW490ACJ5WW owner's manual.
Typical lifespan by washer type
| Washer type | Typical lifespan | Notes |
|---|---|---|
| Top-load (agitator or impeller) | 10 to 15 years | Often lasts longer with simpler mechanics and good maintenance |
| Front-load | 10 to 12 years | More seals and bearings; maintenance is key |
What shortens washer life fastest
- Overloading or consistently washing very heavy, bulky items on the wrong cycle
- Skipping routine cleaning (detergent residue and buildup increase wear)
- Running with unbalanced loads that cause excessive vibration
- Ignoring early symptoms (slow drain, not spinning, unusual noises)
- Old water supply hoses that are past their replacement interval
Maintenance that helps GTW490ACJ5WW last longer
The manual calls out several habits that directly protect the tub, pump, and valves:
- Replace water supply hoses every 5 years to reduce the risk of hose failure and water damage
- Leave the lid open after washing so the interior can dry
- Clean the basket with a soft cloth and mild detergent; avoid harsh or gritty cleaners
- Use the correct cycle for bulky or water-resistant items (to reduce strain and imbalance)
Quick “repair vs. replace” guide
| If the washer is… | Usually worth doing | Why |
|---|---|---|
| Under 10 years old | Repair common wear parts | Lower cost, good remaining life |
| 10 to 15 years old | Repair if the issue is minor | Extends life if the core drive system is sound |
| Over 15 years old | Compare repair cost to replacement | Major drive or leak repairs can exceed value |
Common parts involved when problems start
If you are troubleshooting symptoms that affect longevity, these model-matched parts are often involved:
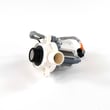
- Not draining or stopping mid-cycle: washer drain pump assembly WH23X28418
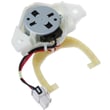
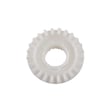
- Not spinning or shifting properly: mode shifter WH03X30517
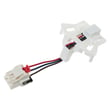
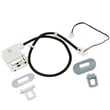
- Lid won’t lock or cycle won’t start: washer lid lock WH08X37938
Why it matters
A washer that is maintained (especially hoses and cleaning) runs with less strain on the drive system, drain pump, and water inlet valve, which is what typically determines whether you get 10 years or closer to 15.
Last updated: February 2026
How to reset the motherboard on a GE washer?
To reset the electronic control (main board) on your GE GTW490ACJ5WW washer, disconnect power for 2 minutes, then restore power and press Start. This clears many temporary control glitches without replacing parts; follow the exact steps in the GTW490ACJ5WW owner's manual.
Reset steps (safe, standard power reset)
- Press the washer control to OFF (if your model has a push-in dial).
- Unplug the washer, or switch OFF the dedicated breaker.
- Wait a full 2 minutes (use a timer).
- Restore power (plug back in, or turn breaker ON).
- Close the lid, select a cycle, then press Start.
What to expect after the reset
| What you see | What it usually means | What to do next |
|---|---|---|
| Washer starts normally | Control recovered from a temporary glitch | Run a quick cycle to confirm |
| Controls seem unresponsive for a few minutes | Some conditions trigger a timed lockout | Wait it out, then restart |
| Won’t start and lid-related light shows | Lid must be opened/closed between cycles | Open lid, close lid, press Start |
| Still won’t run | Likely a fill, lid lock, or control issue | Use the checks below |
If it still won’t run (quick checks)
- Confirm the washer is plugged into a working 115V outlet and power is on.
- Turn both hot and cold water faucets fully on.
- Make sure the lid is fully closed; the washer will not agitate or spin with the lid open.
- If the Fill light is flashing, correct the water supply issue and allow any lockout time to finish.
- If the washer drains poorly or won’t spin out, inspect the drain path; a failing pump can cause control symptoms (see washer drain pump assembly WH23X28418).
Why it matters
A 2-minute power reset is the fastest way to clear minor electronic errors on the GTW490ACJ5WW. It helps you avoid unnecessary part replacement and points you toward the real cause if the washer still will not fill, lock, drain, or start.
Last updated: February 2026
Where is the filter on my GE Deep Fill washing machine?
On the GE GTW490ACJ5WW top-load washer, there typically is not a user-cleanable “filter” like you’d find on many front-load washers. For most clogs and drain issues, we focus on the drain pump area and the drain hose path; use the GTW490ACJ5WW owner's manual for your model’s exact cleaning and maintenance guidance.
What you can check on this model (common “filter” locations)
- Wash basket and tub ring area: look for lint, small socks, or debris trapped along the rim.
- Bottom of the tub: check for coins or hairpins that can migrate toward the drain path.
- Drain system: a restriction often acts like a “filter problem” even when no filter exists.
- Drain hose: kinks, pinches, or a clogged standpipe can stop draining.
- Pump inlet area: debris can lodge at the pump inlet and reduce flow.
If the washer won’t drain, start here
A “no filter” design means the drain pump and hose do the heavy lifting. If you have standing water, these checks usually find the cause:
- Unplug the washer; turn off water supply.
- Verify the drain hose is not kinked and the standpipe is not blocked.
- Listen for the pump during drain; a loud hum with little water movement points to a restriction.
- Inspect the pump area for obstructions; replace the pump if it’s seized or leaking.
If you need the replacement part for a confirmed pump failure, use the washer drain pump assembly WH23X28418.
Quick guide: front-load vs top-load “filter” expectations
| Washer type | Typical filter location | What that means for GTW490ACJ5WW |
|---|---|---|
| Front-load washer | Small access door at bottom front | Often has a clean-out trap/filter |
| Top-load washer (this model) | Usually none, sometimes in agitator on other designs | Drain issues are usually pump/hose related |
Why it matters
Cleaning a front-load filter is a common fix, but on the GTW490ACJ5WW the best results come from checking the drain path (hose, standpipe, and pump). That prevents repeat clogs, slow draining, and wet loads after spin.
Last updated: February 2026


