Get free shipping on your order, with any water filter subscription. Find my filter

Open Hamburger Menu
Sears Parts Direct
Tips to find your model number

Whirlpool WRF560SEYM01 refrigerator Parts

Here are the diagrams and repair parts for Whirlpool WRF560SEYM01 refrigerator, as well as links to manuals and error code tables, if available.

Whirlpool WRF560SEYM01 refrigerator
By Schematic
By Part
SELECT DIAGRAM
?

This is the number corresponding to the part on the diagram / schematic

Browse Parts for WRF560SEYM01 Refrigerators

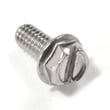
  • Refrigerator Screw for Whirlpool WRF560SEYM01 - Part WP489128

    Unit parts diagram

    Screw

    Part #488500

    Replaced by #WP489128

    Info Icon
    Manufacturer substitution
    This part replaces 488500. Substitute parts can look different from the original.
    This item is not returnable
    In Stock
    $9.45
    10% OFF Phone Price : $10.45Info Icon
    Minus Item
    Qty
    Plus Item
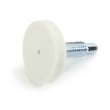
  • Refrigerator Leveling Leg for Whirlpool WRF560SEYM01 - Part WPW10141622

    Cabinet parts diagram

    Brake Lower Foot

    Part #W10141622

    Replaced by #WPW10141622

    Info Icon
    Manufacturer substitution
    This part replaces W10141622. Substitute parts can look different from the original.
    This item is not returnable
    In Stock
    $7.94
    11% OFF Phone Price : $8.94Info Icon
    Minus Item
    Qty
    Plus Item
  • Refrigerator Mastic Sealer for Whirlpool WRF560SEYM01 - Part WP505587

    Optional parts diagram

    Refrigerator Mastic Sealer

    Part #505587

    Replaced by #WP505587

    Info Icon
    Manufacturer substitution
    This part replaces 505587. Substitute parts can look different from the original.
    In Stock
    $128.16
    Minus Item
    Qty
    Plus Item
  • Refrigerator Ice Maker Stripper Arm for Whirlpool WRF560SEYM01 - Part W10788834

    Icemaker parts diagram

    Refrigerator Ice Maker Stripper Arm

    Part #W10699925

    Replaced by #W10788834

    Info Icon
    Manufacturer substitution
    This part replaces W10699925. Substitute parts can look different from the original.
    In Stock
    $100.52
    Minus Item
    Qty
    Plus Item
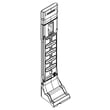
  • Multiflow As for Whirlpool WRF560SEYM01 - Part W11508229

    Liner parts diagram

    Refrigerator Air Tower

    Part #W10448448

    Replaced by #W11508229

    Info Icon
    Manufacturer substitution
    This part replaces W10448448. Substitute parts can look different from the original.
    In Stock
    $52.09
    10% OFF Phone Price : $58.09Info Icon
    Minus Item
    Qty
    Plus Item
  • Refrigerator Thermistor for Whirlpool WRF560SEYM01 - Part W10384183

    Liner parts diagram

    Refrigerator Thermistor

    Part #W10384183

    The manufacturer no longer makes this part, and there's no substitute part

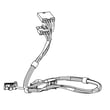
  • Refrigerator Wire Harness for Whirlpool WRF560SEYM01 - Part WPW10424230

    Unit parts diagram

    Refrigerator Wire Harness

    Part #W10424230

    Replaced by #WPW10424230

    Info Icon
    Manufacturer substitution
    This part replaces W10424230. Substitute parts can look different from the original.
    In Stock
    $61.70
    9% OFF Phone Price : $67.70Info Icon
    Minus Item
    Qty
    Plus Item
  • Refrigerator Ice Maker Shut-off Arm for Whirlpool WRF560SEYM01 - Part WPW10474785

    Icemaker parts diagram

    Arm-shut

    Part #W10474785

    Replaced by #WPW10474785

    Info Icon
    Manufacturer substitution
    This part replaces W10474785. Substitute parts can look different from the original.
    In Stock
    $43.96
    12% OFF Phone Price : $49.96Info Icon
    Minus Item
    Qty
    Plus Item
  • Pad Assembly-single, Midgrey for Whirlpool WRF560SEYM01 - Part W11715936

    Dispenser parts diagram

    Refrigerator Pad

    Part #W10433548

    Replaced by #W11715936

    Info Icon
    Manufacturer substitution
    This part replaces W10433548. Substitute parts can look different from the original.
    In Stock
    $122.02
    Minus Item
    Qty
    Plus Item
  • Corner Fille for Whirlpool WRF560SEYM01 - Part W11219639

    Cabinet parts diagram

    Filler, Wrapper (white)

    Part #W11189128

    Replaced by #W11219639

    Info Icon
    Manufacturer substitution
    This part replaces W11189128. Substitute parts can look different from the original.
    In Stock
    $34.77
    Minus Item
    Qty
    Plus Item

Whirlpool Refrigerator WRF560SEYM01 FAQs

Whirlpool refrigerators like model WRF560SEYM01 commonly last about 10 to 15 years, and many reach 15 to 20 years with good airflow, clean condenser coils, and tight door seals. Actual lifespan depends most on usage, maintenance, and repair history; not just the brand.

What affects lifespan the most
  • Condenser coil cleanliness (dust buildup makes the compressor work harder)
  • Door gasket condition (air leaks cause longer run times and frost)
  • Room temperature and ventilation clearance around the cabinet
  • Ice maker and water system health (leaks and restrictions can create secondary damage)
  • How full the refrigerator is and how often doors are opened
Maintenance that helps WRF560SEYM01 last longer

Use the care and cleaning guidance in the WRF560SEYM01 owner’s manual.

  • Vacuum and brush the condenser area regularly
  • Keep food from blocking air vents inside the fresh food section
  • Confirm doors close fully and stay aligned
  • Replace consumables on schedule (air filter, water filter if equipped)
  • Clean spills quickly to prevent odors and corrosion
Quick “repair vs. replace” checkpoints
If your WRF560SEYM01 is… Usually points to… Typical next step
Running constantly but temps are OK Dirty coils, warm room, door leak Clean coils, check gasket
Not cooling well in both sections Airflow issue or sealed system concern Basic checks, then service
Making unusual clicking/humming Start device/capacitor or compressor load Diagnose components
Why it matters

A refrigerator’s most expensive wear items are the sealed-system components (compressor, evaporator, condenser). Simple maintenance like coil cleaning and fixing air leaks can reduce run time and heat stress, which helps those components last.

Parts that support long-term performance (when applicable)

If odors linger or airflow seems reduced, replacing the air filter can help overall freshness and circulation. For this model, we match the correct filter as the refrigerator air filter W10311524.

Last updated: January 2026

On Whirlpool model WRF560SEYM01, the base grille (toe grille) typically pulls straight forward from the bottom front of the refrigerator. If your grille has end caps or retaining screws, remove those first, then pull the grille forward evenly and snap it back on by aligning it with the leveling legs.

Before you start
  • Unplug the refrigerator or switch off power at the breaker (recommended when working near wiring).
  • Remove items from the bottom door bins if they block access.
  • Have a towel ready; dust and pet hair often collect behind the grille.
Steps to remove the base grille
  1. Stand in front of the refrigerator and locate the grille at the very bottom front.
  2. Check both ends for any screws or locking tabs.
  3. If screws are present, remove them and set them aside.
  4. Grip the grille near both ends and pull straight forward with steady pressure.
  5. If it resists, wiggle gently side-to-side while pulling forward to release the clips.
Reinstalling the grille
  • Align the ends of the grille with the leveling assemblies.
  • Press along the length of the grille until the clips snap into place.
  • Reinstall any screws (if used).
What you see What to do
Grille pops off with a firm pull Pull forward evenly from both ends
Screws at the ends Remove screws first, then pull forward
End caps separate from grille Remove end caps, then remove grille
Why it matters

Removing the base grille gives you access for routine cleaning and inspection. Keeping the area clear helps airflow and can reduce cooling problems caused by dust buildup.

Helpful references for this model

Last updated: January 2026

For Whirlpool model WRF560SEYM01, we typically recommend not removing the cardboard-like panel at the bottom rear of the refrigerator. That panel is usually an access cover or air duct that helps protect components and manage airflow for the condenser area; removing it can reduce cooling performance or expose wiring.

What that “cardboard” piece usually is

On many bottom-mount refrigerators, the material that looks like cardboard is a factory-installed lower rear cover (sometimes called an access cover). It is designed to stay in place during normal use.

Common purposes include:

  • Protecting the compressor area and wiring from bumps and debris
  • Directing airflow across the condenser coils for efficient heat removal
  • Reducing noise and vibration from the machine compartment
  • Helping keep pets and dust out of the lower compartment

For model-specific diagrams and panel locations, use the WRF560SEYM01 manual.

When it is OK to remove something (and when it is not)

You may remove packaging materials used for shipping, but you should not remove fixed panels that are screwed or clipped on.

Remove (shipping materials)
  • Tape, foam blocks, and plastic wrap
  • Cardboard spacers around shelves and drawers
  • Protective film on doors or trim
Do not remove (installed covers)
  • Lower rear access cover that looks like fiberboard
  • Toe grille or base grille (unless cleaning or service requires it)
  • Any panel that supports wiring routing or airflow
Quick check: is it packaging or a permanent cover?
What you see Usually means What we recommend
Loose cardboard, taped on, easy to pull away Shipping packaging Remove it
Screws/clips holding a flat panel under the back Access cover/airflow panel Leave it installed
Panel labeled with warnings or covering wiring Safety/airflow component Leave it installed
Why it matters

That bottom cover helps the refrigerator reject heat properly. If airflow is disrupted, the compressor can run longer, temperatures can drift, and energy use can increase.

Last updated: January 2026

For the Whirlpool WRF560SEYM01 bottom-mount refrigerator, the biggest day-to-day problem we see is cooling performance (food not staying cold enough or temperatures swinging). The most common root causes are restricted airflow, dirty condenser coils, or a problem in the evaporator fan or defrost system; see the WRF560SEYM01 user manual for operating and care basics.

What “cooling problem” usually looks like
  • Fresh food section warm but freezer still cold
  • Freezer not freezing hard (soft ice cream, frost buildup)
  • Compressor seems to run a lot
  • Water pooling or ice buildup that blocks airflow
  • Unusual fan noise or no fan sound when the door is closed
Quick checks we recommend first (no parts needed)
  1. Confirm settings: Make sure temperature controls were not bumped.
  2. Check door sealing: Look for gaps, torn gasket areas, or doors not closing fully.
  3. Improve airflow: Do not block vents with food packages.
  4. Clean condenser area: Dust buildup underneath or behind the unit can raise temps.
  5. Listen for the evaporator fan: If it is silent (and the door switch is pressed), airflow may be the issue.
Parts that commonly relate to cooling complaints on this model

If basic checks do not help, these model-compatible parts are often involved:

Symptom Likely area Example compatible part for WRF560SEYM01
Warm fridge, freezer OK Poor air circulation Refrigerator evaporator motor WPW10464673
Frost buildup, warming over time Defrost system issue Refrigerator defrost heater WPW10436849
Weak cooling, long run times Sealed system or airflow restriction Refrigerator condenser WPW10342567
Why it matters

Cooling issues are more than an inconvenience; inconsistent temperatures can shorten food life and make the refrigerator run longer, which increases wear on components like the compressor and fans.

Last updated: January 2026

Most common symptoms to help you fix your refrigerators

Choose a symptom to see related refrigerator repairs.

Main causes: leaky door gasket, defrost system failure, evaporator fan not running, dirty condenser coils, condenser fan…

Main causes: control board or cold control failure, broken compressor start relay, compressor motor failure, defrost tim…

Main causes: blocked vents, defrost system problems, evaporator fan failure, dirty condenser coils, bad sensors, condens…

Main causes: blocked air vents, compressor problems, condenser or evaporator fan not working, control system failure, se…

Main causes: water valve leaking, frozen or broken defrost drain tube, overflowing drain pan, cracked water system tubin…

Main causes: damaged door seal, faulty defrost sensor or bi-metal thermostat, broken defrost heater, bad defrost timer o…

Things to do: clean condenser coils, replace the water filter, clean the interior, adjust doors to prevent air leaks, cl…

Main causes: jammed ice cubes, broken ice maker assembly, dirty water filter, kinked water line, bad water valve, freeze…

Most common repair guides to help fix your refrigerators

These step-by-step repair guides will help you safely fix what’s broken on your refrigerator.

How to replace a refrigerator temperature control board

How to replace a refrigerator temperature control board

If the temperature in your refrigerator doesn't match the temperature you set, the problem could be the temperature cont…

Repair time and Difficulty

 30 minutes or less
How to replace a refrigerator water valve

How to replace a refrigerator water valve

Replace the water valve that feeds water to the ice maker and water dispenser if it no longer controls the flow of water…

Repair time and Difficulty

 15 minutes or less
How to clean refrigerator condenser coils

How to clean refrigerator condenser coils

Help your refrigerator run more efficiently by cleaning the condenser coils. It's easy and takes just a few minutes.…

Repair time and Difficulty

 15 minutes or less

Effective articles & videos to help repair your refrigerators

Use the advice and tips in these articles and videos to get the most out of your refrigerator.

How to Replace the Water Filter in a Universal/Multiflex Refrigerator

How to Replace the Water Filter in a Universal/Multiflex Refrigerator

Learn how easy replacing the water filter in a Universal/Multiflex refrigerator is.…

How to Replace the Water Filter in a KitchenAid Refrigerator

How to Replace the Water Filter in a KitchenAid Refrigerator

Discover how easy it is to replace the water filter in your KitchenAid refrigerator.…

How to get rid of refrigerator smells

How to get rid of refrigerator smells

Learn how to get rid of refrigerator odors…

Parts & More

Bottom-Mount Refrigerator
Chainsaw
Gas Line Trimmer
Gas Water Heater
Hedge Trimmer
Jointer/Planer
Lawn & Garden Engine
Parts
Power Sander
Refrigerator
Toaster
Top-Mount Refrigerator
Washer