Error Codes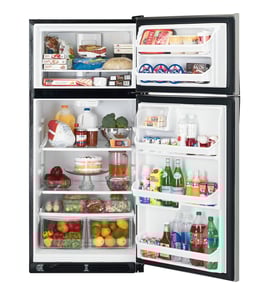





How to clean coils on GE top freezer refrigerator?
For your GE GTS22KYNCRFS top-mount refrigerator, we clean the condenser coil area by unplugging the refrigerator, accessing the coil (rear or bottom), and removing dust with a vacuum and soft brush. This improves cooling performance and helps prevent overheating-related issues.
- Unplug the refrigerator (or switch off the breaker).
- Protect the floor with a towel or cardboard if you need to pull the unit out.
- If the coils are underneath, remove the lower rear access cover or front toe grille (model designs vary).
- Avoid bending coil fins; gentle brushing works best.
- Keep water and spray cleaners away from electrical parts.
- Pull the refrigerator out a few inches so you can reach the back and bottom.
- Locate the condenser coil area (commonly behind the unit or underneath near the front).
- Vacuum loose dust using a brush attachment.
- Brush stubborn buildup with a coil-cleaning brush, then vacuum again.
- Clean the condenser fan area (if accessible) so airflow is not blocked.
- Reinstall any covers, push the refrigerator back, then restore power.
| Home conditions | Typical coil cleaning interval |
|---|---|
| Low dust, no pets | Every 12 months |
| Pets or dusty home | Every 3 to 6 months |
| Greasy kitchen environment | Every 3 to 6 months |
Dirty condenser coils trap heat. When the refrigerator cannot shed heat efficiently, it can run longer, cool poorly, and put extra strain on the compressor and fans.
If the refrigerator is still warm after cleaning, these parts are common next checks for this model:
- Refrigerator condenser fan motor assembly WR17X31476 (no airflow at the back/bottom)
- GE refrigerator evaporator fan motor WR60X31522 (freezer cold but fresh food warm)
- Refrigerator defrost heater assembly WR55X31113 (heavy frost on the freezer back wall)
For GE-specific tips related to alarms and door-open conditions that can mimic cooling complaints, use how to reset the door alarm on a GE refrigerator.
Last updated: February 2026
How to figure out GE fridge model?
To figure out your GE refrigerator model, we look for the model and serial tag on the cabinet (not on a removable drawer). On the GE GTS22KYNCRFS top-mount refrigerator, the tag is typically inside the fresh food section near the door opening.
Check these common GE locations first:
- Inside the refrigerator compartment on the left or right wall near the front
- On the ceiling of the fresh food section near the light housing
- On the side wall behind the crisper drawers (you may need to slide drawers out)
- Along the door frame (cabinet face) where the door gasket seals
- On the back exterior panel (less common, but worth a quick check)
We recommend recording the information exactly as printed so you can match parts correctly.
| Item | What it’s used for | Example format |
|---|---|---|
| Model number | Identifies the exact refrigerator design | GTS22KYNCRFS |
| Serial number | Identifies production run and date code | Letters and numbers |
| Brand | Confirms manufacturer family | GE |
GE often uses similar-looking cabinets across multiple model numbers, but internal components can differ. Using the exact model number helps ensure you get the right ice maker, control board, fan motor, or water inlet valve for your refrigerator.
If you are troubleshooting cooling or noise issues while identifying the model, our GE refrigerator error codes guide can help narrow down what to check next.
Last updated: February 2026
How to find GE appliance parts?
To find the right replacement parts for your GE appliance, we match parts to your exact model number. For your GE GTS22KYNCRFS top-mount refrigerator, start with the model number, then narrow by the symptom (not cooling, leaking, ice maker not working) so you land on the correct part the first time.
- Confirm the model number on the rating label inside the fresh food section.
- Choose the system that matches the problem (cooling, ice maker, doors, controls).
- Compare part name and part ID, not just a photo.
- If multiple versions exist, match any notes like color, revision, or “assembly” vs “blade.”
- Order any small mounting pieces that commonly wear with the main part (grommets, washers, screws).
If you already know what is failing, these are frequent starting points for GTS22KYNCRFS:
| Symptom | What to check first | Example part for this model |
|---|---|---|
| Warm fridge or freezer | Evaporator fan, airflow | GE refrigerator evaporator fan motor WR60X31522 |
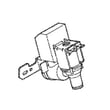
| No ice or slow ice | Water supply, valve, ice maker | Refrigerator water inlet valve WR57X32213 |
| Lights off or fan stops when door opens | Door switch | Refrigerator door switch WR23X31507 |
GE refrigerators often use similar-looking parts across model families, but connectors, mounting points, and revisions can differ. Matching parts to model GTS22KYNCRFS helps prevent returns and gets your refrigerator cooling, dispensing, or making ice again faster.
A quick electrical check often confirms the failure before ordering; for example, testing a door switch or fan motor circuit.
- How to use a multimeter to test electrical parts video
- Must have tools for appliance repair
- Are diy appliance repairs safe
Last updated: February 2026
How to install handles on a GE top freezer refrigerator?
To install handles on your GE GTS22KYNCRFS top-mount (top freezer) refrigerator, we typically start by loosening the handle set screws, sliding the handle onto the door-mounted fasteners, then tightening the set screws until the handle is secure and straight.
- Unplug the refrigerator or switch off power if you will be working near wiring (some models route wiring near the top hinge cover).
- Protect the door finish with painter’s tape where the handle may touch during alignment.
- Use the correct hex key (Allen wrench) or screwdriver for your handle’s set screws.
- Keep a small tray for screws so nothing drops behind the toe grille.
- Locate the handle fasteners on the door (these are the posts or brackets the handle slides onto).
- Loosen the handle set screws (do not remove them unless the handle will not slide on).
- Align the handle with the fasteners.
- Slide the handle into place until it seats fully.
- Tighten the set screws evenly.
- Check alignment; the handle should sit flush and not rock.
- Confirm the handle is fully seated on the fasteners.
- Tighten both set screws a little at a time so the handle clamps evenly.
- Inspect the set screw threads; replace stripped screws if needed.
| Symptom | Most common cause | What we do next |
|---|---|---|
| Handle wiggles | Handle not fully seated | Slide handle fully onto fasteners, then retighten |
| Handle sits crooked | Fasteners not aligned or handle not seated evenly | Reseat handle; verify both ends are fully engaged |
| Set screw will not tighten | Stripped set screw | Replace the screw with the correct size |
If your handle is missing hardware or a set screw is stripped, the correct replacement is often a small handle set screw such as the refrigerator door handle set screw WR01X20424 for this model.
A properly installed handle prevents door slamming, reduces stress on the door hinge, and helps the door gasket seal consistently so your GE refrigerator maintains stable temperatures.
Last updated: February 2026
What is the most common problem with a GE refrigerator?
The most common problem we see with GE refrigerators (including model GTS22KYNCRFS) is a cooling complaint: the fresh food section gets warm, temperatures swing, or the freezer cools but the refrigerator does not. The usual causes are airflow restrictions, dirty condenser coils, or a failing evaporator fan.
- Refrigerator section warm but freezer still cold
- Temperature swings, food spoils faster than normal
- Frost buildup on the freezer back wall
- Loud humming, rattling, or a fan noise that comes and goes
- Ice maker slows down or stops because the freezer is not staying cold enough
- Confirm airflow: Do not block vents with food packages; leave space in front of vents.
- Clean condenser coils: Dust and pet hair reduce heat removal and cause warm temps.
- Check door sealing: Make sure doors close fully and gaskets are not folded or torn.
- Listen for the evaporator fan: When the compressor is running, you should typically hear a steady fan sound from the freezer area.
- Look for frost patterns: Heavy frost on the freezer rear panel often points to a defrost or airflow problem.
If the basic checks do not restore normal temperatures, these model-relevant parts are common next steps:
| Symptom | Likely area | Example part for GTS22KYNCRFS |
|---|---|---|
| Warm refrigerator, weak airflow | Evaporator fan system | GE refrigerator evaporator fan motor WR60X31522 |
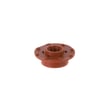
| Fan noisy or vibrating | Fan mounting isolation | Refrigerator evaporator fan motor grommet WR02X12008 |
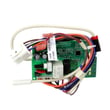
| No cooling, erratic operation | Controls/electronics | GE refrigerator electronic control board WR55X43825 |
Cooling issues are usually progressive. Fixing airflow or a failing fan early helps the compressor run less, keeps food safe, and prevents frost buildup that can block vents and make the problem look worse.
- Use how to fix your evaporator cooling fan to diagnose fan noise, no-fan conditions, and airflow problems.
- If your unit displays a fault, check GE refrigerator error codes to narrow the problem to a fan, sensor, or control issue.
Last updated: February 2026