Owner’s manual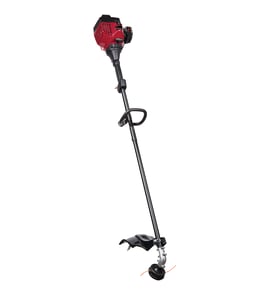

Which is better, .080 or .095 trimmer line?
For the Craftsman 917773761 wheeled weed trimmer, neither .080 nor .095 is the better choice because this model is designed to use .155-inch diameter trimmer line cut to 18-3/4 inches. Using the specified size helps prevent vibration, poor cutting, and premature wear; see the 917773761 owner's manual.
The manual specifies:
- Diameter: .155 inch trimmer line
- Length: cut each piece to 18-3/4 inches
- Match lengths: keep all installed lines within 1 inch of each other to keep the head balanced
If you want longer line life, technique matters too: use the ends of the line to cut and move slowly in heavy weeds.
On handheld string trimmers, .095 is typically tougher and lasts longer in thick weeds, while .080 is lighter and can feel smoother for light trimming. On a wheeled trimmer like the 917773761, the bigger issue is fit and balance; the correct .155 line is what the cutting head is built around.
| Line size | Typical best use | Tradeoff |
|---|---|---|
| .080 | Light grass, detail edging | Wears faster in heavy weeds |
| .095 | Thicker weeds, longer runtime | More load, can feel less “fine” |
| .155 (specified) | Correct fit for 917773761 cutting head | Best balance and intended performance |
- Replace line when it wears to half its original length.
- Avoid letting the trimmer head ride on concrete or asphalt; it can wear the mow ball quickly.
- Keep the top of the engine clear of grass and chaff for good airflow.
- If the head starts vibrating, recheck that all line pieces are close in length.
- Inspect the debris shield and deflector area for packed grass that can affect cutting.
Line diameter and length affect cutting power, engine load, and vibration. Using the specified .155 x 18-3/4 in line keeps the trimmer head balanced and helps protect wear items like the mow ball and spindle components.
Last updated: January 2026
How to replace a line trimmer head?
On the Craftsman 917773761 wheeled weed trimmer, most “head” issues are solved by replacing the trimmer line and inspecting the carrier plate and mow ball area. Our recommended approach is to follow the removal and service steps in the 917773761 owner's manual so the trimmer head and belt area are handled safely.
- Disconnect the spark plug wire and keep it away from the plug.
- Let the engine and all moving parts stop completely.
- Work on a flat surface; tip the trimmer only with the carburetor and fuel cap facing up.
- Wear gloves and eye protection; trimmer line can snap back.
The manual specifies that bulk line must be cut to 18-3/4 inches before installing, and it should be installed evenly on both sides of the carrier plate.
- Remove the worn line from the carrier plate.
- Fold a new, cut-to-length line in half.
- Insert the folded end through the carrier plate opening to the back side of the retainer clip.
- Pull outward until the line seats under the retainer clip.
- Repeat for the other side; confirm both lines match length.
If the trimmer head stops spinning, the manual points to the belt and pulleys. Belt service requires removing the chassis cover and debris shield, then slipping the belt off the engine pulley and trimmer head pulley.
| Symptom | What to inspect | Common next step |
|---|---|---|
| Head does not spin | Belt routing and condition | Replace the belt if worn or broken |
| Vibration or uneven cut | Lines uneven or broken | Install two equal-length lines |
| Line will not stay in | Retainer clip and carrier plate | Replace damaged carrier plate components |
If your belt is cracked, glazed, or stretched, replace it with the correct drive belt for this model: line trimmer belt 532185476.
A properly serviced trimmer head protects the spindle and mow ball area from premature wear, improves cutting performance, and reduces vibration that can loosen fasteners over time.
Last updated: January 2026
Are all string trimmer attachments compatible?
No. Attachments are not universally compatible; they typically must match the manufacturer’s approved accessory system for your specific trimmer. For the Craftsman 917773761 wheeled weed trimmer, we recommend using only manufacturer-approved accessories and using trimmer line only (no blades or wire) as outlined in the 917773761 owner’s manual.
Most attachment-capable tools use a brand-specific coupler, shaft size, and drive connection. Even if an attachment physically fits, it can still be unsafe or damage the driveline.
- Match the brand and attachment system (coupler style and shaft diameter)
- Confirm the attachment is approved for your exact model
- Use only trimmer line on this unit; avoid blades, wire, rope, or flailing devices
- Keep all guards and shields installed when operating
- Stop the trimmer head before crossing gravel, walks, or roads
This model is designed for line-trimming. The manual specifies .155 inch diameter trimmer line, cut to 18-3/4 inches, and recommends keeping installed lines within 1 inch of each other to prevent vibration.
| Item | What to use on 917773761 | Why it matters |
|---|---|---|
| Cutting material | .155 in trimmer line | Prevents breakage and injury risk |
| Line length | 18-3/4 in per line | Helps balance the trimmer head |
| Non-line attachments | Not recommended | Increases injury risk and can damage the unit |
Sometimes the real issue is worn line or a line-retention problem, not an attachment mismatch.
- If trimming is poor, replace line when it wears to about half its original length
- If the head will not retain line, inspect the carrier/retainer components
- If vibration increases after reloading, re-check that line lengths are even
A common fix for line-retention problems is replacing the carrier plate; see the line trimmer carrier plate 594935003 if your current plate is cracked or worn.
Using non-approved attachments or non-specified cutting materials can create dangerous projectiles, increase vibration, and overload the spindle and belt drive. Staying within the manufacturer’s accessory guidance protects the operator and helps the trimmer last longer.
Last updated: January 2026
Why does the cable in my strimmer line keep breaking?
On the Craftsman 917773761 wheeled weed trimmer, the “line” most often breaks because it is hitting hard surfaces (concrete, asphalt, gravel, edging, rocks) or because the wrong line size or length is installed. Using the specified .155-inch line cut to the correct length greatly reduces breakage; see the 917773761 owner's manual.
- Contact with hard surfaces: Keep the trimmer head from riding on concrete, asphalt, and edging; those surfaces wear the bottom of the head and chew up line.
- Crossing gravel or driveways while spinning: Stop the rotating head before crossing gravel, walks, or roads.
- Wrong line diameter: Use .155-inch diameter trimmer line.
- Wrong line length: Cut each piece to 18-3/4 inches; uneven lengths can unbalance the head and cause vibration that snaps line.
- Line installed incorrectly: Reinstall the line so it seats fully under the retainer clip on the carrier plate.
- Line worn too short: Replace when worn to less than half its original length.
- Shut the engine off and let it cool; disconnect the spark plug wire before servicing.
- Cut new line to 18-3/4 inches and confirm both sides match within 1 inch.
- Fold the line, insert through the carrier plate opening, and pull until fully seated under the retainer clip.
- Trim using the ends of the line (not the middle); move slower in thick weeds.
| Item | What to use on Craftsman 917773761 | Why it matters |
|---|---|---|
| Line diameter | .155 inch | Too small breaks and slips; too large will not retain correctly |
| Line length (each piece) | 18-3/4 inches | Correct reach and balanced head |
| Replace when worn | Half-length or less | Short line reduces performance and increases stress |
If the line is the correct size and still will not stay in place, the issue is usually a damaged retainer clip or carrier plate. On this model, the carrier plate is a common wear item; match parts by model number and diagram, and consider the line trimmer carrier plate 594935003 if your carrier plate is cracked or the retention points are worn.
Frequent line breakage is more than an annoyance; it reduces cutting performance, increases vibration, and can accelerate wear on the trimmer head components.
Last updated: January 2026