Error Codes




What is the most common problem with Whirlpool washers?
The most common Whirlpool washer problems are water leaks and drain or spin issues that leave clothes wet. On the Whirlpool WFW6720RW0 (front-load), the most frequent root causes are loose or aging fill hoses, a restricted drain path, or a worn door seal area that lets water escape.
Most common symptoms and what they usually mean
- Water on the floor: loose fill hose connections, cracked hose, or a leaking door seal area
- Won’t drain or drains slowly: kinked drain hose, clogged pump area, or restricted standpipe
- Won’t spin or clothes are still wet: oversudsing, unbalanced load, or a drain problem preventing high-speed spin
- Loud noise in spin: load imbalance, shipping or installation issues, or a worn drive component
- Won’t start or stops mid-cycle: door not latching fully, power interruption, or control issue
Quick checks we recommend first (fast, no parts)
- Reduce suds: Use HE detergent and measure carefully; too many suds can prevent proper draining and spinning.
- Check the fill hoses: Make sure hot and cold hoses are tight at the wall and washer, and the rubber washers are seated.
- Inspect the drain setup: Confirm the drain hose is not kinked and the standpipe is not blocked.
- Level the washer: A front-load washer that is not level can shake, walk, and struggle to spin.
Parts that commonly solve leak and fill complaints
If you see dripping at the back connections or intermittent seepage, replacing the fill hoses is a common fix.
| Symptom | Most likely area | Part on this model page |
|---|---|---|
| Drip at wall or inlet connections | Fill hoses and washers | Washer fill hose set 8212545RP |
| Hose connection won’t stay tight | Hose clamp or clamp tension | Clamp WP596669 |
| Water leaking at the door area | Door boot or door alignment | Bellow W11746638 |
Why it matters
Leaks can damage flooring and cabinets, and drain or spin problems can leave detergent and dirty water in fabrics. Catching hose wear, clamp issues, or a failing bellow early helps prevent bigger repairs.
For error-code driven troubleshooting, we use the Whirlpool duet he front load washer error codes guide to match the code to the most likely failure and the right repair path.
Last updated: February 2026
Can a 5.0 cu ft washer wash a king size comforter?
Yes. A 5.0 cu ft washer is typically large enough to wash most king-size comforters at home, especially in a front-load design like Whirlpool model WFW6720RW0. The key is leaving enough room for the comforter to tumble freely so it rinses well and does not come out lumpy.
Best practices for washing a king comforter
- Check the comforter’s care label for “machine wash” and water temperature limits.
- Load the comforter loosely; do not pack it down.
- Use HE detergent and use less than you think you need (too much causes oversudsing).
- Choose a bulky/bedding cycle if available; otherwise use a normal cycle with an extra rinse.
- After the wash, redistribute the comforter if it’s bunched up, then continue.
- Dry thoroughly; pause to fluff and rotate to prevent wet clumps.
Quick fit check (what “fits” really means)
A comforter can physically fit but still wash poorly if it cannot tumble.
| What you see in the drum | What it means | What to do |
|---|---|---|
| Comforter drops and tumbles | Proper agitation and rinsing | Wash at home normally |
| Comforter stays wedged to one side | Poor cleaning and heavy imbalance risk | Reduce load, add extra rinse |
| Door area gets soaked and slaps | Too much bulk for the cycle | Stop and reposition, use lower spin |
Why it matters
When a comforter cannot tumble, detergent and soil do not rinse out evenly. That can leave odor, soap residue, and a heavy, off-balance load that stresses the suspension and spin system.
Related help
If your washer displays an error during a bulky load, use our Whirlpool duet steam front load washer error codes guide to match the code to the most likely cause and next steps.
Last updated: February 2026
Do front load washers still have mold issues?
Yes. Front-load washers like Whirlpool model WFW6720RW0 can still develop mold and mildew because moisture and detergent residue collect around the door gasket and dispenser area. With simple habits and periodic cleaning, we prevent odors and the black, slimy buildup most people associate with “front-load mold.”
Why front-load washers get moldy
Front-load designs seal tightly to prevent leaks. That tight seal also traps humidity after a cycle, especially when the door stays closed and the washer is used with too much detergent.
Common mold hot spots
- Door boot and folds of the rubber gasket
- Dispenser housing and siphon channels
- Lower front area near the drain path
- Inside the drum when the door stays shut
What to do after every load (best prevention)
- Leave the door ajar for a few hours so the drum and gasket dry.
- Wipe the gasket folds dry; remove hair, lint, and small items.
- Keep the dispenser area dry; wipe drips and residue.
- Use HE detergent and measure carefully (too much feeds residue).
- Remove wet laundry promptly.
Monthly cleaning routine (odor and buildup control)
Run a washer-cleaning cycle (or a hot cycle) and then wipe down the gasket and glass.
If you already have visible buildup, clean the gasket folds with a mild cleaner, then rinse and dry thoroughly. If the gasket is torn, warped, or permanently deformed, replacement is the long-term fix.
Parts that can matter
| Symptom | What to check | Example part on this model page |
|---|---|---|
| Persistent musty odor at the door | Door seal condition and cleanliness | Bellow W11746638 |
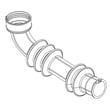
| Water left in the machine or slow draining | Drain path and drain hose routing | Hose assy-dr W11549455 |
Why it matters
Mold and residue can cause odors, reduce cleaning performance, and eventually lead to leaks if the door seal is damaged. Keeping airflow and reducing detergent buildup are the two biggest wins.
For additional prevention and cleanup steps, we recommend following the process in how to keep a washer odor free and, for existing growth, how to get rid of mold in a front load washer.
Last updated: February 2026
What is the average lifespan of a Whirlpool dryer?
Whirlpool dryers last 13 years on average with normal household use. Your model WFW6720RW0 is a Whirlpool washer, so this lifespan figure applies to Whirlpool dryers in general, not to this washer.
Typical Whirlpool dryer lifespan
| Appliance type | Average lifespan | What most often shortens it |
|---|---|---|
| Electric dryer | 13 years | Restricted venting, overheating, overloading |
| Gas dryer | 13 years | Restricted venting, overheating, igniter or gas valve wear |
What makes a Whirlpool dryer last longer
- Clean the lint screen every load.
- Keep the vent run short, smooth, and clear; airflow problems cause overheating.
- Avoid overloading; it strains the drum support, belt, and motor.
- Address long dry times quickly; they usually point to vent restriction.
- Level the dryer to reduce vibration and premature wear.
If you were asking about your Whirlpool washer WFW6720RW0
Front-load washers typically last 11 years. Many common issues are repairable on WFW6720RW0, especially leaks, door-closing problems, and drain issues.
- Replace aging fill hoses to prevent leaks using washer fill hose set 8212545RP.
- If the door will not close or the washer will not start, inspect the door strike; replace with strike, door W11316914 if cracked or loose.
- Use error codes to pinpoint failures before replacing parts; see Whirlpool duet high efficiency front load washer error codes.
Why it matters
Knowing the typical service life helps you decide whether to repair or replace. For dryers, airflow maintenance prevents overheating and expensive failures; for washers, catching leaks and door issues early prevents water damage.
Last updated: February 2026