Owner’s manual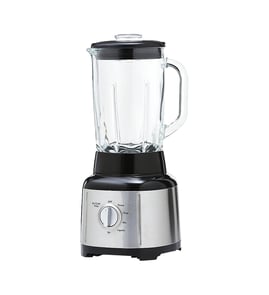



Are KitchenAid blenders lifetime warranty?
No. The KitchenAid KSB4031CU0 blender is covered by a five-year full warranty from the date of purchase, not a lifetime warranty. During that five-year period, KitchenAid provides either a hassle-free replacement or authorized repair (parts and labor) for defects in materials and workmanship; see the KSB4031CU0 owner's manual.
What the 5-year warranty covers
For blenders operated in the 50 United States, District of Columbia, Puerto Rico, and Canada, the warranty includes:
- Five years of coverage starting on the purchase date
- Hassle-free replacement with an identical or comparable unit (where offered)
- Replacement parts and repair labor for covered defects
- Service performed by an Authorized KitchenAid Service Facility (for repair option)
What you need to make a warranty claim
Having the right information ready speeds up the process.
- Original sales receipt or other proof of purchase
- Your complete shipping address (no P.O. Box for replacement shipments)
- Model number KSB4031CU0
- A clear description of the failure (for example: won’t start, leaks, burning smell)
Warranty vs. parts replacement: what to do first
If your blender is within 5 years, warranty service is usually the best first step. If it is out of warranty, replacing a worn part is often the most cost-effective fix.
| Situation | Best next step | Common related part (if out of warranty) |
|---|---|---|
| Within 5 years of purchase | Use warranty service per the manual | Not needed unless directed |
| Out of warranty and jar leaks or blade is damaged | Replace the jar or blade components | Jar assembly W11433178 or blender blade assembly W11396694 |
| Motor runs but jar does not spin | Inspect/replace the drive interface | Blender drive coupling W11627528 |
Why it matters
A “lifetime warranty” changes how you plan repairs. With a five-year warranty on the KSB4031CU0, it makes sense to pursue warranty replacement or authorized repair first, then consider parts like the jar assembly, blade assembly, or drive coupling after coverage ends.
Last updated: February 2026
Can I put my KitchenAid blender in the dishwasher?
Yes, many removable parts on your KitchenAid blender model KSB4031CU0 are dishwasher-safe, but the blender base and power cord must never go in water. For best results, follow the rack placement and “top rack only” guidance in the KSB4031CU0 owner's manual.
What you can wash in the dishwasher
From the care and cleaning instructions, these items are dishwasher-safe:
- Personal jar (top rack only)
- Small batch jar (top rack only)
- Lids (top rack only)
- Blade assembly (top rack only)
- Tamper (top rack only)
- Lid center cap (top rack only)
- Blender jar and glass jar (bottom rack is allowed)
What should never go in the dishwasher
Keep these out of the dishwasher to prevent electrical damage and corrosion:
- Blender base
- Power cord
Quick cleaning option (no dishwasher)
If you want a fast cleanup between recipes, use the blender’s clean function:
| Method | What you do | Best for |
|---|---|---|
| Clean function | Fill jar halfway with warm water, add 1 to 2 drops of dish soap, run the clean cycle, then rinse and dry | Everyday cleanup, light residue |
| Dishwasher | Load dishwasher-safe parts on the correct rack, then air-dry | Deeper cleaning, multiple parts |
Why it matters
Dishwasher-safe parts can handle heat and detergent, but the base contains electrical components. Keeping the base dry helps prevent no-start issues and premature control or motor problems.
Last updated: February 2026
Can a broken blender be fixed?
Yes, a broken KitchenAid blender like model KSB4031CU0 is often fixable when the issue is a jam/overload shutdown, a worn drive connection, or a damaged jar or lid. We start with the troubleshooting steps in the KSB4031CU0 owner's manual, then replace the specific failed part if needed.
Quick checks before buying parts
- Confirm the blender is plugged into a grounded 3-prong outlet.
- If it stopped mid-blend, unplug it and reduce the load (overload protection can shut it off).
- Remove the jar and use a spatula to rearrange ingredients; add liquid or blend smaller batches.
- If it stops after about 3 minutes, turn the dial to O (off) and restart (normal durability feature).
- Inspect the jar, lid, and blade area for cracks, leaks, or a jam.
Common fixes and the parts that usually solve them
If the motor runs but the blades do not spin, the drive connection is a common failure point. If the jar is cracked or leaking, replacing the jar assembly is the practical repair.
| Symptom | Most likely cause | Typical fix |
|---|---|---|
| Motor sounds normal, blades do not turn | Worn drive coupling | Replace blender drive coupling W11627528 |
| Leaks, cracks, or damaged jar | Jar damage or worn sealing surfaces | Replace jar assembly (match your version) |
| Stops during blending | Overload or jam | Reduce batch size, add liquid, restart |
| Will not start | Power supply issue or control problem | Check outlet/breaker; then consider control service |
Why it matters
Fixing the right component restores performance and protects the motor. Overloading a blender can trigger automatic shutoff to prevent motor damage, so correcting batch size and ingredient load can solve the problem without any parts.
When replacement makes more sense
If the base electronics or motor are damaged, repair can be more involved than replacing a jar, lid, or coupling. For units still within the KitchenAid five-year coverage described in the manual, service or replacement options may be the best path.
Last updated: February 2026
Does KitchenAid sell replacement parts?
Yes. For the KitchenAid KSB4031CU0 blender, KitchenAid sells accessories and replacement parts, and the user manual also lists how to order parts and get service by phone (including after the warranty expires). See the KSB4031CU0 owner’s manual for the official service and parts-ordering details.
How to get the right replacement part
Using the exact model number matters because KitchenAid blenders can use different jar, lid, and drive components.
- Match your model number exactly: KSB4031CU0
- Identify the failed area: jar and blade, lid, drive coupling, or base controls
- Compare your original part’s shape and mounting points before ordering
- If the blender is within the 5-year warranty period, check service options first
- For wear items, inspect for cracks, stripped drive teeth, or leaks before replacing
Common KSB4031CU0 parts customers replace
These are examples of model-matched parts we list for this blender.
| Symptom | Likely part to check | Example model-matched part |
|---|---|---|
| Jar leaks, won’t lock, or is damaged | Jar components | Jar assembly W11433178 |
| Blender runs but blades do not spin | Drive connection | Blender drive coupling W11627528 |
| Lid won’t seal or is torn | Lid components | Assembly, lid W11182040 |
Warranty and service notes (U.S. and Canada)
KitchenAid’s blender warranty for this product line is 5 years from the date of purchase and includes options for replacement or repair through authorized service (terms apply). The manual also provides the phone numbers for ordering accessories and replacement parts.
Why it matters
Ordering the correct KitchenAid replacement part prevents fit issues (jar-to-base engagement, lid sealing, and blade coupling) and helps protect the motor and electronic control from damage caused by leaks or slipping couplers.
Last updated: February 2026
How to disassemble a KitchenAid blender blade?
On the KitchenAid KSB4031CU0 blender, we recommend removing the blade assembly from the jar for cleaning or replacement rather than fully disassembling the blade itself. Unplug the blender first, then remove the jar and carefully twist the blade assembly off (clockwise or counterclockwise depends on the jar style); follow the steps in the KSB4031CU0 owner's manual.
Safe removal steps (recommended)
- Unplug the blender and wait for the blade to fully stop.
- Remove the jar from the base; never work on the blade while the jar is on the base.
- Use a towel or cut-resistant gloves to protect your hands from sharp edges.
- Hold the jar firmly on a stable surface.
- Twist the blade assembly to remove it (jar designs vary; use the jar’s locking direction shown in the manual).
- If it is stuck, do not force it with excessive torque; rinse the base of the jar with warm water to loosen residue, then try again.
When you should not fully disassemble the blade
Many blender blade assemblies are designed as a sealed unit. Taking the blade apart can cause leaks, wobble, or unsafe operation. If the blade is dull, leaking, or noisy, replacement is the reliable fix.
Common symptoms and the likely fix
| Symptom | What it usually means | What to do |
|---|---|---|
| Jar leaks from the bottom | Seal or blade assembly wear | Replace the blade assembly or jar assembly |
| Blade wobbles or rattles | Bearing wear or damage | Replace the blade assembly |
| Poor blending, torn ingredients | Dull or damaged blade | Replace the blade assembly |
| Burning smell or frequent stopping | Overload or jam | Reduce batch size, add liquid, clear jam |
Parts that may be involved
If you are servicing the jar area on KSB4031CU0, these model-matched parts are commonly replaced:
- Blender blade assembly W11396694 (cutting and sealing assembly)
- Jar assembly W11433178 (complete jar when the jar or base is damaged)
- Blender drive coupling W11627528 (connects motor drive to the jar)
Why it matters
A properly seated blade assembly prevents leaks and keeps the jar locked correctly. Forcing disassembly or running with a loose blade can damage the drive coupling, jar threads, and motor.
Last updated: February 2026
What is the color of the year for the KitchenAid KSB4031CU0 blender?
KitchenAid’s “Color of the Year” is a marketing release that applies to specific limited-edition products, not to every KitchenAid blender model. For the KitchenAid KSB4031CU0 blender, the practical way to identify your unit’s color is to match the actual base finish and order color-matched housings when needed; see the KSB4031CU0 owner's manual for model identification and component overview.
How to identify the color/finish on your KSB4031CU0
Use these checks to confirm what you own before ordering cosmetic parts:
- Read the full model number on the rating label (KSB4031CU0).
- Visually match the base finish (the upper housing color is the key).
- If you are replacing a housing piece, match the finish name to the part description.
- If you are replacing functional parts (jar, lid, blade), prioritize fit over color.
Common KSB4031CU0 base finishes (parts you can match)
These upper base options are listed for this model; choose the one that matches your blender’s appearance:
| Finish name (as listed) | Example part to match | What it affects |
|---|---|---|
| Black matte | Upper base (black matte) W11245946 | Exterior look of the base |
| Contour silver | Upper base (contour silver) W11279715 | Exterior look of the base |
| Passion red | Upper base (passion red) W11245947 | Exterior look of the base |
| White | Upper base (white) W11245949 | Exterior look of the base |
Why it matters
“Color of the Year” and other special colors are about styling, but parts selection for KitchenAid blenders is about correct fit and safe operation. Matching the correct KSB4031CU0 housing finish prevents a mismatched look, and using compatible jar and lid parts helps prevent leaks.
Last updated: February 2026
Why is my KitchenAid blender leaking at the bottom?
A bottom leak on your KitchenAid KSB4031CU0 blender almost always comes from the jar-to-blade seal area or from liquid getting into the drive area under the jar. Reseating the jar components and correcting the seal orientation typically stops the leak.
Most common causes (and what to check first)
- Sealing ring (gasket) is mis-seated: it can be flipped, pinched, or not fully seated.
- Blade assembly is not tightened evenly: a slightly loose blade base lets liquid seep out.
- Cracked jar or worn sealing surface: hairline cracks near the bottom can drip only under load.
- Overfilling or hot liquids: pressure and expansion can force liquid past the seal.
- Spills during blending: liquid can run down the outside of the jar and look like a bottom leak.
Quick fix checklist
- Unplug the blender and remove the jar.
- Disassemble the jar bottom and inspect the sealing ring for nicks, flattening, or twisting.
- Reinstall the sealing ring so it sits flat and even all the way around.
- Reassemble and tighten the blade base firmly by hand (do not overtighten).
- Test with water only for 10 to 15 seconds.
Parts that commonly solve bottom leaks
If the jar is damaged or the sealing surfaces are worn, replacing the full jar is the fastest, most reliable fix.
| Symptom | Most likely fix | When to replace parts |
|---|---|---|
| Drips start immediately after filling | Reseat seal and retighten base | If it still drips after reseating |
| Leaks only while blending | Check for cracks, correct fill level | If jar shows cracks or wear |
| Liquid appears under jar/drive area | Clean and dry, prevent spills | If leak persists with water test |
Helpful model-matched replacements:
Why it matters
Leaks can let liquid reach the drive coupling and motor area, which leads to slipping, burning smells, or premature motor failure. Catching a seal or jar issue early protects the base and electronic control.
For cleaning and safe handling steps (including keeping the base dry), follow the KSB4031CU0 owner's manual.
Last updated: February 2026
Why is my KitchenAid blender not working?
If your KitchenAid KSB4031CU0 blender is not working, the most common causes are a power issue, an automatic safety shutoff from a jam or overload, or the 3-minute run limit. Reset by turning the dial to (O), unplugging, clearing the load, then restarting per the KSB4031CU0 owner's manual.
Quick checks (start here)
- Confirm the blender is firmly plugged into a grounded 3-prong outlet.
- Check your breaker/fuse and reset if tripped.
- Turn the control dial to (O), unplug for 1 minute, then plug back in.
- Remove the jar and re-seat it fully on the base.
- If the blender ran for about 3 minutes, it may have stopped by design; restart after turning to (O).
If it stops while blending (jam or overload)
When ingredients are too thick or the blade is jammed, the blender can shut off to protect the motor.
- Unplug the blender.
- Remove the jar.
- Use a spatula to rearrange ingredients.
- Blend in smaller batches.
- Add liquid to reduce load (when your recipe allows).
What you’ll notice vs. what to do
| What happens | Likely cause | What to do |
|---|---|---|
| Won’t start at all | Outlet/breaker, jar not seated | Verify power, re-seat jar, reset dial to (O) |
| Stops around 3 minutes | Normal durability limit | Turn to (O) and restart |
| Stops mid-blend | Overload or jam | Unplug, clear/reduce load, add liquid |
| White LED ring flashes rapidly | Error detected | Follow the error guidance in the manual; service may be needed |
Parts that commonly relate to “won’t blend” symptoms
If the motor runs but the blade does not spin, a worn coupling or a jar-related issue is a common mechanical cause.
- Blender drive coupling W11627528: transfers motor power to the jar blade system
- Jar assembly W11433178: includes the jar components that interface with the base
Why it matters
These shutoffs and limits help prevent motor damage and extend blender life. Clearing a jam and reducing load often restores normal operation without replacing the motor or electronic control.
Last updated: February 2026