Get free shipping on your order, with any water filter subscription. Find my filter

Open Hamburger Menu
Sears Parts Direct
Tips to find your model number

Kenmore 11024712300 washer Parts

Here are the diagrams and repair parts for Kenmore 11024712300 washer, as well as links to manuals and error code tables, if available.

Kenmore 11024712300 washer
By Schematic
By Part
SELECT DIAGRAM
?

This is the number corresponding to the part on the diagram / schematic

Browse Parts for 11024712300 Washer

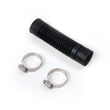
  • Washer Tub-to-pump Hose for Kenmore 11024712300 - Part 285871

    Rear panel diagram

    Pump Hose

    Part #3951449

    Replaced by #285871

    Info Icon
    Manufacturer substitution
    This part replaces 3951449. Substitute parts can look different from the original.
    In Stock
    $21.39
    22% OFF Phone Price : $27.39Info Icon
    Minus Item
    Qty
    Plus Item
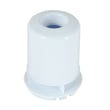
  • Washer Fabric Softener Dispenser Cup for Kenmore 11024712300 - Part WP8528278

    Agitator/basket/tub diagram

    Washer Fabric Softener Dispenser Cup

    Part #8528278

    Replaced by #WP8528278

    Info Icon
    Manufacturer substitution
    This part replaces 8528278. Substitute parts can look different from the original.
    In Stock
    $12.67
    14% OFF Phone Price : $14.67Info Icon
    Minus Item
    Qty
    Plus Item
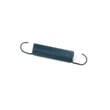
  • Kenmore Washer Leveling Leg Spring for Kenmore 11024712300 - Part 8316845

    Machine base diagram

    Spring

    Part #62597

    Replaced by #8316845

    Info Icon
    Manufacturer substitution
    This part replaces 62597. Substitute parts can look different from the original.
    This item is not returnable
    In Stock
    $6.42
    13% OFF Phone Price : $7.42Info Icon
    Minus Item
    Qty
    Plus Item
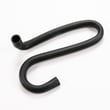
  • Washer Tub Fill Nozzle Hose for Kenmore 11024712300 - Part WP3357328

    Rear panel diagram

    Washer Water Fill Nozzle Hose

    Part #3357328

    Replaced by #WP3357328

    Info Icon
    Manufacturer substitution
    This part replaces 3357328. Substitute parts can look different from the original.
    In Stock
    $16.35
    11% OFF Phone Price : $18.35Info Icon
    Minus Item
    Qty
    Plus Item
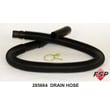
  • Washer Drain Hose for Kenmore 11024712300 - Part 285664

    Rear panel diagram

    Drain Hose

    Part #3951609

    Replaced by #285664

    Info Icon
    Manufacturer substitution
    This part replaces 3951609. Substitute parts can look different from the original.
    In Stock
    $45.02
    12% OFF Phone Price : $51.02Info Icon
    Minus Item
    Qty
    Plus Item
  • Washer Suspension Plate Friction Pad for Kenmore 11024712300 - Part 285219

    Machine base diagram

    Pad

    Part #62568

    Replaced by #285219

    Info Icon
    Manufacturer substitution
    This part replaces 62568. Substitute parts can look different from the original.
    In Stock
    $16.08
    11% OFF Phone Price : $18.08Info Icon
    Minus Item
    Qty
    Plus Item
  • Washer Agitator Cam Repair Kit for Kenmore 11024712300 - Part WP8537433

    Agitator/basket/tub diagram

    Washer Agitator Cam Repair Kit

    Part #8537433

    Replaced by #WP8537433

    Info Icon
    Manufacturer substitution
    This part replaces 8537433. Substitute parts can look different from the original.
    In Stock
    $52.59
    10% OFF Phone Price : $58.59Info Icon
    Minus Item
    Qty
    Plus Item
  • Washing Machine Washer for Kenmore 11024712300 - Part WP3949550

    Agitator/basket/tub diagram

    Washing Machine Washer

    Part #3949550

    Replaced by #WP3949550

    Info Icon
    Manufacturer substitution
    This part replaces 3949550. Substitute parts can look different from the original.
    In Stock
    $10.49
    16% OFF Phone Price : $12.49Info Icon
    Minus Item
    Qty
    Plus Item
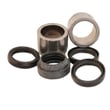
  • Washer Bearing And Seal Kit for Kenmore 11024712300 - Part 285203

    Machine base diagram

    Washer Bearing And Seal Kit

    In Stock
    $90.60
    6% OFF Phone Price : $96.60Info Icon
    Minus Item
    Qty
    Plus Item
  • Washing Machine Washer for Kenmore 11024712300 - Part WP8543666

    Agitator/basket/tub diagram

    Washer

    Part #3355921

    Replaced by #WP8543666

    Info Icon
    Manufacturer substitution
    This part replaces 3355921. Substitute parts can look different from the original.
    This item is not returnable
    In Stock
    $11.33
    15% OFF Phone Price : $13.33Info Icon
    Minus Item
    Qty
    Plus Item

Kenmore Washer 11024712300 FAQs

The Kenmore washer model 11024712300 has a 3.5 cu. ft. wash basket capacity. For the matching use and care details for this exact model, use the 11024712300 owner's manual.

How to confirm you are matching the right model

Use the model and serial tag under the lid so you do not mix up similar Kenmore 110-series washers.

  • Lift the washer lid and locate the model/serial label
  • Match the full model number exactly: 11024712300
  • Use the capacity for load sizing, not the cabinet size
  • If you are comparing washers, compare capacity and basket style (standard vs. larger basket)

What 3.5 cu. ft. means for real-world loading

A 3.5 cu. ft. top-load washer is a large-capacity design; it handles everyday family loads without packing the basket.

Load type Practical guidance for 3.5 cu. ft.
Mixed clothes Fill loosely to the top of the basket, do not compress
Towels/jeans Run medium loads; keep like items together
Bulky items Wash 1 large item at a time; add a few small items to balance

Why it matters

Using the correct capacity helps prevent poor cleaning and out-of-balance spinning; it also reduces strain on the drive system and agitation components.

Tips to avoid overload and balance problems

  • Load items evenly around the basket
  • Keep the top layer loose so water and detergent circulate
  • If the washer bangs or will not spin, pause and redistribute the load
  • Replace worn agitation parts if clothes are not moving well, such as the agitator dog 80040

Last updated: January 2026

To hard reset your Kenmore washer model 11024712300, unplug it (or switch off the breaker) for 2 minutes, then restore power and restart a cycle. This clears many temporary control glitches; if the washer still will not run, check lid closure and basic drain and level conditions.

Hard reset steps (safe and effective)

  • Press the Cycle Control knob in to stop the washer (if it is running).
  • Unplug the washer or turn off the circuit breaker.
  • Wait 2 minutes.
  • Restore power.
  • Close the lid fully.
  • Select a cycle and pull out the Cycle Control knob to start.

For model-specific control and cycle details, follow the 11024712300 owner's manual.

If it still will not start, agitate, or spin

A reset will not fix a mechanical or safety-interlock issue. For this model, the manual notes the washer will not agitate or spin with the lid open, and some cycles pause briefly.

  • Confirm the lid is fully closed and the washer is not in a normal cycle pause.
  • Avoid extension cords; plug directly into a grounded outlet.
  • Reduce load size if overloaded.
  • If the washer will not spin or drain, check for a kinked or clogged drain hose and confirm the drain height is not above typical limits.
  • If the symptom matches a lid-safety problem (fills but will not agitate/spin), inspect the washer lid switch WP3949238.

Quick checks: reset vs. repair

What you see Most likely cause Best next step
Random lights or odd behavior Control glitch Hard reset (2 minutes)
Fills but will not agitate/spin Lid not closed or lid switch issue Check lid; test/replace lid switch
Will not drain/spin Drain restriction or pump issue Check hose; inspect pump
Basket crooked or banging Unbalanced load or leveling Rebalance; level washer per install guide

Why it matters

A hard reset is a fast first step because it clears temporary electronic states. When the problem is a safety input (lid switch), drain restriction, or out-of-level cabinet, the washer needs a correction or part replacement, not a reset.

Last updated: January 2026

To unclog the drain hose on Kenmore washer model 11024712300, we unplug the washer, drain any standing water, then remove and flush the drain hose and check the pump inlet for debris. Reinstall the hose exactly as shown in the 11024712300 installation guide to prevent leaks and kinks.

Safety and prep

  • Unplug the washer.
  • Turn off both water faucets.
  • Protect the floor with towels or a shallow pan.
  • If the tub is full, bail out water first to reduce spills.

Steps to clear the clog

  1. Access the drain hose connection: Pull the washer forward and locate the drain hose where it connects at the bottom of the cabinet.
  2. Remove the hose: Release the clamp and twist the hose back and forth while pulling it off the drain connector.
  3. Clear the blockage:
    • Run water through the hose from a sink or outdoor spigot.
    • Push out lint or small items with a flexible brush or a straightened coat hanger (avoid puncturing the hose).
  4. Check the pump inlet: Look into the pump port and remove coins, socks, or lint clumps.
  5. Reinstall correctly: Push the hose fully onto the drain connector until it reaches the cabinet stop, then reposition the clamp.

Reinstall tips that prevent repeat clogs

The drain hose setup matters as much as the unclogging.

  • Keep the hooked end in the tub or standpipe; do not straighten it.
  • Rotate the hook to eliminate kinks.
  • Do not force extra hose down into the standpipe.
  • Leave an air gap so drain water cannot siphon back.
Symptom Most common cause What we check first
Washer will not drain Hose kink or clog Hose routing and hooked end
Slow drain Lint buildup Hose flush and pump inlet
Leaks at washer base Loose clamp or poor seating Clamp position and hose fully seated

Why it matters

A partially clogged or kinked drain hose can cause slow draining, poor spin performance, and leaks. Installing the hose per the guide protects floors from water damage and helps prevent the hose from slipping off.

Last updated: January 2026

Most common symptoms to help you fix your washers

Choose a symptom to see related washer repairs.

Main causes: clogged drain hose, house drain clogged, bad drain pump, water-level pressure switch failure, bad control b…

Main causes: broken lid switch or lid lock, bad pressure switch, broken shifter assembly, faulty control system…

Main causes: worn agitator dogs, bad clutch, broken motor coupler, shifter assembly failure, broken door lock, suspensio…

Main causes: water heater failure, bad water temperature switch, faulty control board, bad water valve, faulty water tem…

Main causes: lack of electrical power, wiring failure, bad power cord, electronic control board failure, bad user interf…

Main causes: no water supply, bad water valves, water-level pressure switch failure, control system failure, bad door lo…

Main causes: unbalanced load, loose spanner nut, worn drive block, broken shock absorber or suspension spring, debris in…

Main causes: leaky water inlet valve, faulty water-level pressure switch, bad electronic control board…

Main causes: bad lid switch or door lock, bad timer or electronic control board, wiring failure, bad water inlet valve a…

Repair guides for gas ranges

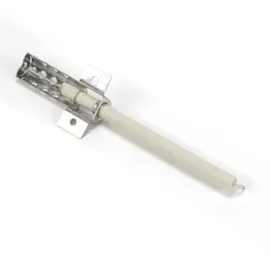
How to replace a gas range oven igniter

How to replace a gas range oven igniter

If your gas oven doesn't heat up, the problem could be a faulty oven igniter. These step-by-step instructions guide you …

Repair time and Difficulty

 45 minutes or less
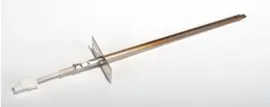
How to replace an oven temperature sensor on a gas range

How to replace an oven temperature sensor on a gas range

See how to replace an oven temperature sensor on a gas range.…

Repair time and Difficulty

 15 minutes or less
How to replace a gas range oven control board

How to replace a gas range oven control board

These step-by-step instructions explain how to replace an oven control board on a gas range…

Repair time and Difficulty

 15 minutes or less

Effective articles & videos to help repair your washers

Use the advice and tips in these articles and videos to get the most out of your washer.

How auto-load sensing washers work (and when they don't)

How auto-load sensing washers work (and when they don't)

Your washer barely fills or seems stuck in sensing mode? Find out how auto-load sensing and Precise Fill features work, …

How to remove the main control board and user interface from a Maytag Epic Z front-load washer

How to remove the main control board and user interface from a Maytag Epic Z front-load washer

Get step-by-step instructions for removing the main electronic control board and the control panel from a Maytage Epic Z…

Using a wiring schematic to trace a current video

Using a wiring schematic to trace a current video

Find out what’s wrong with your appliance by following a circuit.…

Parts & More

Bottom-Mount Refrigerator
Carpet Cleaner
Central Vacuum
Dehumidifier
Electric Cooktop
Exercise Cycle
Front-Engine Lawn Tractor
Gas Pressure Washer
Gas Snowblower
Gas Walk-Behind Mower
Others
Parts
Refrigerator
Treadmill
Washer