Owner’s manual
 Error Codes


How to find model number on Kenmore?
On Kenmore model 79571313314 bottom-mount refrigerators, the model and serial number are printed on an identification label inside the fresh food (refrigerator) compartment. We recommend writing both numbers down so you can match parts and service information correctly using the owner's manual.
Where to look on the refrigerator
Check these common label locations first:
- Inside the refrigerator compartment on the interior liner (side wall or upper area)
- On the wall behind the lower crisper drawer area
- Inside the door area near the gasket line
- Under the front of the refrigerator (some models also have a tech sheet stored there)
What the label looks like and what to record
The identification label typically includes both the model number and serial number.
| Item on label | Example for this unit | Why you need it |
|---|---|---|
| Model number | 79571313314 | Ensures diagrams and parts match your exact refrigerator |
| Serial number | Varies by unit | Helps confirm production details for service and some part revisions |
Tips to make it easier
- Use a flashlight; labels are often printed in small text.
- Take a clear photo of the label before ordering parts.
- If drawers block the view, remove the crisper drawers and look on the liner behind them.
- Record the numbers in your manual or keep the photo in your phone.
Why it matters
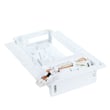
Kenmore model numbers can look similar, but small differences can change the correct door gasket, ice maker assembly, or water inlet valve. Using the exact model number helps prevent ordering the wrong part and saves time on returns.
Last updated: January 2026
Is a top mount or bottom mount fridge better?
For most households, a bottom-mount refrigerator like Kenmore model 79571313314 is better for everyday convenience because fresh foods sit at eye level and storage is easier to organize. A top-mount is often the better pick when you want the simplest layout and typically lower energy use.
Quick comparison
| Feature | Top-mount (freezer on top) | Bottom-mount (freezer on bottom) |
|---|---|---|
| Everyday access | More bending for fresh food | Less bending for fresh food |
| Organization | Usually simpler shelving | Often more drawers and bins |
| Freezer access | Easier access to freezer | More bending for freezer |
| Energy use | Often lower | Often slightly higher |
| Price | Often lower | Often higher |
When a bottom-mount is the better choice
Bottom-mount designs are a strong fit when you use the refrigerator section the most and want better day-to-day ergonomics.
- You want fresh food at eye level (less bending)
- You prefer drawer-style freezer storage for bags and boxes
- You like adjustable shelving and door bins for organization
- You frequently open the refrigerator doors more than the freezer
- You want easier access to crisper and pantry-style storage
For model 79571313314, our owner's manual covers features like adjustable refrigerator shelves and storage sections so you can match the layout to how you shop and cook.
When a top-mount is the better choice
Top-mount refrigerators are a practical option when you want a straightforward design and strong value.
- You use the freezer more often than the refrigerator
- You want a simpler interior with fewer moving drawer parts
- You are shopping primarily by upfront cost
- You want a layout that is easy to place in tighter kitchens
Why it matters
The “better” refrigerator is the one that matches how you access food every day. If you are in the fresh-food section constantly, bottom-mount convenience usually wins. If you prioritize freezer access, simplicity, and value, top-mount often wins.
Last updated: January 2026
What is the bottom part of a refrigerator called?
The bottom area of a Kenmore bottom-mount refrigerator model 79571313314 is commonly called the machine compartment; it houses major cooling components like the compressor and condenser area, and it may also include a base grille and a drain pan underneath. For model-specific safety and access notes, use the 79571313314 owner's manual.
Common names you will hear
Different people use different terms for the same lower section. These are the most common:
- Machine compartment (the compartment that holds the cooling system components)
- Base grille (the vented grille at the bottom front on many refrigerators)
- Compressor compartment (informal term for the area around the compressor)
- Condenser area (where heat is rejected from the sealed system)
- Drain pan area (where defrost water can evaporate)
What parts are typically located at the bottom
On model 79571313314, the bottom section is where you will typically find components tied to cooling, airflow, and water management.
| Bottom-area item | What it does | Example part for this model |
|---|---|---|
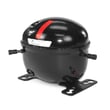
| Compressor | Pumps refrigerant through the sealed system | Refrigerator compressor TCA38091801 |
| Condenser coil area | Releases heat from the refrigerant | (varies by configuration) |
| Defrost drain path | Routes defrost water to the drain pan | Refrigerator drain tube 5251JA3003D |
| Base grille/vents | Allows airflow and access for cleaning | (varies by configuration) |
Why it matters
Knowing the correct name helps you find the right instructions and parts faster. For example, the manual warns to keep hands and objects out of the base grille and the bottom of the refrigerator when the unit is powered, because moving parts and electrical components can be present.
Quick tips before you access the bottom area
- Unplug the refrigerator before removing covers or reaching near wiring.
- Avoid pushing tools or fingers through vents or the base grille.
- If you are cleaning, vacuum vents and the condenser cover area; do not remove panels that are not meant to be removed.
- If you see water under the unit, check for a clogged drain path and inspect the drain tube.
Last updated: January 2026
Why is my Kenmore refrigerator leaking from the bottom?
On Kenmore bottom-mount refrigerator model 79571313314, a leak from the bottom is usually caused by defrost water not draining correctly (ice or debris blocking the drain path) or a water supply connection that is seeping and running down to the base. Use the steps below to pinpoint the source; see the 79571313314 owner's manual for safety and access guidance.
Quick checks that find most bottom leaks
- Look for ice or water under the freezer drawer; this often points to a defrost drain issue.
- Check the floor under the back of the refrigerator; water there often points to the water line or inlet valve.
- Inspect the door gaskets for gaps that cause excess frost, which can overwhelm the defrost drain.
- Confirm the refrigerator is level; poor leveling can make water miss the drain path.
- Check for water hammer (banging pipes); the manual notes it can lead to leakage and should be corrected by a qualified plumber.
Most common causes and what to do
| What you see | Most likely cause | What we recommend |
|---|---|---|
| Water pooling inside, then leaking out the bottom | Defrost drain clogged with ice/debris | Thaw and clear the drain opening and drain tube; flush with warm water |
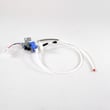
| Water on floor near back, especially after dispensing/ice maker fills | Seeping water connection or faulty inlet valve | Tighten fittings, then inspect/replace the lg refrigerator water inlet valve AJU73753101 if it still seeps |
| Leak seems to start after a move or install | Loose compression nut/ferrule or tubing not seated | Follow the manual water-line steps: flush tubing, connect, then tighten any connections that leak |
| Moisture and frost around door edges | Door gasket not sealing | Clean and warm the gasket to reshape; replace if torn (right side option: lg Kenmore refrigerator door gasket, right ADX73350633) |
Why it matters
Bottom leaks can damage flooring and also create ice buildup in the freezer compartment. Fixing the root cause (drain, water line, or gasket) prevents repeat leaks and helps the refrigerator maintain stable temperatures.
Safety and setup notes
- Unplug the refrigerator before removing panels or working near wiring.
- Turn off the household water supply before servicing the water line or valve.
- After any water-line work, turn water back on and tighten any connections that leak, then monitor for several hours.
Last updated: January 2026