Owner’s manual
 Error Codes


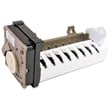
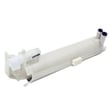
How to replace an ice maker in a side by side refrigerator?
To replace the ice maker in your Kenmore 10657368703 side-by-side refrigerator, we disconnect power, remove the ice bin and mounting screws, transfer any matching parts (such as the shutoff arm/stripper if used), install the new ice maker, then restore power and water and test for ice production. See the 10657368703 owner's manual for model-specific safety steps.
- Unplug the refrigerator or disconnect power at the breaker.
- Turn OFF the water supply to the refrigerator.
- Empty the ice bin and remove it from the freezer.
- Protect the floor with towels; a small amount of water can drip from the fill tube.
- Keep screws and brackets together so the new ice maker mounts the same way.
- Shut off the ice maker: raise the wire shutoff arm to the OFF (up) position.
- Remove the ice bin and any shelf that blocks access.
- Remove the ice maker mounting screws; support the ice maker as the last screw comes out.
- Disconnect the wiring harness plug.
- If your old ice maker has reusable pieces (for example, a shutoff arm or stripper), move only the parts that are identical on the replacement.
- Connect the wiring harness to the new ice maker.
- Mount the new ice maker and tighten screws snugly (do not overtighten).
- Lower the wire shutoff arm to turn the ice maker ON.
After installation, turn the water supply back ON and check connections for leaks.
| What to check | What “good” looks like | What to do if not |
|---|---|---|
| Water supply valve | Fully open | Open valve; confirm house water is on |
| Fill tube area | No dripping | Reseat tube, clear ice blockage |
| Inlet valve behavior | No buzzing with no fill | Diagnose water valve if it hums but won’t fill |
If you suspect a water supply problem, the refrigerator inlet valve W10408179 is a common fix when the ice maker will not fill.
A correct ice maker replacement prevents leaks, protects the wiring harness, and ensures the shutoff arm can stop ice production when the bin is full.
You can order the correct replacement parts for your Kenmore 10657368703 from the parts list for this model, or search by model number on Sears PartsDirect.
Last updated: February 2026
Where to find model number on Kenmore side by side refrigerator?
On Kenmore side-by-side refrigerator model 10657368703, the model and serial number are printed on the model and serial number label located on the product. The quickest way to find it is to open the fresh food (refrigerator) door and look along the inside cabinet walls near the door opening; confirm the exact location in the 10657368703 owner's manual.
- Open the fresh food door and scan the inside cabinet frame around the door opening
- Check the side walls inside the refrigerator compartment (left or right liner)
- Look near the crisper area or lower wall where labels are often placed
- If you do not see it, check the freezer compartment door opening area
- Write down both the model number and serial number exactly as shown
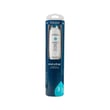
Having the correct model number helps us match the right Kenmore parts and diagrams for your refrigerator, including common replacements like the refrigerator water filter EDR3RXD1 and the refrigerator ice maker WPW10190965.
| Item | What it tells us | Example for this page |
|---|---|---|
| Model number | Which design and parts list to use | 10657368703 |
| Serial number | Production details used for service history | Varies by unit |
| Purchase date | Helpful for maintenance tracking | Your receipt date |
Kenmore model numbers can look similar across 106-series refrigerators, but small differences change which water filter, inlet valve, thermostat, or door gasket fits. Using the exact label information prevents ordering the wrong part and speeds up troubleshooting.
Last updated: February 2026
How many cubic feet is my Kenmore refrigerator by model number?
Your Kenmore side-by-side refrigerator model 10657368703 has its exact cubic-foot capacity listed on the model and serial rating label inside the fresh food compartment (and sometimes also in the specifications section of the 10657368703 owner's manual). Using the rating label is the fastest, most accurate way to match capacity to your exact build.
- Check the model and serial rating label inside the refrigerator section (commonly on a side wall, ceiling area, or near the crisper frame).
- Look for wording such as “Capacity”, “Total volume”, or separate refrigerator/freezer volume values.
- If the label is hard to read, take a clear photo and zoom in; capacity is usually printed in the same block as electrical ratings.
- Use the specifications/features pages in the 10657368703 owner's manual to confirm what you see on the label.
- If you are comparing sizes for replacement planning, measure the cabinet opening too; capacity does not equal exterior dimensions.
Capacity is typically shown as total cubic feet, and sometimes broken out by compartment.
| What you see on the label/manual | What it means | How to use it |
|---|---|---|
| Total capacity (cu. ft.) | Combined refrigerator + freezer volume | Best number for “How big is it?” |
| Refrigerator volume | Fresh food section only | Helps when comparing shelf and bin space |
| Freezer volume | Freezer section only | Helps when comparing ice storage and frozen food space |
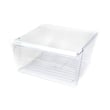
Cubic-foot capacity helps us match the right storage parts (bins, shelves, pans) and set expectations for cooling load. For example, if you are replacing a cracked drawer, matching by model ensures the correct fit, such as the refrigerator crisper pan WP2188656.
Last updated: February 2026
What's the average lifespan of a Kenmore refrigerator?
Most Kenmore refrigerators average 10 to 15 years of service life. For a Kenmore side-by-side like model 10657368703, consistent care (cleaning, good door sealing, and timely part replacement) is what most directly determines whether it lands closer to 10 years or pushes beyond 15.
In normal household use, these are practical benchmarks we see for refrigerators:
- 10 to 15 years: typical lifespan for most modern refrigerators
- 15 to 20 years: common when maintenance is consistent and repairs are handled early
- 20+ years: achievable, but usually requires excellent upkeep and occasional component replacement
| Lifespan range | What it usually means | Common deciding factors |
|---|---|---|
| 10 to 15 years | Average ownership experience | Coil cleaning, door seal condition, stable temps |
| 15 to 20 years | Well-maintained unit | Quick fixes for ice/water issues, airflow kept clear |
| 20+ years | Exceptional longevity | Fewer overheating events, strong compressor health |
These actions reduce compressor strain, prevent temperature swings, and help avoid moisture and ice problems:
- Clean condenser coils regularly (dust buildup raises operating temperatures)
- Keep door gaskets sealing tightly; fix gaps before they cause frost or warm spots
- Maintain proper airflow; do not block vents with food packages
- Replace water filters on schedule to protect the dispenser and ice maker system
- Address unusual noises, warm temps, or heavy frost early (small issues become expensive ones)
For model-specific care and cleaning steps, use the owner's manual.
When these parts start failing, the refrigerator often runs longer and harder, which shortens overall life:
- Water filter and related dispenser components (clogs can reduce flow and stress the system)
- Water inlet valve (can cause no-ice/no-water symptoms or leaking)
- Defrost components (failures can lead to frost buildup and poor cooling)
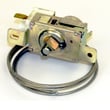
- Temperature control components (can cause warm refrigerator or freezing sections)
If you are replacing the filter for this model, match it to the correct part; the genuine Kenmore refrigerator water filter EDR3RXD1 is listed for 10657368703.
A refrigerator that is running inefficiently can still “work,” but it typically cycles longer, struggles to hold safe food temperatures, and puts extra wear on major components like the compressor. Preventive maintenance is the simplest way to protect the sealed system and extend service life.
Last updated: February 2026
Why is there water leaking from the bottom in my Kenmore refrigerator?
Water leaking from the bottom of your Kenmore 10657368703 side-by-side refrigerator is usually caused by defrost water missing the drain path and overflowing into the cabinet or onto the floor; the most common reasons are a clogged or frozen defrost drain, a shifted drain pan, or a water supply leak to the ice maker or dispenser. Use the owner's manual to locate access points and follow safe shutoff steps.
- Look for ice or sludge in the defrost drain trough (inside the freezer, near the back panel).
- Check the drain pan underneath for cracks, overflow, or being out of position.
- Inspect the water line connection at the lower rear of the refrigerator for drips.
- If the leak happens only when dispensing water or making ice, suspect the inlet valve or tubing.
- If the leak appears after a defrost cycle, suspect a drain restriction (water should run to the pan).
| What you notice | Most likely cause | What to do next |
|---|---|---|
| Water on floor after defrost, no dispenser use | Clogged or frozen defrost drain | Thaw ice with warm water; flush the drain with hot water using a turkey baster; clear debris with a flexible brush |
| Water under front grille area | Drain pan overflow or misalignment | Re-seat the pan; clean it; confirm it is directly under the drain outlet |
| Leak only during ice maker fill | Water inlet valve seep or loose fitting | Tighten fittings; check for cracks; test valve for seepage; replace if leaking |
| Slow drip at back of unit | Water line connection leak | Turn off water supply; re-make compression connection; replace damaged tubing |
If the leak is tied to the ice maker or dispenser water supply, these parts are common fixes for model 10657368703:
- Refrigerator inlet valve W10408179 (controls water flow to the ice maker and dispenser)
- Refrigerator ice maker WPW10190965 (if the mold or fill area is leaking or overfilling)
For ordering, we list model-matched parts for 10657368703 on this page; you can also search by model number on Sears PartsDirect.
Water leaks can lead to ice buildup, poor cooling airflow, and floor damage. A clear defrost drain keeps meltwater moving into the drain pan (you may hear water running into the pan during defrost), and a tight water supply connection prevents intermittent drips.
Last updated: February 2026