Owner’s manual
 Error Codes




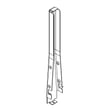
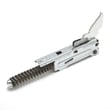
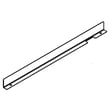
Are Kenmore appliance parts still available?
Yes. Replacement parts are still available for Kenmore appliances, including the Kenmore 66495123610 electric range. The best results come from matching your exact model number to the correct replacement part so you get the right fit and electrical rating.
How to make sure you get the right part
Use your model number (66495123610) and confirm the part by name and identifier in the parts list, then compare it to what you’re replacing.
- Match the full model number from the rating plate: 66495123610
- Use the diagrams and part descriptions in the 66495123610 owner's manual
- Compare the failed part’s shape, terminals, and mounting points
- If a part has multiple versions, match by position (for example, left-front element vs right-rear)
- Replace any heat-damaged wiring or connectors at the same time
Common range parts that are typically replaced
For this model, these are examples of parts that are commonly replaced and often available:
| What’s not working | Likely part category | Example part for this model |
|---|---|---|
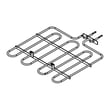
| Oven not baking evenly or not heating | Oven bake element | Bake element W10779716 |
| Burner won’t regulate heat | Infinite switch / control switch | Range infinite switch W10917724 |
| Range won’t power on | Power connection components | Range terminal block WPW10245259 |
| Oven light out | Light bulb / lens | Light bulb 8009 |
Why it matters
Kenmore ranges like model 66495123610 can have similar-looking parts across different series, but small differences (wattage, connector style, mounting) affect fit and performance. Matching by model first prevents returns and repeat repairs.
Last updated: March 2026
How to replace Kenmore Range oven control board?
To replace the oven control board on Kenmore electric range model 66495123610, we disconnect power, access the control area, label and transfer each wire connector one at a time, then install the new board and restore power to test basic functions. Use the steps and diagrams in the 66495123610 owner's manual.
Safety first (before you touch the control)
- Turn off the range breaker (240V) and confirm the display is off.
- Let the oven cool completely.
- Use gloves; sheet-metal edges behind panels are sharp.
- Take a clear photo of the wiring before removing anything.
- If you see heat damage at the power connection, replace the terminal block parts before operating.
Replacement steps (typical for this model style)
- Disconnect power at the breaker.
- Access the control: remove the rear control panel cover (or backguard cover) to reach the electronic control.
- Label connectors: tag each wire harness plug so it goes back to the same location.
- Transfer wires one at a time from the old board to the new board (this prevents mix-ups).
- Ribbon cable (if equipped): release the locking tab, slide the ribbon out, then fully seat it into the new board connector and lock it.
- Mount the new board, reinstall the cover, restore power.
- Test: set the clock, start Bake, and verify the oven heats and the keypad responds.
Quick symptom-to-part check
| Symptom | Most common cause | What to check next |
|---|---|---|
| Dead display, nothing works | Power supply issue | Breaker, cord, and range terminal block WPW10245259 connections |
| Keypad beeps but won’t start | Control settings or lockout | Control lockout, Demo mode, Settings/Clock options in the manual |
| Random beeping or wrong response | Keypad or control issue | Reseat ribbon cable; inspect for corrosion or heat damage |
Why it matters
The control board manages bake, broil, timing, tones, and settings (like Energy Save and 12-hour shutoff). A careful wire-by-wire transfer and a properly seated ribbon cable prevent miswiring, error tones, and no-heat conditions.
Last updated: February 2026
Where can I find my Kenmore electric range model number?
For Kenmore electric range model 66495123610, the model and serial number label is on the oven frame behind the top side of the oven door. Open the oven door and look along the frame near the top edge for the rating label; it lists both numbers.
Where to look on the range
Check these common label locations first:
- Oven frame behind the top side of the oven door (most common on this model)
- Door jamb area around the oven opening (left or right side)
- Storage drawer area (remove the bottom drawer and look on the frame)
- Back panel near the vent area (less common, but possible)
Quick steps to find it fast
- Turn the oven light on so the frame is easier to see.
- Open the oven door fully.
- Look at the top edge of the oven frame (not the door itself).
- Wipe the label gently with a damp cloth if it is greasy or dusty.
- Write down the full model number and serial number exactly as shown.
What the label looks like
The rating label is usually a small sticker or metal tag with a block of text.
| Item on label | What it’s used for |
|---|---|
| Model number | Matching parts and diagrams to your exact range |
| Serial number | Identifying production series for service and support |
| Electrical ratings | Confirming power requirements and wiring specs |
Why it matters
We use the model number to make sure you get the correct Kenmore parts (such as a bake element, surface element, or control switch) that fit your exact configuration and finish.
For diagrams and model-specific details, use the 66495123610 owner’s manual.
Last updated: February 2026
Why is my Kenmore Elite stove not working?
If your Kenmore electric range model 66495123610 is completely not working, the most common causes are a tripped breaker or loose power connection at the range terminal block, or the control being set to Demo Mode (which prevents the oven from turning on). Use the 66495123610 owner's manual to check Demo Mode and basic control settings.
Quick checks first (power and settings)
- Reset the range by turning the double breaker OFF for 1 minute, then ON.
- Confirm the range has 240 VAC supply (a partially tripped breaker can leave you with lights but no heat).
- Check for Demo Mode: when enabled, the oven will not heat even though the display works.
- If the cooktop works but the oven does not, focus on oven settings, elements, and control.
- If nothing works (no display, no lights), focus on the house supply and power connection.
Demo Mode and control features that can “stop” heating
Your manual notes Demo Mode is intended for showroom use and prevents the oven from operating. To toggle it:
- Press SETTINGS/CLOCK until “DEMO MODE” appears
- Press “1” to change the setting
- Press START or STOP to exit
Also note: Sabbath Mode limits operation to Bake only and disables other cycles; it can make the range seem unresponsive for certain functions.
What to check based on the symptom
| Symptom | Most likely cause | What to inspect next |
|---|---|---|
| No display, no lights | No power to range | Breaker, outlet/junction box, cord, connections |
| Display works, oven will not heat | Demo Mode, failed bake element, control issue | Demo Mode setting, bake element W10779716, wiring |
| One surface element not heating | Bad radiant element or infinite switch | Element, switch, harness connections |
| Burning smell or intermittent power | Loose terminal block connection | Range terminal block WPW10245259, cord ends, signs of heat damage |
Why it matters
An electric range that “won’t work” is often a power delivery issue (breaker, terminal block, wiring) or a control setting issue (Demo Mode). Fixing those first prevents unnecessary parts replacement and helps avoid overheating at electrical connections.
Last updated: February 2026
Why is my Kenmore electric range not heating up?
If your Kenmore electric range model 66495123610 is not heating, the most common causes are a failed oven heating element, a control problem, or a power supply issue (the range can light up but still not have full 240 volts for heat). Use the 66495123610 use & care guide troubleshooting section to narrow it down safely.
Quick checks we recommend first
- Confirm the range is getting 240 VAC at the outlet (a partial power loss can leave the display working but prevent heating).
- Make sure the oven is not in a delayed start or special mode; cancel the cycle and set Bake again.
- Look for visible damage on the bake element (blisters, cracks, holes, or a separated spot).
- If the cooktop works but the oven does not, focus on the oven circuit and heating components.
- If nothing heats (cooktop and oven), check the house breaker (double-pole) and cord connection.
Most likely parts involved (by symptom)
| Symptom | Most likely cause | What to check next |
|---|---|---|
| Oven will not heat, broil may still work | Bake element failed | Inspect and test the bake element W10779716 for continuity |
| One surface element will not heat or cycles wrong | Infinite switch or radiant element issue | Check the switch and element connections |
| Range powers on but heats weakly or not at all | Missing L1 or L2 (not full 240V) | Verify breaker, cord, and terminal block wiring |
Power supply and terminal block (important)
Electric ranges need two hot legs (L1 and L2) to heat properly. A loose or burned connection at the rear terminal block can interrupt one leg.
- Unplug the range or shut off the breaker before inspecting wiring
- Check for discoloration, melted insulation, or loose screws at the terminal block
- If the terminal block is damaged, replace it with the correct part for this model
Why it matters
When an electric range is not heating, replacing parts without confirming power and continuity can waste time and money. A quick visual inspection plus a basic multimeter test usually identifies whether the problem is the heating element, a control/switch, or the power feed.
Last updated: February 2026