Owner’s manual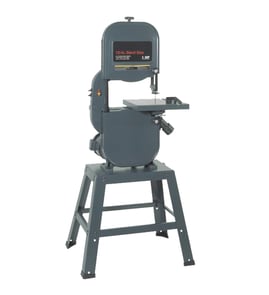

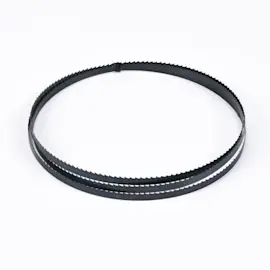
How do I know the size of my bandsaw blade?
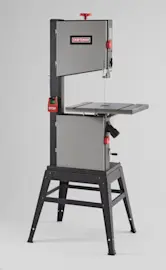
For the Craftsman 113248321 12-inch band saw, you can confirm blade size by checking the blade width range the saw supports (1/8-inch to 1/2-inch) and then measuring your blade’s length, width, and TPI. We also recommend verifying the correct blade setup steps in the 113248321 owner’s manual.
On band saws, “blade size” usually refers to these specs:
- Length: total loop length of the blade
- Width: from the back of the blade to the tooth tips
- TPI (teeth per inch): tooth count in a 1-inch span
- Thickness (gauge): less commonly needed, but can affect tracking and guide setup
For model 113248321, the manual confirms the saw can use blades from 1/8-inch to 1/2-inch wide (and it ships with a 1/4-inch blade).
- Unplug the saw and remove the blade.
- Lay the blade flat on the floor (or a large bench).
- Mark one spot (often near the weld).
- Use a tape measure and “walk” the blade around until you return to the mark.
- Record the total inches.
- Measure from the tooth tip to the back edge of the blade.
- Count how many tooth tips fall within exactly 1 inch.
- If it’s hard to count, count teeth across 2 inches and divide by 2.
| Spec | How to measure | Why it matters |
|---|---|---|
| Length | Tape measure around full loop | Must match wheel spacing and tension range |
| Width | Tooth tip to back edge | Must fit guides; affects curve radius |
| TPI | Teeth in 1 inch | Controls cut speed vs. smoothness |
Using the wrong blade length can prevent proper tensioning and tracking. Using the wrong width or guide setup can increase drift, rough cuts, and blade breakage. On the 113248321, guide and backup bearing adjustments are part of correct blade installation.
- Unplug the saw and remove the switch key
- Wear eye protection and snug-fitting gloves
- Keep the upper blade guide lowered for control during install
- After installing, adjust guides and backup bearings per the 113248321 owner’s manual
Last updated: January 2026
What are the longest lasting bandsaw blades?
For a Craftsman 113248321 12-inch band saw, the manual does not rank blade materials by “longest lasting.” In practice, blade life is usually improved most by using the correct blade width and tooth count for the job, setting proper tension, and adjusting the guides and backup bearings correctly (see the 113248321 owner’s manual).
The owner’s manual provides model-specific guidance on blade sizes, operations, and speed settings that help you avoid premature dulling and breakage.
- Blade width range: 1/8-inch to 1/2-inch
- Two speeds: 3000 FPM (normal) and 1500 FPM (more control)
- Intended materials: wood, wood-like products, plastics, and non-ferrous metals (not iron or steel)
Use these recommendations to reduce blade stress and improve overall blade life.
| Operation | Recommended blade size (inches) |
|---|---|
| Cross cutting | 1/4, 3/8, 1/2 |
| Ripping | 1/2 |
| Resawing | 1/2 |
| Curve cutting | 1/8, 1/4 |
| Extremely fine scroll cutting (thin material only) | 1/16 (optional accessory) |
These are the most common causes of early blade failure on a band saw like the Craftsman 113248321.
- Set blade tension to match blade width; recheck after installing a blade
- Track the blade so it runs correctly on the upper wheel
- Adjust blade guides so they support the blade without contacting the teeth
- Set backup bearings so they do not spin unless you are cutting
- Use the correct speed setting and avoid forcing the feed rate
A blade that is properly sized and supported cuts straighter and is less likely to kink, wander, or break. That saves time, improves cut quality, and reduces strain on the motor and drive belt.
Last updated: January 2026
What is the 3 tooth rule for bandsaw blades?
The “3-tooth rule” means you should choose a blade pitch (TPI) so that, on your Craftsman 113248321 12-inch band saw, about 3 to 6 teeth are in the cut at all times. This helps the blade cut smoothly, clear sawdust, and reduces tooth stripping and blade breakage.
- Measure the material thickness at the cut.
- Pick a blade where at least 3 teeth contact the material at once.
- Avoid having only 1 to 2 teeth in the cut (too aggressive; can snag).
- Avoid having too many teeth in the cut (chips pack in the gullets; overheats and dulls).
- For tight curves, you may need a narrower blade; then re-check that you still have 3+ teeth engaged.
Use this as a practical starting point; exact best TPI also depends on wood species, feed rate, and cut quality goals.
| Material thickness | Typical starting TPI range | What you’re preventing |
|---|---|---|
| 1/8 in. to 1/4 in. | 14 to 24 TPI | tooth snagging, tear-out |
| 1/4 in. to 3/4 in. | 6 to 10 TPI | rough cut, vibration |
| 3/4 in. to 2 in. | 3 to 6 TPI | gullet packing, burning |
This Craftsman saw supports multiple blade widths and is designed for common woodworking cuts; matching TPI to thickness helps the blade track better and reduces stress on the guides and thrust bearings. For blade installation, tracking, and guide spacing details, follow the 113248321 owner’s manual.
- Set the upper blade guide/guard to just clear the workpiece.
- Use steady feed pressure; do not force the cut.
- If the saw slows or the cut burns, reassess TPI, blade sharpness, and feed rate.
- Keep guides adjusted so teeth do not contact the guides.
Last updated: January 2026