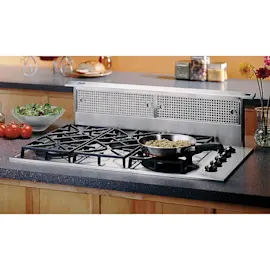
Installation guide
 Owner’s manual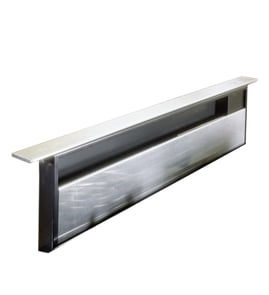



How does a downdraft ventilation system work?
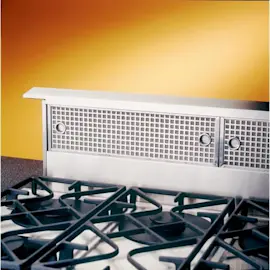
A downdraft ventilation system like the Dacor ERV36 raises an intake near the cooktop, pulls smoke, steam, and cooking odors across the surface, then moves that air through ductwork to vent outside (or through a filtered path, depending on the setup). See the ERV36 installation guide for venting configuration and operation checks.
What’s happening inside the system
When you turn the unit on, the raised vent lifts into position and the blower starts moving air. The airflow path is designed to capture cooking byproducts at the cooking surface level.
Key steps in the process:
- The vent rises to its operating position when powered on
- Air is drawn into the intake opening at the top cap
- Front filters must be installed before operation
- Air is routed to the exhaust outlet and into the duct run
- The exhaust can be configured to exit through the back, bottom, or a side
Venting options (typical for ERV-series raised vents)
The ERV36 raised vent exhaust can be configured for multiple directions; your cabinet layout and duct run length determine the best choice.
| Exhaust direction | Common use case | What to plan for |
|---|---|---|
| Back | Wall exit behind the unit | Clearance for duct and solid, square contact surfaces |
| Bottom | Down through cabinet base | Space below and a clean duct path |
| Side | Tight rear clearance | Room for elbow and duct routing |
Setup and operation checks we recommend
Use these checks after installation or any time performance seems weak:
- Confirm the power switch is in the up position
- Raise the vent and verify it begins drawing air
- Turn the variable speed control both directions to confirm speed changes
- Lower the vent and confirm the top cap does not catch on the cooktop/range edge
- If the vent scrapes or will not raise, check for obstructions in the lift path
Why it matters
Downdraft systems rely on capturing fumes close to the cooking surface; correct filter installation, a reasonable duct layout, and interference-free vent movement directly affect how well smoke and odors are removed.
Last updated: February 2026
How much does downdraft ventilation cost?
A downdraft ventilation setup typically costs about $900 to $2,000 for the vent unit itself, and the total installed cost is often higher once you include the required blower, metal ductwork, and labor. For the Dacor ERV36 raised vent, installation requirements (ducting outside, approved blower) can significantly affect the final price; see the ERV36 installation guide.
What drives the total cost
Downdraft systems are more than just the vent; the biggest price swings usually come from the blower choice and how hard it is to route ductwork to the outdoors.
- Blower requirement: ERV and PRV series raised vents must be paired with an approved remote or in-line blower (one blower only).
- Ductwork materials: Metal ductwork is required; duct, screws, and tape are typically purchased separately.
- Duct run complexity: Long runs, multiple elbows, and transitions add time and materials.
- Cabinet and countertop modifications: Cutting, reinforcing, and fitting the vent and duct path can add labor.
- Electrical work: A dedicated outlet or wiring changes can add cost.
Typical cost ranges (what to budget)
| Cost item | Typical range | Notes |
|---|---|---|
| Downdraft vent unit | $900 to $2,000 | Common market range for downdraft vents. |
| Blower (remote or in-line) | $300 to $1,200 | Depends on CFM and style. |
| Ductwork and venting materials | $100 to $600 | Metal duct, elbows, damper, tape, fasteners. |
| Professional installation labor | $400 to $1,500+ | Higher when duct routing is difficult. |
How to keep costs down without sacrificing performance
We recommend planning the venting first because performance problems often come from duct choices.
- Route ducting using the shortest, most direct path to the outside.
- Use metal ductwork only and tape all joints securely.
- Avoid tight elbow stacks; keep straight duct between elbows when possible.
- Do not reduce duct size along the run (increasing size is acceptable).
- Do not add a second blower to “help”; it can reduce air draw.
Why it matters
Downdraft ventilation performance depends heavily on the blower and duct design. Spending a bit more on proper metal duct routing and an approved blower helps the ERV36 draw smoke and odors effectively and reduces the chance of backdrafting.
Last updated: February 2026
Can you install a downdraft vent behind a range?
Yes, you can install a Dacor downdraft raised vent behind a range in many kitchen layouts, but it must be planned around the range’s required cutout and the downdraft’s chassis and duct routing. For the ERV36, the correct approach is to follow the ERV36 installation guide and the specific range installation instructions so clearances and interference points are handled correctly.
What determines whether it will fit behind your range
A downdraft behind a range is mainly a space and clearance problem, not a “can it run” problem. The installation guide shows range layouts and calls out that some installations require cabinet and countertop notches.
Key fit checks:
- Cutout dimensions: use the range’s cutout specs for the exact opening size.
- Depth behind the range: you need room for the downdraft chassis plus ductwork.
- Duct direction: ERV36 exhaust can route rear, bottom, or side, which changes cabinet conflicts.
- Service access: plan so the range and vent can be removed for service.
- Top cap clearance: the vent must raise and lower without catching the back edge of the range.
Typical installation options (what changes in the cabinet)
| Venting direction | Where it usually works best | Common cabinet impact |
|---|---|---|
| Rear exhaust | Exterior wall directly behind | Back panel cutout, wall cap path |
| Bottom exhaust | Basement, crawlspace, or toe-kick duct path | Floor cutout, duct chase planning |
| Side exhaust | When rear/bottom are blocked | Side panel cutout, tighter turns |
Why it matters
If the downdraft is squeezed behind a range or the duct run is forced into sharp turns, performance drops and noise increases. Clearance also prevents the top cap from scraping the range, which can damage the vent.
Quick pre-install checklist
- Confirm the range is an approved Dacor pairing for this raised vent.
- Map the duct run first; keep it as short and straight as possible.
- Verify the vent can be powered and the blower receives power from the raised vent.
- After install, raise and lower the vent and confirm no interference with the range.
Last updated: February 2026