Owner’s manual


What is the life expectancy of a DPGT750EC1PL dryer?
A GE electric dryer like model DPGT750EC1PL typically lasts about 13 years with normal household use and routine vent and lint maintenance. Keeping airflow strong (clean lint screen, clear exhaust duct) is the biggest factor in reaching that expected lifespan.
Most residential electric dryers fall into a similar life range; what changes the outcome is heat stress, airflow restriction, and how hard the dryer is worked.
- Clean the lint screen before every load
- Keep the exhaust duct and hood clear; restricted venting overheats components
- Avoid overloading; it strains the drum belt, drum supports, and motor
- Use the right cycle and heat setting for the fabric load
- Address new noises early (squeal, thump, scraping) to prevent secondary damage
The DPGT750 manual calls out periodic cleaning of the interior and exhaust duct connection.
| Task | How often | Why it matters |
|---|---|---|
| Clean lint screen | Every load | Maintains airflow and drying performance |
| Check outside exhaust hood flap movement | Monthly | Prevents backpressure and long dry times |
| Clean interior and exhaust duct connection | At least yearly | Reduces overheating risk and wear |
When a dryer is otherwise in good shape, a few wear items often determine whether it keeps running smoothly.
- Dryer drum belt WE12X10011: worn belt can slip, squeal, or break and stop the drum
- Drum covers and seals (front and rear) can wear and contribute to noise or rubbing
- Door switch and controls can fail from normal use over time
A dryer that is taking longer to dry, running hotter than normal, or getting noisy is usually telling you airflow is restricted or a wear part is failing. Fixing those issues early helps you get the full expected life out of your GE DPGT750EC1PL.
For model-specific operating and care guidance, follow the maintenance and safety sections in the owner's manual.
Last updated: February 2026
How much does it cost to run an electric dryer for 1 hour?
For a GE DPGT750EC1PL electric dryer, the cost to run 1 hour depends on your electricity rate and how hard the heater is working. Most electric dryers draw about 4,000 to 6,000 watts while heating, so a typical 1-hour cost is often around $0.50 to $1.50.
Use this formula:
- Cost per hour = (kW × hours) × your $/kWh rate
- Convert watts to kW: watts ÷ 1,000 = kW
Example ranges (common for electric dryers):
- 4.0 kW × 1 hour × $0.15/kWh = $0.60/hour
- 5.5 kW × 1 hour × $0.15/kWh = $0.83/hour
- 6.0 kW × 1 hour × $0.25/kWh = $1.50/hour
| Dryer heating load (kW) | $0.12/kWh | $0.18/kWh | $0.25/kWh |
|---|---|---|---|
| 4.0 | $0.48/hr | $0.72/hr | $1.00/hr |
| 5.0 | $0.60/hr | $0.90/hr | $1.25/hr |
| 6.0 | $0.72/hr | $1.08/hr | $1.50/hr |
Even though you may “run it for an hour,” the heater cycles on and off, so actual energy use varies. These factors usually have the biggest impact:
- Vent restriction or long vent runs (dryer heats longer to finish)
- Load size and fabric type (towels cost more than light synthetics)
- Moisture level (overloaded washer or no high-spin leaves more water)
- Cycle choice (timed high heat costs more than sensor dry on medium)
- Lint buildup (reduces airflow and increases run time)
A dryer that takes longer to dry can cost significantly more per load than the “per hour” estimate. Keeping airflow strong is the fastest way to reduce run time and energy use; our owner's manual covers safe operation and electrical requirements for this electric dryer.
Last updated: February 2026
What is the most common problem with a GE electric dryer?
The most common issue we see with a GE electric dryer like model DPGT750EC1PL is poor or no drying performance caused by restricted exhaust airflow (lint buildup, crushed duct, or a stuck vent hood). Another frequent problem is the dryer not running because of a tripped breaker or a control that needs to be reactivated or reset; see the owner's manual.
- Takes too long to dry or clothes feel damp: vent restriction, lint buildup, or improper ducting
- No heat but drum tumbles: heating circuit problem (often airflow-related overheating first)
- Stops mid-cycle or shuts off: overheating from blocked venting, or power supply issue
- Won’t start at all: control panel asleep, door not closed, START not pressed, or breaker/fuse issue
- Drum won’t turn: broken belt or drive system issue (common wear item)
- Clean the lint screen and check for a film buildup.
- Inspect the vent hood outside; the flaps should move freely and the hood should be clear of nests or debris.
- Confirm the dryer is exhausted outdoors and the duct is not kinked or crushed.
- Check your home electrical supply; electric dryers typically use two fuses or breakers.
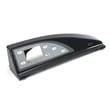
- Reset the electronics: unplug for 2 minutes, plug back in, then press POWER.
| Symptom | Most likely cause | What to do next |
|---|---|---|
| Long dry times | Restricted exhaust | Clean/shorten duct; use rigid metal where possible |
| Won’t operate | Control asleep or power issue | Press POWER; verify both breakers; reset electronics |
| Drum not spinning | Worn/broken belt | Replace the dryer drum belt WE12X10011 |
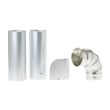
Restricted venting is a root cause behind long dry times and overheating-related shutdowns. Your DPGT750EC1PL is designed to vent outdoors, and the installation guidance strongly favors rigid metal ducting and configurations that minimize kinks and blockage.
- Use our dryer takes a long time to dry guide for step-by-step airflow troubleshooting.
Last updated: February 2026
Can a 7.3 cu ft dryer dry a king size comforter?
Yes. A 7.3 cu ft GE electric dryer like model DPGT750EC1PL is typically large enough to dry a king-size comforter, as long as the comforter can tumble freely and air can circulate. For best results, use the comforter or bedding-type cycle options listed in the DPGT750EC1PL owner's manual.
- Shake the comforter out before loading to loosen clumps.
- Load it by itself (no towels or sheets) so it can tumble.
- Choose a bedding/comforter cycle when available; otherwise use Timed dry.
- Use a lower heat setting if the care label calls for it.
- Pause mid-cycle to reposition and break up damp spots.
- Clean the lint filter before every load.
| What you see on the dryer | What it’s best for | What to watch for |
|---|---|---|
| Comforter (Special cycles) | Bulky comforters and bedding | Add time if corners stay damp |
| Blankets / Sheets (Special cycles) | Large flat items | Avoid mixing with small items |
| Timed dry | When auto cycles end too soon | Set enough time; check every 20 to 30 minutes |
| Rack dry | Items that should not tumble | Do not use with other clothes in the drum |
Comforters hold a lot of moisture and can “ball up.” If the load cannot tumble, drying time increases and the comforter can come out damp in the middle. Proper loading and the right cycle help the dryer heat and airflow work efficiently.
If the comforter tumbles freely but still takes too long to dry, check these common causes:
- Lint filter not cleaned before the load
- Crushed, kinked, or clogged venting
- Overloading with other items
- Drum not turning smoothly (a worn belt can cause slipping)
If the drum is not turning or you hear squealing, the dryer drum belt WE12X10011 is a common wear part for this model.
Last updated: February 2026