

Can a rear tine tiller cut through roots?
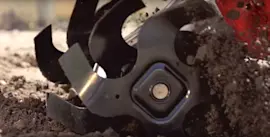
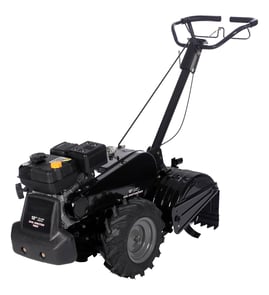
Yes. A rear-tine tiller like the Craftsman 917293200 can cut through small, shallow roots while it tills, but it is not designed to chew through large roots or stumps. For thicker roots, we recommend clearing them first to prevent drive, chain, and gearcase damage.
What it can (and cannot) handle
Rear-tine tillers have the traction and tine torque to break tougher ground than many front-tine models, but roots vary a lot.
- Works well: fibrous roots and small feeder roots near the surface
- Sometimes works: woody roots that are thin and not anchored deeply
- Does not work well: thick, tough roots that bind the tines or stop the machine
- Stop immediately if the tines jam; forcing it can damage the drive system
How to till rooty ground without breaking parts
Use a slow, controlled approach so the tines do the work instead of the drivetrain.
- Make a shallow first pass, then deepen in small steps
- Till in short sections; back up and re-approach if the tines start to bind
- Remove exposed roots with loppers or a mattock before re-tilling
- Keep the tine area clear; shut the engine off before clearing debris
- If engagement feels weak or inconsistent, inspect the clutch cable adjustment and condition
Quick guide: when to till vs. when to cut first
| Root size (approx.) | Best approach | Why |
|---|---|---|
| Under 1/4 inch | Till normally | Usually shears cleanly |
| 1/4 to 1/2 inch | Shallow passes, go slow | Reduces binding and shock loads |
| Over 1/2 inch | Cut and remove first | Prevents jams and drivetrain strain |
Parts that commonly take the hit when roots bind the tines
If the tines stop suddenly, the load transfers into the drive components.
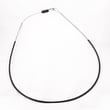
- Tiller clutch cable 532110675 (engagement issues can mimic “can’t cut roots”)
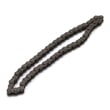
- Tiller chain, #25-50 532102134 (can stretch or wear faster under shock loads)
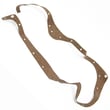
- Gearcase lh 532407383 (internal wear risk if repeatedly forced)
Why it matters
Roots create sudden resistance. Avoiding jams protects the chain drive, gearcase, and engagement system, and it also makes tilling safer and more controllable.
Last updated: February 2026
What are the common problems with lawn tillers?
Common problems on a lawn tiller like the Craftsman 917293200 include hard starting, rough running, loss of tine drive, poor tilling performance, and control issues (cable or linkage problems). Most failures trace back to fuel quality, ignition, belt/chain drive wear, or a clutch cable that is out of adjustment.
Most common tiller symptoms and what usually causes them
- Engine will not start: stale fuel, clogged fuel path, fouled spark plug, dirty air filter
- Engine runs rough or stalls: contaminated fuel, carburetor varnish, restricted airflow
- Tines will not turn: worn/loose drive components, clutch cable out of adjustment, chain issues
- Wheels move but tines do not: drive engagement problem, worn chain/sprocket components
- Poor tilling (skips, shallow cut, uneven): worn tines, incorrect depth stake setting, drive slippage
- Excess vibration or noise: loose hardware, worn bearings/bushings, damaged chain
Quick checks we recommend first (fast, no special tools)
- Drain old gas and refill with fresh fuel; clean the fuel cap vent if it is plugged.
- Inspect the spark plug; replace if fouled or worn.
- Check the air filter and throttle/choke operation.
- Verify the tine engagement control moves freely and returns fully.
- Look for obvious drive wear: slack chain, missing clips, loose fasteners.
Parts that commonly fix “won’t drive” or “won’t till” complaints
If your 917293200 starts fine but the tines do not engage, these model-matched parts are frequent culprits:
Symptom-to-part starting point
| Symptom | What to inspect first | Common part match on this model |
|---|---|---|
| Tines will not turn | Cable adjustment and free play | Tiller clutch cable |
| Grinding/clicking in drive | Chain tension and wear | Tiller chain / chain |
| Poor traction | Wheel condition | Tiller wheel |
Why it matters
A tiller drive system that slips or binds can quickly wear chains, pulleys, and bushings, and it also makes the machine harder to control. Catching a stretched chain or misadjusted clutch cable early usually prevents bigger gearcase damage.
For step-by-step troubleshooting, we recommend starting with rear tine tiller troubleshooting tips wheels and tines.
Last updated: February 2026
What is the bar on the back of a tiller for?
On the Craftsman 917293200 rear-tine tiller, the bar on the back is the drag bar (also called a depth stake). We use it to control how deep the tines dig and to help stabilize the tiller so it does not lunge forward or “run away” in hard soil.
What the drag bar does
- Sets tilling depth by limiting how far the tines can pull the machine downward
- Adds resistance so the tiller moves at a controlled pace
- Helps keep the tiller tracking straighter, especially in packed ground
- Improves results when you make multiple passes (shallow first, deeper later)
How to adjust it (typical setup)
Most rear-tine tillers adjust the drag bar by moving it up or down in a bracket and securing it with a pin.
- Shut the engine off and let all moving parts stop
- Pull the retaining/lock pin
- Remove the clevis pin (or hitch pin) holding the bar position
- Move the drag bar to the hole/slot you want
- Reinstall the clevis pin and lock pin fully
Quick adjustment guide
| Soil condition | Drag bar position | What you’ll notice |
|---|---|---|
| Hard, dry, or rocky | Higher (shallower) | Less bouncing and better control |
| Average garden soil | Middle | Balanced depth and forward speed |
| Loose soil or second pass | Lower (deeper) | Deeper tilling, slower forward travel |
Why it matters
Correct drag bar depth protects the drivetrain and helps you get even tilling. If the tiller surges forward, chatters, or digs too aggressively, adjusting the drag bar is usually the first and fastest fix.
If the bar will not stay set
If the bar slips, the pin hardware is often worn or missing. On this model, common small retainers used with pins include the spring retainer 532003146.
Last updated: February 2026
Where is the model number on a Craftsman rear tine tiller?
On a Craftsman rear-tine tiller like model 917293200, the model number is printed on the product ID label (a sticker or metal tag). You’ll usually find it on the tine shield/guard area, on or near the engine, or around the fuel tank area.
Common places to check on model 917293200
Look for a rectangular label with the model number and other ID information. Check these spots first:
- On the tine shield (tine guard) near the rear of the unit
- On the frame rail near the engine mounting area
- Near the fuel tank (side of the tank or the frame next to it)
- On the front frame or handle support bracket
- Near the transmission/gearcase area (on the chassis, not on the rotating parts)
Tips for finding the label fast
If the label is dirty or faded, these steps usually make it readable again:
- Wipe the area with a damp rag; then dry it
- Use a flashlight at a low angle to make stamped or faded print easier to see
- Brush off packed soil around the tine guard and frame
- Avoid scraping with metal tools (it can remove the printed model number)
What the label typically shows
| Label item | What it’s used for |
|---|---|
| Model number (example: 917293200) | Matching the correct Craftsman parts diagrams |
| Serial number | Identifying production run details |
| Engine info (varies) | Getting the right engine tune-up parts |
Why it matters
Using the exact model number helps us match the right tiller parts the first time, especially for drive and tine components that can vary by production run. If you’re troubleshooting drive engagement, the parts list for 917293200 includes items like the tiller clutch cable 532110675.
Last updated: February 2026