Owner’s manual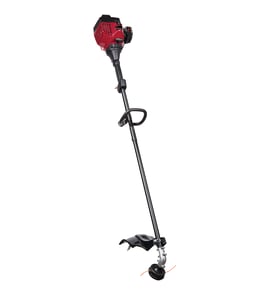




How to replace line on Craftsman gas trimmer?
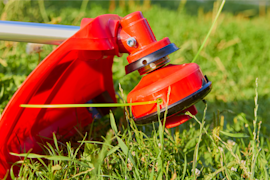
To replace the trimming line on your Craftsman line trimmer model 316711201, remove the old line from the cutting head, thread a new line through the cutting head holes, then pull both ends until they are equal length and snug against the head. For the exact line type and diagrams, use the 316711201 owner's manual.
- Shut the trimmer off, let it cool, and disconnect the spark plug wire before servicing.
- Remove the old line: push one end into the cutting head until a loop protrudes, then pull the loop to remove the line.
- Wipe the cutting head clean with a cloth.
- Insert both ends of the new trimming line into the cutting head holes and push until the ends come out of the positioning tunnels.
- Pull both ends until the line is tight against the cutting head; adjust so both ends are the same length.
- Press the exposed loop until it sits tight against the cutting head.
Use only the trimming line type specified for model 316711201.
| Line type | Use it? | Why |
|---|---|---|
| Standard nylon trimmer line (correct size) | Yes | Prevents overheating and feed problems |
| Metal-reinforced line, wire, chain, rope | No | Can break off and become dangerous projectiles |
| Spiral “quiet” style line (if listed for your model) | Yes | Can reduce noise and improve cutting in some conditions |
Correct line installation keeps the cutting head balanced, reduces tangles, and helps the engine avoid overheating from excess drag. Equal-length line ends also reduce vibration and improve cut quality.
Last updated: January 2026
Do trimmer plus attachments work with Craftsman?
Yes, TrimmerPlus attachments work with Craftsman trimmers that are attachment-capable and use an EZ-Link style coupler. For the Craftsman 316711201, compatibility comes down to whether the attachment shaft matches the coupler connection and whether you lock it in correctly per the 316711201 owner's manual.
Check these items on your Craftsman 316711201 power head before buying an attachment:
- A coupler section on the shaft with a tightening knob
- A spring-loaded release button that snaps into a hole on the attachment shaft
- A clearly defined “edging hole” position (the manual describes a 90° hole used for edging)
- The attachment shaft seats fully into the coupler without forcing
Even when an attachment connects, it still has to run safely and correctly.
| Check | What you want to see | What it prevents |
|---|---|---|
| Coupler locks | Release button snaps in firmly | Attachment wobble or disconnecting |
| Proper orientation | Attachment rotated only as instructed | Damage to the shaft/coupler |
| Correct use mode | 90° edging hole used only for the trimmer attachment | Injury or unit damage |
Use these best practices any time you swap attachments on a gas line trimmer:
- Shut the engine off before loosening the coupler and rotating or removing attachments.
- Tighten the coupler knob securely after the release button snaps into place.
- Do not use the 90° edging hole with non-trimmer attachments.
- Keep hands away from hot muffler and cylinder surfaces after operation.
- Keep hands away from the line cutting blade on the debris shield.
A mismatched or loosely locked attachment can slip, vibrate excessively, or bind the drive system. Correct coupler lock-in and correct rotation position protect the drive shaft assembly and help you avoid injury.
Last updated: January 2026
What is the fuel mix for a Craftsman gas trimmer?
For the Craftsman 316711201 gas line trimmer, we use a 40:1 fuel mix: unleaded gasoline mixed with 2-cycle engine oil. Mixing at 40:1 helps the 2-cycle engine get proper lubrication and prevents hard starting, poor performance, and internal engine damage.
- Fuel/oil ratio: 40:1
- Gas type: fresh unleaded gasoline
- Oil type: 2-cycle engine oil (air-cooled 2-cycle)
- Mix in a separate fuel can: do not mix directly in the trimmer fuel tank
- Shake to blend: mix thoroughly before filling
| Gasoline amount | 2-cycle oil amount | Notes |
|---|---|---|
| 1 U.S. gallon | 3.2 fl oz | Common full-can mix |
| 1 liter | 25 ml | Metric reference |
- Pour the measured 2-cycle oil into an approved fuel can.
- Add the measured unleaded gasoline.
- Cap the can and shake well.
- Fill the tank; do not overfill.
- Wipe up any spilled fuel and reinstall the fuel cap.
- Move the trimmer at least 30 ft away from the fueling area before starting.
This Craftsman trimmer uses an air-cooled 2-cycle engine, so the oil in the fuel is the engine’s lubrication. A lean mix (too little oil) increases wear and overheating; a rich mix (too much oil) can foul the spark plug and cause smoky running.
For the exact fuel and maintenance guidance for your unit, follow the 316711201 operator’s manual.
Last updated: January 2026
What is the thickest whipper snipper cord?
For the Craftsman 316711201 gas line trimmer, the thickest cord is the maximum trimmer line diameter approved for the Hassle Free head on your unit. Use the exact maximum diameter listed in the 316711201 owner's manual so the line feeds correctly and the engine does not bog down.
The “thickest” line is only a good choice when it matches the cutting head design and the type of weeds you cut.
- Match the line diameter to what the manual specifies for the Hassle Free head
- Use medium line for grass and small weeds; it keeps RPM up and cuts cleaner
- Use larger line only when you regularly cut heavier weeds or light brush
- If the head will not feed smoothly, the line is too thick or too stiff for the head
- If the engine stalls or vibrates excessively, step down to the next smaller diameter
| Line choice | Best for | What you will notice |
|---|---|---|
| Thinner line (light-duty) | Fine grass, touch-up trimming | Faster spool-up, less load |
| Medium line (general-purpose) | Most lawns and edging | Balanced cut and durability |
| Thickest line allowed by the manual | Heavy weeds, tougher growth | More load, more vibration |
Using the maximum line diameter that Craftsman specifies for model 316711201 protects the clutch, flexible drive shaft, and gearbox from unnecessary strain, and it prevents poor feeding and uneven cutting.
- Cut in shorter passes instead of forcing the head into dense growth
- Keep line length correct by letting the guard trim it with the line-cutting blade
- Clean packed grass from the head and debris shield after each use
- If the head is worn or cracked, replace it with the correct assembly for your trimmer, such as the mtd line trimmer cutting head assembly 753-08172
Last updated: January 2026