 Owner’s manual
 Error Codes



How do I tell what model Kenmore stove I have?
For a Kenmore range, the model number is printed on the appliance’s ID label; on model 91163261690, you will use that exact model number to match the correct parts list and the correct instructions in the 91163261690 owner's manual.
Check these common spots on Kenmore electric ranges:
- Oven door frame (open the door and look around the frame)
- Storage drawer opening (pull the drawer out and look along the frame)
- Under the lift-up cooktop (if your cooktop lifts, look near the burner box area)
- Back panel (rear of the range, near the power cord entry)
On the label, the model number is usually next to wording such as Model, Model No., or MOD. Write it down exactly as shown (including all digits).
| What to record | Example | Why it matters |
|---|---|---|
| Model number | 91163261690 | Ensures parts diagrams and fit are correct |
| Serial number | (varies) | Helps identify production run for service |
| Electrical rating | (varies) | Confirms correct power supply and wiring |
Kenmore ranges often have multiple versions that look similar. Using the exact model number prevents ordering the wrong bake element, surface element, control switch, or oven light bulb.
If you are shopping for common maintenance items, match by model first, then by the part ID:
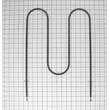
- Oven not heating evenly: consider the g.e. range bake element WB44K5012
- Oven light out: check the 40a15bulb 40A15
- One surface burner not heating: verify the correct coil size (6-inch vs 8-inch)
Last updated: February 2026
How to replace Kenmore Range oven control board?
To replace the oven control board on your Kenmore 91163261690 electric range, we shut off power, access the control area, move each wire to the matching terminal on the new board one at a time, then reassemble and restore power to test bake and broil.
Electric ranges use 240 volts; we always disconnect power before touching wiring.
- Turn off the range breaker (double-pole) and confirm the display and oven lights are off
- Let the oven cool completely
- Use a dry work area and good lighting
- Label wires or take a clear photo before moving anything
- Avoid pulling on wire insulation; grip connectors instead
- Disconnect power at the breaker.
- Remove the backguard or rear control cover to access the control area (use the 91163261690 owner's manual for panel locations and control identification).
- If your control uses a ribbon connector, release the locking tab, then pull the ribbon straight out.
- Transfer wires one at a time from the old board to the same position on the new board.
- Reinstall the control cover and any knobs.
- Restore power and test:
- BAKE: verify the oven heats and the indicator light behavior is normal
- BROIL: verify the broil function engages
| What we do | Why it helps |
|---|---|
| Move one wire at a time | Prevents miswiring |
| Match terminal labels/positions | Keeps functions correct |
| Fully seat the ribbon connector | Prevents dead display or no heat |
| Reinstall covers before testing | Reduces shock and short risk |
These checks often pinpoint the real cause when the control board is not the issue:
- Inspect the bake element for visible damage; replace if failed (see g.e. range bake element WB44K5012)
- Check the broil element if broil is also weak or dead
- Look for burned or loose power connections at the terminal block (a common no-power/no-heat cause)
- Verify the door latch is not locked during baking (some models inhibit heating when mis-latched)
- Test for proper voltage with a meter if you have one
A correctly wired control board restores accurate bake, broil, and indicator light operation. Misplaced wires or a loose ribbon connector can mimic a bad board and cause no-heat symptoms.
Last updated: February 2026
What do Kenmore model numbers look like?
Kenmore model numbers are a string of digits (sometimes with punctuation) that identify the exact appliance build; for your Kenmore electric range, the model number is 91163261690. On many Kenmore appliances, the first three digits are a prefix tied to the original manufacturer, followed by digits that narrow down the base model and specific variations (color, features, revisions). For model-specific identification details, use the 91163261690 owner's manual.
- A 3-digit prefix at the beginning (commonly used to indicate the manufacturer behind the Kenmore-branded unit)
- A base model sequence (the “family” of the product)
- Additional digits that identify the exact version (feature set, engineering change, finish)
- The model number printed on a rating plate or label (often near the oven frame, storage drawer area, or behind the control panel area on ranges)
Many Kenmore model numbers start with a 3-digit prefix. Here are two well-known examples customers often ask about:
| Kenmore prefix | Common manufacturer association | Example product types |
|---|---|---|
| 790 | Frigidaire-built | Ranges, wall ovens |
| 795 | LG-built | Refrigerators |
Using the full model number helps us match the correct parts list for your exact range configuration.
- Match the model number character-for-character (for this range: 91163261690)
- Use the model number to confirm fit for parts like a bake element, surface element, or oven light bulb
- If you are troubleshooting heating issues, the parts list for this model includes items such as the g.e. range bake element WB44K5012
Kenmore used multiple manufacturers over the years, and parts can vary even when ranges look similar. The full model number prevents ordering the wrong surface unit, control switch, or oven door gasket.
Last updated: February 2026
Why is my Kenmore electric oven not getting hot?
If your Kenmore range model 91163261690 isn’t getting hot in BAKE, the most common causes are a failed bake heating circuit (bake element or wiring), a problem with the oven temperature sensor, or airflow issues like a blocked oven vent. Use the checks below to pinpoint the failure.
- Confirm the selector is set to BAKE (not BROIL or CLEAN) and allow a full preheat until the tone sounds.
- Avoid opening the door repeatedly; heat loss can make it seem like the oven never reaches temperature.
- Make sure the oven vent under the right rear element is clear; blocking it can cause poor heating and baking.
- Never line the oven bottom with foil; it can restrict airflow and cause heating problems.
A cracked, blistered, or separated element often will not heat.
- Inspect for visible damage.
- If you have a multimeter, unplug power and test for continuity.
- Replace the bake element if it fails the continuity test.
Helpful part for this model: g.e. range bake element WB44K5012
This model uses a sensor tube at the back of the oven to maintain temperature. If it is damaged or out of position, heating can be erratic.
- Do not bend or move the sensor tube.
- If the oven heats weakly or cycles incorrectly, sensor or control issues are likely.
| Symptom | Most common cause | What we recommend |
|---|---|---|
| Broil works, bake does not | Bake element failed | Inspect and test the bake element |
| Oven heats but never reaches set temp | Vent blocked, foil use, calibration off | Clear vent, remove foil, verify preheat |
| Oven cycles strangely, temps inconsistent | Sensor or control issue | Inspect sensor area, then test components |
An electric oven relies on proper airflow (venting), correct preheat behavior, and accurate sensor feedback so the elements can cycle on and off to hold temperature. One weak link can prevent the oven from getting hot enough for safe, predictable baking.
For model-specific operating and preheat details, use the 91163261690 owner’s manual.
Last updated: February 2026




