 Installation guide
 Owner’s manual





How to hard reset a Kenmore Elite washer?
To hard reset a Kenmore Elite washer model 41744132000, we power-cycle it: turn the washer off, unplug it for a full minute, then plug it back in and let the control finish its startup (about 1 minute) before selecting a cycle. Use the 41744132000 installation guide for the correct power-up and control steps.
- Press POWER to turn the washer off.
- Unplug the washer (or switch the breaker off).
- Wait 60 seconds.
- Plug the washer back in (or turn the breaker on).
- Wait about 1 minute for the display/control to complete its initial boot-up.
- Select a cycle and press START.
These checks fix most “won’t start”, “won’t respond”, or “cycle won’t resume” complaints after a reset:
- Confirm the outlet has power (test with a lamp or phone charger).
- Make sure the door is fully closed and latched.
- Cancel the cycle (POWER off, then on) and reselect the cycle.
- If the tub will not drain, clean the pump filter area and check for a blocked drain path (a clog can prevent normal operation).
- If the washer will not fill, verify both water supply valves are fully open.
A hard reset clears a temporary control “glitch”. A diagnostic routine checks installation and can point to a fill or hose issue.
| Action | What it does | When to use it |
|---|---|---|
| Hard reset (power-cycle) | Reboots the control | Unresponsive buttons, frozen display, odd behavior |
| Installation Cycle | Runs built-in checks and displays prompts | New install, moved washer, suspected fill/hose setup issue |
For the Installation Cycle button sequence and what messages mean, follow the 41744132000 installation guide.
This washer’s control performs an initial boot-up after power is restored; letting it finish prevents false “no response” symptoms and helps you avoid unnecessary part replacement.
Last updated: January 2026
How to open front panel of Kenmore front load washer for an F21 error?
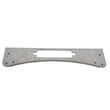
To access the drain pump area on a Kenmore Elite washer model 41744132000 when you’re dealing with an F21 (long drain) type problem, we remove the lower front access panel (toe panel) by taking out the bottom screws, then pulling the panel down and out. Use the steps in the 41744132000 installation guide for safe power-off handling before servicing.
- Unplug the washer from the power source.
- Turn off both water supply valves.
- Have towels and a shallow pan ready; opening the pump filter area can release water.
- Use a #2 driver bit (square or straight bit works well for many fasteners on this platform).
- If the washer is tight in a closet, slide it forward enough to work safely.
- Disconnect power at the outlet.
- Locate the lower front access panel under the door.
- Remove the bottom edge screws (commonly 3 screws along the very bottom lip).
- Pull the panel downward slightly, then pull it outward to release the top tabs.
- Set the panel aside and keep the screws together.
| Item | What it does | Why you care for F21/long drain |
|---|---|---|
| Drain pump and hoses | Moves water out of the tub | Blockages here are the most common cause |
| Pump filter area | Catches lint, coins, debris | A clogged filter slows draining |
| Wiring to pump | Powers the pump motor | Loose connections can stop draining |
- Clean out debris from the pump filter area (coins, socks, lint).
- Check the drain hose for kinks or a crushed section.
- If the pump hums but won’t move water, the pump is often failing.
- If the washer will not drain at all, inspect the washer drain pump filter 134640200 and the pump itself.
Opening the lower front panel gives direct access to the drain system, which is the fastest way to fix the most common causes of F21-style long-drain symptoms (clogs, restricted hoses, or a failing pump).
Last updated: January 2026
What is the code de1 on a Kenmore Elite washer?
On the Kenmore Elite washer model 41744132000, the DE1 code indicates a door lock or door not locked condition; the washer will not start or continue a cycle until the door is fully closed and the lock system confirms it is engaged. See the 41744132000 owner's manual for the exact reset steps and code behavior.
- Press Pause/Cancel once, wait 10 seconds, then restart the cycle.
- Open the door, check for a sock or small item caught at the door opening, then close the door firmly.
- Confirm the washer is level; a twisted cabinet can prevent the door from aligning and locking.
- Remove heavy pressure on the door (do not lean on it) and try closing again.
- Power reset: unplug for 2 minutes (or switch the breaker off and back on), then retry.
If the door closes normally but the code returns, the issue is usually in the lock circuit or a related control input.
| Symptom | Most likely area | What we do next |
|---|---|---|
| Door will not latch or feels misaligned | Door alignment, latch/strike area | Inspect for looseness, tighten hardware |
| Door latches but never “locks” | Door lock assembly or wiring | Check harness connections and damage |
| Intermittent DE1 during vibration | Loose connector, cabinet not level | Re-level washer, reseat connectors |
| Multiple odd behaviors with DE1 | Control sensing issue | Verify connections; consider control diagnostics |
Some cycles may appear “stuck” after a door error. If the door locks but the washer still will not proceed, confirm the washer is actually filling. A restricted fill can create confusing symptoms; the washer water inlet valve 134637810 is the model-matched part that controls hot and cold water entry.
The door lock is a safety system; it prevents the door from opening during tumbling and high-speed spin. Fixing a DE1 condition protects the door boot, reduces leaks, and prevents cycle interruptions.
Last updated: January 2026


