Owner’s manual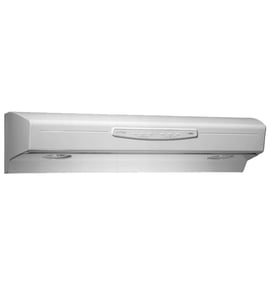

How do I know what model range hood I have?
To identify your KitchenAid range hood model, look for the model/serial rating plate. On model KWCU300LSS1, the rating plate is located inside the range hood on the rear wall; the model number is printed on that label (use the exact characters shown). See the KWCU300LSS1 owner's manual for the rating plate location and installation clearance notes.
Where to look for the model/serial label
Check these common spots first (power off the hood and let lights cool):
- Inside the hood on the rear wall (this is the documented location for KWCU300LSS1)
- Behind or near the grease filter area (you may need to remove the filter to see the rear wall)
- On the underside of the canopy near the blower opening
- On the top of the hood body (less common once installed)
What to write down (so you get the right parts)
Record the information exactly as printed on the rating plate:
- Model number (example format: KWCU300LSS1)
- Serial number (helps confirm production details)
- Electrical rating (useful when troubleshooting power issues)
- Venting configuration notes (some hoods can be converted for rear venting)
Quick check: model number vs. hood size
Many canopy hoods come in multiple widths (often 30, 36, 42, or 48 inches). The model number on the rating plate is the only reliable identifier, but size can help you sanity-check what you have.
| What you see | What it usually means |
|---|---|
| 30, 36, 42, or 48 inch canopy | Same hood family, different width/version |
| One vs. two exhaust openings | Often differs by width/version |
Why it matters
We use the model number to match the correct parts and specs for your exact hood. For example, KWCU300LSS1 uses model-specific components like the filter WPW10252087 and the range hood light bulb WPW10252088, and the correct match depends on the exact model printed on the rating plate.
Last updated: February 2026
How to replace light in KitchenAid hood?
To replace the light in your KitchenAid KWCU300LSS1 range hood, turn the hood off at the control and shut off power at the breaker, then replace the halogen lamp by removing the trim screws, swapping the bulb, and reinstalling the trim. Follow the steps in the KWCU300LSS1 owner's manual.
Steps to replace the halogen lamp
- Turn the hood light switch to 0 (OFF).
- Let the lamps cool completely; halogen bulbs run extremely hot.
- Switch power off at the service panel (breaker) before servicing.
- Remove the 2 screws from the circular metal trim around the lamp assembly.
- Pull the trim and lamp assembly down far enough to access the bulb.
- Push the old lamp out of the socket, insert the new lamp, then push the trim assembly back up.
- Reinstall the trim and screws.
Which replacement bulb do I need?
For this model, the listed replacement part is the Range hood light bulb.
| What you are replacing | Sears PartsDirect part | What it does |
|---|---|---|
| Hood light bulb (lamp) | Range hood light bulb WPW10252088 | Provides cooktop lighting inside the canopy |
After replacement: quick operation check
Use the hood controls on the right-hand underside of the canopy.
- Move the light switch to 1; the light should turn on.
- Move the blower switch to 1; the blower should run.
- Set blower speed to 1 / 2 / 3 for low / medium / high.
Why it matters
A correct halogen lamp replacement prevents heat damage to the socket and trim, restores safe visibility over the cooktop, and helps you confirm the hood’s electrical circuit and switches are working normally.
Last updated: February 2026
What are the parts of a range hood called?
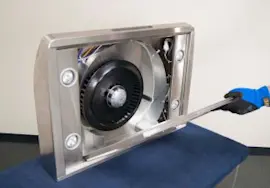
A range hood is made up of the canopy (hood body), venting path, blower (fan), controls, lights, and filters. On KitchenAid model KWCU300LSS1, you will also see mounting brackets and an exhaust opening that connects to your ductwork; details are shown in the KWCU300LSS1 owner's manual.
Common range hood parts (and what they do)
- Canopy/hood body: captures smoke, steam, and grease above the cooktop
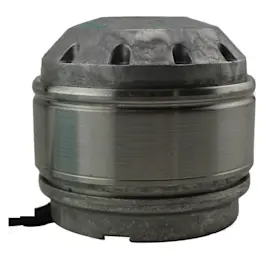
- Blower (fan) assembly: moves air through the hood and into the vent system
- Exhaust opening/duct connection: outlet where the hood connects to a rectangular or round vent
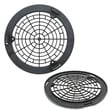
- Grease filter: traps grease before it reaches the blower and ductwork (example: filter WPW10252087)
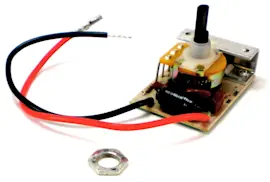
- Control panel or switches: turns the fan and lights on and off (example: slide switch WPW10252122)
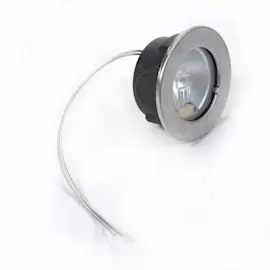
- Lights and light bulb: illuminates the cooking surface (example: range hood light bulb WPW10252088)
Names you might see in diagrams for KWCU300LSS1
The manual and parts diagrams often use these terms for installation and venting:
| Diagram term | What it means | Why you care |
|---|---|---|
| Canopy hood | The main hood housing | Determines fit and mounting points |
| Blower | Fan inside the hood | Affects airflow and noise |
| Vertical venting / rear venting | Duct exits up or out the back | Impacts duct routing and installation |
| Mounting brackets | Hardware that hangs/supports the hood | Must be secured to solid wood/support framing |
Why it matters
Using the correct part name helps you order the right replacement and troubleshoot faster. For example, poor airflow is often tied to a clogged grease filter, restricted ducting, or a failing blower, while dead lights are commonly a bulb or switch issue.
Last updated: February 2026
What does F1 mean on a KitchenAid oven?
F1 on a KitchenAid oven usually indicates a control-related fault (most often the electronic oven control or a temperature-sensor circuit issue). For your KitchenAid KWCU300LSS1 range hood, F1 is not a normal range hood code; use the troubleshooting and service guidance in the KWCU300LSS1 owner’s manual to diagnose the hood correctly.
What to do first (quick checks)
- Turn off power at the breaker for 1 minute, then restore power (resets many control glitches).
- Confirm the code is coming from the oven display, not the hood controls.
- If the oven shows F1 again, stop using self-clean until the issue is corrected.
- If the hood is acting up (fan or lights), focus on hood-specific checks instead of oven codes.
- Gather the full model and serial number before calling for service (the manual recommends having this ready).
If the problem is actually the KWCU300LSS1 range hood
Range hoods typically do not display “F1” like ovens. If your hood has no fan or no lights, these are common, model-relevant items to inspect:
- Grease filter condition and seating (restricted airflow can mimic “weak fan” symptoms)
- Light operation and bulb type
- Switch operation (fan or light switch sticking or failing)
Parts that commonly affect hood performance
| Symptom | What to check | Example part for this model |
|---|---|---|
| Fan seems weak or airflow reduced | Grease filter clogged/greasy | Filter WPW10252087 |
| Lights out | Bulb failed or socket issue | Range hood light bulb WPW10252088 |
| Fan or lights intermittent | Switch issue | Slide switch (match by diagram) |
Why it matters
An oven F1 code often points to an electrical control or sensor problem that can cause overheating or erratic operation. Separately, a range hood issue (filter, bulb, switch) affects ventilation, smoke removal, and safe cooking airflow.
Last updated: February 2026
What is the life expectancy of a KitchenAid oven?
KitchenAid ovens last 15 years with normal household cooking and routine care. Your model KWCU300LSS1 is a KitchenAid range hood, so this 15-year estimate applies to ovens in general; for KWCU300LSS1 maintenance details, use the KWCU300LSS1 owner’s manual.
Typical life expectancy (by appliance)
| Appliance type | Typical life expectancy | What drives lifespan |
|---|---|---|
| KitchenAid oven (gas or electric) | 15 years | Heat cycles, self-clean frequency, ventilation, power quality |
| KitchenAid range hood (KWCU300LSS1) | 15 years | Grease load, filter cleaning, fan run time, ducting airflow |
What usually shortens oven life
- Frequent self-clean cycles (high heat stresses wiring and controls)
- Poor ventilation around built-in ovens
- Heavy daily use (multiple long bake cycles)
- Power surges affecting electronic controls
- Delayed repairs when preheat is slow or temperatures drift
If you meant “range hood life expectancy” for KWCU300LSS1
A range hood typically reaches its full service life when airflow stays strong and grease is managed. These are the most common upkeep items for KWCU300LSS1:
- Clean or replace the grease filter on schedule (see filter WPW10252087)
- Replace dim or failed lights (see range hood light bulb WPW10252088)
- Keep the fan controls responsive; worn switches can cause intermittent operation (slide switches are common)
Why it matters
A clear 15-year planning target helps you decide when a repair is cost-effective and which maintenance habits protect the most failure-prone components (controls, heating system, and ventilation).
Last updated: February 2026
Why would a Range Hood fan stop working?
A KitchenAid range hood like model KWCU300LSS1 usually stops blowing because it is not getting power, the blower switch is not making contact, or airflow is restricted by grease buildup on the filters. Start with the breaker and filter condition, then move to the controls and wiring checks in the KWCU300LSS1 owner's manual.
Most common causes (and what to check first)
- Tripped breaker or blown fuse: Reset the circuit breaker or replace the house fuse; the manual specifically calls this out when the hood will not operate.
- Incorrect or loose wiring connection: With power disconnected, confirm the wiring connections are tight and correct (white-to-white, black-to-black, ground to green ground screw).
- Grease filter clogged: Heavy grease buildup can restrict airflow and make the fan seem weak or non-working; clean or replace the filter.
- Fan switch failure: If lights work but the blower does not respond, the blower switch can be the issue.
- Blocked ducting or damper (ducted setups): A stuck damper or blocked vent reduces airflow and can overload the blower.
Quick diagnostic flow (KWCU300LSS1)
| What you observe | Most likely issue | Best next step |
|---|---|---|
| Fan and lights both dead | No power or wiring problem | Check breaker, then follow electrical checks in the manual |
| Lights work, fan does not | Blower switch or blower circuit issue | Test the blower switch operation; inspect wiring to the blower |
| Fan runs but weak airflow | Grease filter clogged or duct restriction | Clean/replace filter; inspect duct and damper |
Parts that commonly solve “fan not working” symptoms
- Clean or replace the grease filter: filter WPW10252087
- If the fan control feels loose, intermittent, or stuck: slide switch WPW10252122
Why it matters
A hood that is not moving air lets grease and heat build up around the cooktop. Keeping filters clean and verifying proper electrical connections helps the blower operate correctly and improves ventilation performance.
Last updated: February 2026