Installation guide
 Owner’s manual




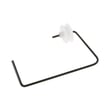
How to tell if a dryer thermal fuse is blown?
On a GE GTD81ESSJ0WS electric dryer, a blown thermal fuse typically shows up as a dryer that will not start at all, or runs with no heat, depending on which safety device opened. The most reliable way to tell is to unplug the dryer and test the fuse for continuity with a multimeter.
Common symptoms you can check first
- Dryer will not start (no motor run)
- Dryer tumbles but does not heat (often tied to power supply issues on electric dryers, but a safety device can also stop heat)
- Cycle starts then stops quickly
- Burning smell or repeated overheating before the failure
- Lint buildup or restricted venting leading up to the problem
How to confirm a blown thermal fuse (continuity test)
- Disconnect power: Unplug the dryer; for a hardwired setup, turn off both breakers.
- Access the fuse: The thermal fuse is commonly mounted on the blower housing or heater duct area (location varies by design).
- Remove at least one wire from the fuse terminal so you do not read through the circuit.
- Test with a multimeter set to continuity or lowest ohms.
- Interpret the reading:
- Continuity (near 0 ohms): fuse is good
- No continuity (open/infinite): fuse is blown and must be replaced
Use the GTD81ESSJ0WS owner's manual for safety steps and access guidance specific to this dryer.
What usually causes the thermal fuse to blow
A thermal fuse is a one-time safety device; it opens when the dryer overheats. The most common root causes are airflow problems.
| Likely cause | What to do next |
|---|---|
| Clogged lint screen or housing | Clean the lint screen and the lint chute thoroughly |
| Restricted vent duct (kinked, crushed, long run) | Inspect and correct vent routing; clean the duct |
| Blocked outside damper | Make sure the damper opens freely |
| Weak airflow from blower area | Check for lint blockage around the blower wheel |
A damaged airflow component can contribute to overheating; if you find a broken blower wheel, replace the dryer blower wheel WE16M24.
Why it matters
Replacing a blown thermal fuse without fixing the overheating cause often leads to repeat failures, longer dry times, and higher energy use.
Last updated: January 2026
What is the most common problem with a GE dryer?
On the GE GTD81ESSJ0WS electric dryer, the most common complaint we see is no heat or weak heat, which often points to a failed heater circuit (such as the heater assembly) or restricted airflow from lint buildup or improper venting. Start with airflow checks before replacing parts.
Quick checks first (no tools)
- Clean the lint screen before every load and confirm it is not coated with residue.
- Verify strong airflow at the outside vent hood while the dryer runs.
- Avoid flexible plastic venting; it can collapse and trap lint.
- Make sure the exhaust duct is not kinked, crushed, or packed with lint.
- If drying times are inconsistent, check the exhaust system for blockage.
Most common causes and what they look like
| Symptom | Most likely cause | What to do next |
|---|---|---|
| Runs but no heat | Heater circuit problem | Follow the diagnostic steps in the GTD81ESSJ0WS owner’s manual and test components safely with power disconnected |
| Long dry times | Blocked or poorly installed venting | Confirm vent material and routing match the GTD81ESSJ0WS installation guide |
| Stops when door moves | Door not closing or switch issue | Inspect latch alignment; consider the dryer door switch WE4M415 if the switch is intermittent |
| Lint on clothes | Lint screen full or airflow restriction | Clean lint screen and inspect venting end-to-end |
Why it matters
A restricted vent can make a GE electric dryer seem like it has a heating problem because poor airflow prevents moisture from leaving the drum. Fixing venting often restores normal heat performance and shortens cycle times.
When a part replacement is more likely
Replace a part after you confirm:
- The dryer has proper power supply and runs normally.
- Venting is clear and installed correctly.
- The symptom is repeatable (for example, heat never comes on, or the door switch cuts out).
Last updated: January 2026
What is the downside to a ventless dryer?
A ventless dryer’s main downside is slower drying and more heat and humidity released into the laundry area. In contrast, your GE GTD81ESSJ0WS is designed to be vented outdoors for best performance, shorter run times, and safer exhaust handling (see the GTD81ESSJ0WS installation guide).
Key downsides of ventless dryers
- Longer cycle times: Condensing moisture without a vent typically takes longer than vented drying.
- More room heat and humidity: Even with condensation systems, the space can feel warmer and more humid.
- More maintenance: Many ventless designs require regular cleaning of filters and condenser/heat-exchanger areas.
- Higher sensitivity to airflow and cleanliness: Lint buildup and restricted air paths can affect performance quickly.
- Different installation tradeoffs: You avoid a vent duct, but you need adequate room airflow and clearance.
How this compares to your GE GTD81ESSJ0WS (vented electric dryer)
Your GTD81ESSJ0WS is built around outdoor exhausting. When the vent system is restricted, you can see the same symptoms people associate with ventless drying: longer dry times and higher energy use.
| Topic | Vented dryer (GTD81ESSJ0WS) | Ventless dryer |
|---|---|---|
| Drying speed | Faster when venting is correct | Typically slower |
| Room comfort | Less added heat/humidity | More added heat/humidity |
| Maintenance focus | Lint screen and vent duct | Filters plus condenser/air path |
Why it matters
Drying performance depends on moving moist air out of the drum. GE’s venting guidance for this model emphasizes exhausting to the outdoors with proper metal ducting; restricted venting can make the dryer run longer and use more energy.
Practical tips if drying is slow on GTD81ESSJ0WS
- Clean the lint filter before every load.
- Check that the outside vent hood flaps move freely.
- Inspect the duct for kinks, crushing, or lint buildup.
- Avoid overloading; one washer load at a time tumbles best.
- If you use energy-saving settings (such as eDry), expect longer dry times.
For deeper maintenance and airflow guidance, use the GTD81ESSJ0WS owner’s manual.
Last updated: January 2026
What is the lifespan of a GE dryer?
A GE electric dryer like model GTD81ESSJ0WS typically lasts 13 years with normal household use. Good airflow (clean lint path and proper venting) and basic maintenance are the biggest factors that help you reach or exceed that lifespan.
What affects dryer lifespan the most
- Vent restriction (long runs, crushed duct, clogged vent hood) that makes the dryer run hotter and longer
- Lint buildup in the lint screen housing, blower area, or exhaust duct
- Overloading that strains the drive system (belt, drum support, motor)
- Power issues (loose cord connections, tripped breakers) that cause heat or start problems
- Wear parts aging out over time (door switch, belt, blower wheel)
Maintenance that helps GTD81ESSJ0WS last longer
We recommend following the care and cleaning guidance in the GTD81ESSJ0WS owner’s manual. Also, the installation instructions emphasize using rigid metal ducting for best performance and avoiding crushed or overly long transition ducting.
- Clean the lint screen every load
- Inspect and clean the venting path at least yearly
- Use rigid metal transition duct when possible; keep the run short and unkinked
- Avoid overloading; dry similar fabrics together for shorter cycles
- Address new noises early (thumping, squealing, scraping)
Common “wear-out” symptoms and likely areas to check
| Symptom | Common cause area | Example part for this model |
|---|---|---|
| Dryer will not start when door closes | Door switch or latch alignment | Dryer door switch WE4M415 |
| Drum not turning, motor runs | Belt or drum support issue | Dryer drum belt WE12M37 |
| Long dry times | Venting restriction or airflow problem | Lint path and exhaust duct |
| Loud rumble or vibration | Blower wheel or drum support components | Dryer blower wheel WE16M24 |
Why it matters
A dryer that takes longer to dry clothes runs hotter and longer each cycle, which accelerates wear on the heater, motor, belt, and controls. Keeping airflow strong is the simplest way to protect performance and extend service life.
Last updated: January 2026