


What's the average lifespan of a whirlpool dryer?
Most Whirlpool dryers, including the Whirlpool WED6120HW2 electric dryer, typically last 10 to 13 years with normal household use and basic maintenance. Keeping airflow strong (lint screen and venting) and fixing wear items early can help you reach the high end of that range.
A dryer’s life is mostly determined by heat, airflow, and moving-part wear.
- 10 to 13 years: typical for a Whirlpool electric dryer in average use
- Shorter lifespan: heavy daily loads, restricted venting, frequent overheating
- Longer lifespan: lighter use, clean venting, prompt replacement of worn rollers and pulleys
These are the highest-impact habits for WED6120HW2-STYLE dryers:
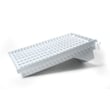
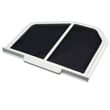
- Clean the lint screen every load; replace a damaged screen such as screen W10120998.
- Keep the exhaust vent run short and clear; remove lint buildup behind the dryer.
- Avoid overloading; heavy loads strain the drum support system and belt path.
- Listen for squealing or thumping and address it early (rollers, idler pulley, blower wheel).
- If drying times increase, restore airflow before replacing heat parts.
| Symptom | Most common wear area | Example part for WED6120HW2 |
|---|---|---|
| Thumping, rumbling | Drum support | Dryer drum support roller WPW10314173 |
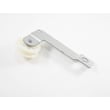
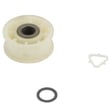
| Squealing | Belt tension system | Dryer idler pulley W10837240 |
| Poor airflow noise, vibration | Air movement | Dryer blower wheel WP697772 |
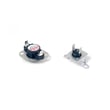
| No heat or overheating shutdown | Heating and safety circuit | Thermal fuse W10909685 |
A dryer that runs hot because of poor airflow wears out faster and can repeatedly trip safety devices. Good venting and timely replacement of drum support parts usually cost less than repeated no-heat or long-dry-time problems.
For efficiency habits that also reduce wear, follow how to use your clothes dryer efficiently.
Last updated: February 2026
Where is my dryer part number?
Your Whirlpool electric dryer model WED6120HW2 does not have one single “dryer part number.” Each component has its own part number; we match the correct replacement by using your dryer’s model number from the ID tag, then selecting the specific part you need.
On most Whirlpool dryers (including WED6120HW2), the model and serial tag is typically located:
- Inside the door opening on the front panel
- On the door frame (around the opening)
- On the cabinet opening near the lint screen housing
Write down the full model number exactly as shown (WED6120HW2) so we can match compatible parts.
Once you have the model number, identify the part by symptom or location, then confirm the part name and ID.
- Look up the part by the symptom (no heat, noisy, won’t start, long dry times)
- Compare the part name to what you see on the dryer
- Match the part ID exactly before ordering
- Replace related wear items together when it makes sense (rollers, idler, belt)
| Symptom | Common part to check | Example part for this model |
|---|---|---|
| Loud thumping or rumbling | Drum support rollers | Dryer drum support roller WPW10314173 |
| Squealing noise | Idler pulley | Dryer idler pulley W10837240 |
| No heat or weak heat | Heating circuit parts | Element, heater 5400w WP3387747 |
Dryer parts are model-specific. Using the WED6120HW2 model number prevents ordering a look-alike part that does not fit, does not wire in correctly, or does not restore proper airflow, heat, and drum support.
Last updated: February 2026
What are the common problems with whirlpool dryers?
Common problems we see on Whirlpool electric dryers like model WED6120HW2 include no-start issues, no-heat or long-dry times, squealing or thumping noises, and the drum not turning. Most of these symptoms trace back to power supply, airflow restrictions, or normal wear parts in the drive and heating systems.
- Dryer will not start: door switch, start switch, control, or power supply issue
- Runs but no heat: heating circuit problem (heater, thermal fuse, wiring, timer/control)
- Takes too long to dry: restricted venting, clogged lint path, weak airflow, moisture sensor issues
- Drum not spinning: belt or drive system problem (idler pulley, rollers, motor)
- Squealing, grinding, thumping: worn drum support rollers or idler pulley
- Stops mid-cycle: overheating from poor airflow, thermal protection opening
- Confirm full power: electric dryers need 240V; a tripped breaker can leave the dryer running but not heating.
- Check airflow: clean the lint screen and verify strong airflow at the outside vent hood.
- Avoid overloading: heavy loads reduce tumbling and slow drying.
- Use the right cycle: sensor cycles rely on clean sensor bars and proper load size.
- Listen for noise clues: squeal often points to the idler pulley; thump often points to rollers.
| Symptom | Common cause | Example part for this model |
|---|---|---|
| Squealing or chirping | Worn idler pulley | Dryer idler pulley W10837240 |
| Thumping, rumbling | Worn drum rollers | Dryer drum support roller WPW10314173 |
| No heat or overheating shutdown | Blown safety device | Thermal fuse W10909685 |
| Poor drying on sensor cycles | Dirty or failed sensor | Dryer moisture sensor WP3387223 |
Catching airflow and wear-part problems early helps prevent overheating, repeat fuse failures, and damage to the drum and motor. It also restores normal dry times and reduces energy use.
- Use electric dryer wont heat troubleshooting video for a step-by-step no-heat checklist.
- If your dryer displays a code, check Whirlpool duet dryer error codes to match the code to the most likely cause.
Last updated: February 2026
How do I know if my whirlpool dryer thermal fuse is blown?
On your Whirlpool WED6120HW2 electric dryer, a blown thermal fuse commonly shows up as a dryer that will not start or runs with no heat. The sure way to confirm is a continuity test with a multimeter; a thermal fuse is a one-time safety device and must be replaced if it tests open.
- Dryer will not run at all (no motor operation)
- Dryer runs but produces no heat (clothes stay damp)
- Cycle ends early or heat is inconsistent (often tied to airflow problems)
- Lint screen area feels unusually hot, or drying times suddenly increase
- Unplug the dryer (electric shock risk).
- Access the fuse location (typically on the blower housing or exhaust path).
- Pull the wire connectors off the fuse terminals.
- Set your multimeter to continuity or ohms.
- Touch probes to the fuse terminals:
- Good fuse: continuity tone or near 0 ohms
- Blown fuse: no tone or infinite/open reading
If it is blown, replace the fuse with the correct part for this model, such as the thermal fuse W10909685.
A thermal fuse opens when the dryer overheats; overheating is most often caused by restricted airflow.
- Clean the lint screen and confirm it is not torn or clogged (consider the screen W10120998 if yours is damaged)
- Inspect and clear the vent duct and outside vent hood
- Check for a crushed, kinked, or overly long vent run
- Make sure the blower is moving air; a damaged wheel can reduce airflow
| What you notice | Most common underlying issue | What to do next |
|---|---|---|
| No heat or no start | Thermal fuse opened | Test fuse, replace if open |
| Long dry times | Vent restriction | Clean venting, confirm strong airflow |
| Burning smell/hot cabinet | Overheating from poor airflow | Stop use, clear restriction before running |
Replacing a blown thermal fuse without fixing the airflow problem often leads to repeat failures. Restoring proper venting protects the heater, wiring, and controls, and gets drying performance back to normal.
Last updated: February 2026