Owner’s manual
 View engine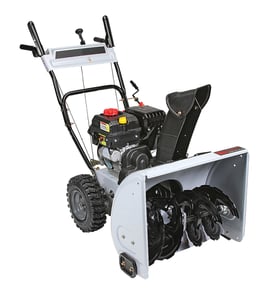



Should I spray my snowblower with WD-40?
Yes; for a Murray snow thrower model 1695539, we recommend using a light spray on the discharge chute and inside the housing to help snow slide through and reduce clogging. For storage, use a rust-preventative spray on bare metal as outlined in the 1695539 owner's manual.
Where spraying helps (and where it does not)
Use a light, even coat on slicking surfaces; avoid soaking areas that need grease or friction.
- Good places to spray: discharge chute interior, chute deflector, auger housing surfaces
- Avoid spraying: belts, pulleys, friction disc area, drive plate, tires, and any braking or traction surfaces
- Do not spray into the engine area: muffler, hot surfaces, air intake, or around the spark plug boot
- Never use your hands to clear clogs: shut the engine off, wait for all movement to stop, then use a stick or clean-out tool
In-season vs. off-season: what to use
WD-40 can work as a short-term water-displacing film, but a silicone spray or dedicated rust inhibitor typically lasts longer on snow-contact surfaces.
| When you’re using it | Best goal | What to apply | How much |
|---|---|---|---|
| During snow season | Reduce sticking and clogging | Light silicone spray (or light WD-40) | Thin coat, reapply as needed |
| End of season storage | Prevent rust on bare metal | Rust-preventative spray lubricant | More complete coverage on exposed metal |
Quick steps we use for best results
- Turn the engine off and let all moving parts stop completely
- Brush off packed snow and wipe wet areas dry
- Spray a thin coat on the chute and housing surfaces
- Wipe off overspray near controls and traction surfaces
- Before the next use, confirm the auger and drive controls move freely
Why it matters
A slick chute reduces clogging, which lowers the temptation to reach into the discharge area. The manual also calls out covering bare metal (housing, auger, impeller) with a spray rust-preventative lubricant for storage, which helps prevent corrosion and seized hardware.
Last updated: January 2026
What is the typical lifespan of a gas snowblower?
A gas snowblower like the Murray 1695539 typically lasts 10 to 15 years with normal residential use and consistent maintenance; units that get regular oil service, proper fuel storage, and end-of-season prep often reach 15 to 20 years.
What most affects lifespan
- Fuel care: using fresh fuel, draining or stabilizing fuel for storage
- Oil maintenance: changing oil on schedule and before long storage
- Wear parts condition: belts, cables, skid shoes, and shear bolts
- Storage habits: storing only after the engine cools and away from ignition sources
- Operating habits: avoiding overload (clearing too fast) and preventing freeze-up after use
Maintenance habits that add years
The Murray 1695539 operator guidance emphasizes safe storage and extended-storage preparation steps such as draining fuel, running the engine until it’s out of gas, changing oil, cleaning, and lubricating points. For model-specific procedures and intervals, use the 1695539 owner's manual.
- Run the machine a few minutes after throwing snow to help prevent collector/impeller freeze-up
- Check shear bolts and other fasteners frequently for tightness
- For extended storage: drain fuel, run engine dry, change oil, clean thoroughly, and lubricate moving points
- Store with the engine cooled and do not store with fuel indoors near ignition sources
Quick lifespan guide (typical)
| Usage pattern | Typical lifespan | What usually wears first |
|---|---|---|
| Light residential (few storms/season) | 12 to 20 years | Belts, skid shoes, cables |
| Average residential (regular storms) | 10 to 15 years | Belts, friction wheel, cables |
| Heavy or harsh use (wet snow, long runs) | 7 to 12 years | Friction wheel, bearings, auger/drive components |
Why it matters
A snowblower’s engine can last a long time, but most “end of life” decisions come from drivetrain wear (friction wheel, belts, pulleys) or neglected fuel and oil care. Staying ahead of routine wear parts keeps performance strong and prevents mid-storm breakdowns.
Last updated: January 2026
Is a 2 stage or 3 stage snowblower better?
For most homeowners, a 2-stage snowblower is the better choice because it clears heavy snow efficiently with an auger plus impeller. Your Murray model 1695539 is a dual-stage (2-stage) snow thrower; a 3-stage is mainly worth it for frequent deep, dense, plowed-in snow.
Quick comparison: 2-stage vs 3-stage
| Feature | 2-stage snowblower | 3-stage snowblower |
|---|---|---|
| Snow-moving system | Auger feeds an impeller | Accelerator feeds auger and impeller |
| Best for | Most driveways; typical storms; packed snow | Very deep, heavy, wet snow; plow berms; fast clearing |
| Clearing speed | Strong | Typically faster in extreme conditions |
| Complexity | Lower | Higher |
| Cost and maintenance | Usually lower | Usually higher |
How this applies to Murray 1695539
Our Murray 1695539 is a dual-stage snowthrower with an auger and impeller, designed for serious residential clearing (the manual lists it as a dual-stage unit with a 24-inch housing). Use the 1695539 owner's manual to match features like skid height, drift cutters (if equipped), and control adjustments to your conditions.
Choose 2-stage when
- You clear a standard driveway and sidewalks.
- Snow depth is usually moderate, even if it gets heavy or packed.
- You want simpler controls and fewer systems to maintain.
- You prefer easier troubleshooting for belts, cables, and traction drive.
Choose 3-stage when
- You regularly deal with deep, wet snow and plowed-in end-of-driveway piles.
- You want maximum intake speed in extreme storms.
- You are comfortable with added complexity and higher part wear potential.
Why it matters
The “better” snowblower is the one that matches your snow type and workload. A properly adjusted 2-stage unit like the Murray 1695539 can throw snow effectively without overloading the machine, which helps protect wear items such as shear bolts and drive components.
Last updated: January 2026
Is it worth fixing a snowblower?
For a Murray snow thrower model 1695539, fixing it is worth it when the problem is a normal wear item (belt, cable, shear bolt) and the total repair cost stays well under about half the price of a comparable new snowblower. If the engine or auger/drive system needs major work, replacement usually makes more sense.
Quick decision checklist
- If it starts and runs well, repairs are usually worthwhile.
- If it will not start after basic tune-up steps, engine work can get expensive fast.
- If the auger or drive will not engage, a belt or cable fix is often a good value.
- If the auger housing or frame is damaged, repairs can exceed the machine’s value.
- If you use it often (large driveway, frequent storms), reliability matters more than squeezing out one more season.
Typical “worth fixing” repairs (common on this model type)
These are the kinds of repairs that usually pay off because parts are straightforward and labor is reasonable:
- Replace a worn ground drive belt such as the Murray snowblower ground drive belt 1733324SM.
- Replace or adjust a stretched/binding drive cable such as the briggs & stratton craftsman snowblower clutch cable 1501123MA.
- Replace broken shear bolts (a frequent cause of “auger not turning”) using the muarray snowblower shear bolt kit, 1/4-20 x 1-3/4 1501216MA.
- Seasonal maintenance: lubrication, fastener checks, and control adjustments.
Repair vs replace: simple cost guide
| Situation | Usually fix | Usually replace |
|---|---|---|
| Belt/cable/shear bolt issue | Yes | No |
| Routine maintenance and adjustments | Yes | No |
| Major engine problem (low compression, heavy smoking) | Sometimes | Often |
| Gearcase/auger drive internal damage | Rarely | Often |
Why it matters (safety and reliability)
A snowblower that is out of adjustment or has worn controls can be unsafe and frustrating to use. The manual emphasizes keeping guards in place, keeping bystanders away, and using safe methods to clear a clogged chute (engine off, wait for moving parts to stop, clear with a stick). Use the 1695539 owner’s manual to follow the correct maintenance and adjustment schedule, including checking controls and replacing worn parts promptly.
Last updated: January 2026