Installation guide
 Owner’s manual
 Error Codes


How to stop a refrigerator from moving?
To stop your Kenmore refrigerator model 25360082412 from moving, make sure it’s properly leveled so all four corners rest firmly on the floor, then lower the front leveling/roller adjustments until the cabinet is stable and slightly tilted back (about 1/4 inch) for solid door sealing. See the installation guide for the leveling procedure.
Quick fixes that work fast
- Remove the toe grille, then adjust the front rollers/leveling screws until the refrigerator stops rocking.
- Confirm the cabinet is level front-to-rear and side-to-side; rocking means at least one corner is not supported.
- Keep the refrigerator from shifting side-to-side; push it straight back into place to avoid floor damage.
- Add non-slip pads under the front feet/rollers if you have slick tile or vinyl.
- If it still creeps when you open the door, place a wood stop (such as a short 2x4) behind the rear wheels.
Leveling targets (what “right” looks like)
The installation guidance for this style of refrigerator is consistent: stable on all corners, level cabinet, and a slight backward tilt to help doors close and seal.
| Check | Target | Why it helps |
|---|---|---|
| Corner support | All 4 corners firmly on floor | Prevents rocking and rolling |
| Front-to-back tilt | About 1/4 inch higher in front | Helps doors self-close and seal |
| Movement when opening door | No sliding or rocking | Prevents spills and hinge stress |
Why it matters
A refrigerator that moves usually is not fully supported on the floor. That can cause door alignment issues, weak gasket sealing, temperature swings, and extra compressor run time. Proper leveling also helps prevent the cabinet from “walking” when you open and close the doors.
When to check the door seal
If the refrigerator is level but the door still pulls the cabinet forward, inspect the gasket for sticking, gaps, or tearing. A damaged gasket can grab the cabinet as the door opens and can also cause cooling problems. For a common replacement on this model, see the frigidaire refrigerator door gasket (white) 242193213.
Last updated: February 2026
How to tell what model Kenmore refrigerator?
Your Kenmore refrigerator’s model number is printed on the appliance ID label; once you find it, you can match parts and instructions to the exact unit (for example, model 25360082412). On most refrigerators, the label is inside the fresh food compartment or on the door frame.
Where to look for the model number label
Check these common spots first (use a flashlight and look for a white or silver sticker/plate):
- Inside the fresh food section on a side wall (often near the top)
- On the door frame around the fresh food opening (hinge side is common)
- Behind the toe grille or kick plate at the bottom front
- Near the crisper drawers (side wall or ceiling area)
- On the back of the cabinet (less common, but possible)
What to write down (so you get the right parts)
Record the information exactly as shown on the label:
- Model number (this is the key for parts lookup)
- Serial number (helps confirm production run)
- Any revision or type code (if listed)
Quick ID checklist
| Label item | Why it matters | Example format |
|---|---|---|
| Model number | Ensures correct fit and compatibility | 25360082412 |
| Serial number | Helps narrow down variations | Letters and numbers |
| Type/revision | Confirms design changes within a model | Short code |
Why it matters
Kenmore refrigerators can look similar across multiple model families, but shelves, door gaskets, ice makers, and control parts can differ. Using the exact model number prevents ordering the wrong door rack, gasket, or electrical component.
Helpful references
- Use the 25360082412 owner’s manual to confirm label location and model-specific details.
- If you’re identifying the unit to service the ice system or water line, the 25360082412 installation guide also references key setup areas like the toe grille and rear connections.
Last updated: February 2026
How to unclog a Kenmore refrigerator drain line?
To unclog the drain line on your Kenmore refrigerator model 25360082412, unplug the refrigerator, melt any ice at the freezer drain opening, then flush the drain hole with hot water until it runs freely into the defrost pan. Use the 25360082412 owner's manual for access and panel removal details.
Before you start (safe setup)
- Unplug the refrigerator.
- Lay towels down; water often releases when the ice plug melts.
- Remove freezer items and the bin or floor panel to reach the drain trough.
- If equipped with an ice maker, close the household water shut-off valve.
- Use only gentle tools; sharp objects can puncture the drain tube.
Step-by-step: clear the defrost drain
- Locate the drain hole: Typically bottom rear of the freezer, under or near the evaporator cover.
- Melt the ice plug: Use a hair dryer on low (keep it moving) or warm towels.
- Flush the drain: Use a turkey baster or squeeze bottle with hot water; repeat until water flows fast.
- Loosen sludge near the top: Feed a pipe cleaner or zip tie a short distance, then flush again.
- Verify drainage: Confirm water reaches the defrost pan underneath the cabinet.
Tool guide
| Tool | Best for | Tip |
|---|---|---|
| Turkey baster + hot water | Most clogs | Several strong flushes work best |
| Hair dryer (low) | Ice at drain opening | Keep heat moving to protect liners |
| Pipe cleaner / zip tie | Sludge near top | Do not force it deep |
Why it matters
A clogged defrost drain causes water to pool, refreeze, and leak onto shelves or the floor. Clearing it restores normal defrost drainage and helps prevent repeat icing.
Last updated: February 2026
Is there a reset button on a Kenmore refrigerator?
Most Kenmore refrigerators, including model 25360082412, do not have a single, dedicated “reset” button for the whole unit; the practical reset is a power reset (unplugging briefly, then restoring power) and then confirming your temperature and ice maker settings in the 25360082412 owner's manual.
How to reset (power reset) safely
- Unplug the refrigerator from the wall outlet.
- Wait about 5 minutes to let the control fully power down.
- Plug the power cord back in.
- Set fresh food and freezer controls back to your normal settings.
- Allow 24 hours for temperatures to stabilize after any reset or control change.
What a “reset” fixes (and what it does not)
A power reset clears minor control glitches, display oddities, and some intermittent cooling or fan behavior. It will not fix a failed component such as a bad evaporator fan motor, temperature sensor, or control board.
| Symptom after reset | Most likely next check | Common part involved on 25360082412 |
|---|---|---|
| Lights work but cooling is weak | Airflow in freezer, frost buildup | Refrigerator evaporator motor 242077705 |
| Temps swing or seem inaccurate | Sensor placement and wiring | Refrigerator temperature sensor 240597220 |
| No ice after power outage | Ice maker switch ON, water supply open | Refrigerator ice maker IM116000 |
If the issue is ice maker or water related
If your “reset” is really about ice production or water flow, confirm the basics from the 25360082412 installation guide:
- Refrigerator must be plugged in before normal operation.
- Household water pressure should be 30 to 100 psi.
- Use copper tubing (plastic is more likely to leak).
- Open the shut-off valve fully and recheck for leaks in 24 hours.
Why it matters
A power reset is the fastest way to rule out a temporary control hiccup before you spend time diagnosing parts like the evaporator fan, sensor, or ice maker. It also helps you confirm the refrigerator is level and sealing properly so temperatures recover normally.
Last updated: February 2026
What is the ER if code on a Kenmore Elite?
On Kenmore model 25360082412, the ER IF (or Er IF) code points to an ice fan (ice room/freezer fan) airflow problem. That fan moves cold air through the door ducting to keep the ice maker area cold; when airflow is blocked or the fan is not running correctly, the control shows ER IF.
What to check first (fast, no parts)
- Power reset: unplug the refrigerator for 5 minutes, then restore power.
- Make sure the freezer vents and door air ducts are not blocked by packages or frost.
- Check for heavy frost/ice buildup around the fan cover area (a common cause of restricted airflow).
- Confirm the freezer door closes and seals fully; warm air leaks can create frost that jams airflow.
- Verify the ice maker area is not overpacked and the ice bin is seated correctly.
Likely causes and the most common fixes
| What’s happening | What it usually means | Typical fix |
|---|---|---|
| Fan is quiet, no airflow | Fan motor not running or not getting power | Inspect wiring, replace fan motor if failed |
| Fan is noisy or rubbing | Fan blade hitting ice or cover | Defrost/clear ice, check blade and cover alignment |
| Frost keeps returning | Defrost or door-seal issue causing repeated icing | Check door gaskets, airflow, and defrost performance |
Parts that commonly relate to ER IF symptoms
If you confirm the fan is not moving air (or is damaged), these model-compatible parts are often involved:
- Refrigerator evaporator motor 242077705 (drives airflow across the evaporator)
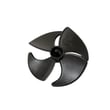
- Refrigerator evaporator fan blade 242219302 (moves air; can crack or rub)
- Refrigerator fan cover 242294704 (can ice up or get misaligned and contact the blade)
Why it matters
The ice fan is what keeps the ice maker compartment cold enough to make and hold ice. When airflow drops, ice production slows, cubes melt or clump, and frost can spread into ducts and the freezer.
Where to find model-specific guidance
We outline access points, safety steps, and any model-specific checks in the 25360082412 owner's manual. For installation-related airflow and door-seal alignment basics, use the 25360082412 installation guide.
Last updated: February 2026
What's the average lifespan of a Kenmore refrigerator?
A Kenmore refrigerator typically lasts 10 to 15 years. With steady upkeep (good airflow, tight door seals, and correct temperatures), many units run longer; for Kenmore model 25360082412, installation and operating conditions play a big role in reaching that average. See the 25360082412 owner's manual for model-specific care and operating guidance.
What affects lifespan most
- Condenser airflow and cleanliness (restricted airflow makes the compressor work harder)
- Door seal condition (warm air leaks increase run time and frost)
- Room temperature (very hot or very cold rooms reduce cooling performance)
- Level installation (helps doors close correctly and reduces vibration)
- Water supply quality and pressure for ice maker models (helps prevent valve and ice issues)
Quick maintenance checklist (high impact)
- Keep vents inside the fresh food and freezer sections unblocked.
- Confirm the toe grille area has clear airflow and is not blocked.
- Wipe and inspect door gaskets; replace if torn or not sealing.
- Set temperatures to typical targets: 37°F fresh food, 0°F freezer.
- If you have an ice maker, use the correct water supply setup and pressure range.
Typical lifespan by style (industry averages)
| Refrigerator type | Typical lifespan | Notes |
|---|---|---|
| Top freezer | 14 to 17 years | Simplest design, fewer components |
| Side-by-side | 12 to 15 years | More door sealing surface area |
| French door | 10 to 14 years | More features, more airflow paths |
| Compact/mini | 8 to 12 years | Smaller compressors run hotter |
Why installation conditions matter
For model 25360082412, proper clearances and a stable environment reduce strain on the sealed system (compressor, evaporator, condenser). Our installation guidance calls for 3/8 inch at the sides and top and 1 inch at the rear, plus avoiding extension cords/adapters and keeping the refrigerator out of extreme room temperatures. Details are in the 25360082412 installation guide.
When a “shorter lifespan” is usually a repairable issue
| Symptom | Common cause | Often-fixed items |
|---|---|---|
| Warm fridge, freezer OK | Weak airflow in fresh food | Refrigerator evaporator motor 242077705, fan blade, defrost issue |
| Frost buildup, sweating | Door not sealing | Door gasket adjustment/replacement |
| Clicking, won’t start | Start components | Start relay, capacitor |
Last updated: February 2026