Owner’s manual
 Error Codes









What are the electrical requirements for the LG range?
For the LG LSE4613BD electric range, we install it on a properly grounded, dedicated branch circuit that supplies a single-phase 120/208V or 120/240V, 60 Hz electrical system. The range is rated at 13.5 kW at 120/240 VAC and typically uses a 40-amp range cord.
Electrical requirements (what to plan for)
- Single-phase, 3-wire AC system: 120/208 V or 120/240 V, 60 Hz
- Proper grounding is required; wiring must follow local codes and NEC (ANSI/NFPA 70)
- Use a UL-listed range cord with approved terminals (closed-loop, or open-end spade lugs with upturned ends)
- Use a strain relief; do not install the cord without one
- A 40-amp range cord is required; a 50-amp cord can be used if it is marked for the correct opening size
For the exact connection method and terminal block details for your model, use the LSE4613BD owner's manual.
Cord vs. conduit: which connection is right?
Most homes use a cord and receptacle, but some installations use conduit. Your choice depends on your local code and how the kitchen is wired.
| Connection type | Common use case | What to check first |
|---|---|---|
| Range cord (3- or 4-conductor) | Standard receptacle behind/near the range | Cord amperage rating and strain relief |
| Conduit (3-wire or 4-wire) | Hardwired installation | Approved conduit connection and grounding method |
Why it matters
Correct voltage, amperage, and grounding protect the control boards, heating circuits, and wiring harness from overheating or damage. It also helps the oven and radiant elements heat properly and prevents nuisance tripping.
Quick safety checklist before you connect power
- Turn off the breaker before accessing the terminal block
- Confirm the circuit voltage (120/208 vs. 120/240) matches your supply
- Match the cord type to your outlet (3-prong vs. 4-prong)
- Verify the strain relief is installed and tightened
- Engage the anti-tip device after positioning the range
Last updated: February 2026
What are the disadvantages of slide-in ranges?
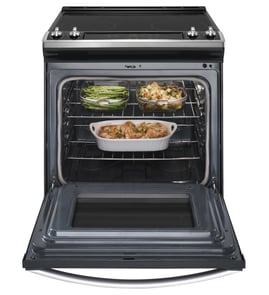
Slide-in ranges like the LG LSE4613BD are designed for a built-in look, but the tradeoffs are higher cost, tighter installation requirements, and less flexibility if your countertop opening is not the right depth. They also need careful gap management at the back and sides to avoid fit and spill issues.
Common disadvantages (what we see most often)
- More precise fit required: Slide-in models are built to sit flush with countertops, so cabinet cutout and countertop depth matter more.
- Potential rear gap issues: If the counter does not bridge the rear opening, you may need a rear filler; deeper counters can still leave a gap.
- Less placement flexibility: They are less forgiving if you later remodel or move the range to a different opening.
- Often less storage: Many slide-in designs reduce or eliminate a full storage drawer compared with freestanding ranges.
- Higher purchase and install cost: The “built-in” look typically costs more, and installation can take longer.
LG LSE4613BD fit and installation details to know
The LSE4613BD is a 29 7/8 in wide slide-in electric range with a listed depth of 26 1/2 in (door closed) and height to cooking surface of 36 in. For exact clearances, electrical requirements, and anti-tip setup, use the LSE4613BD owner's manual.
Countertop depth and rear gap (quick reference)
| Countertop depth situation | What typically happens | What to plan for |
|---|---|---|
| Greater than 25 in | Gap may remain between filler and back wall | Consider how you will finish/seal the gap |
| Less than 24 in | Control panel may not sit flush | Adjust opening or choose a different range style |
Why it matters
A slide-in range looks great when it fits correctly, but a small mismatch in countertop depth or opening can create visible gaps, alignment problems, and extra installation work. Planning the cutout and rear gap solution up front prevents frustration later.
Before you buy or reinstall (fast checklist)
- Measure countertop depth and the cabinet opening width
- Confirm the range can sit flush where you want it
- Plan for rear gap coverage if the counter does not bridge the opening
- Verify the anti-tip bracket can be installed and engaged
- Confirm your electrical supply matches the range requirements
Last updated: February 2026
How to reset an LG electric stove?
To reset your LG electric range model LSE4613BD, turn the range off, then restore power by switching the range circuit breaker off for 1 minute and back on. After a reset, the clock may flash, which is normal; set it using the steps in the LSE4613BD owner's manual.
Quick reset steps (power cycle)
- Turn all surface element knobs to OFF.
- Turn the oven mode knob to OFF.
- Switch the range breaker OFF (or unplug if accessible).
- Wait 60 seconds.
- Switch the breaker ON (or plug back in).
- Set the clock; a flashing colon indicates a recent power interruption.
What a reset fixes (and what it does not)
A reset clears many temporary control glitches (display oddities, unresponsive keys, clock flashing). It does not fix a failed heating circuit, sensor, or control.
| Symptom after reset | Most common cause | What to check next |
|---|---|---|
| Oven will not heat | Heating circuit or control issue | Run Bake; if still cold, test components below |
| Temperature is inaccurate | Sensor out of range | Consider the range oven temperature sensor EBG61305805 |
| Surface burner not heating | Element or switch issue | Inspect element; consider the LG range surface element control switch EBF62174907 |
| Convection fan cycles on/off | Normal operation | No repair needed |
If the oven still will not heat
- Confirm the breaker is fully reset (OFF then ON) and not tripped again.
- Try Bake and Broil; note whether either one heats.
- If you get heat sometimes, check for loose wiring at the terminal block (power off first).
- If the oven overheats or throws temperature-related errors, the oven sensor is the first part we check.
- If the cooktop element will not heat, the element and its control switch are common suspects.
Why it matters
Resetting (power cycling) is the fastest way to separate a temporary electronic glitch from a true parts failure. If the problem returns immediately after a reset, troubleshooting the sensor, surface element, or control components saves time and prevents repeat shutdowns.
Last updated: February 2026