Owner’s manual



Do all GE microwaves use the same mounting bracket?
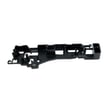
No. GE microwaves do not all use the same mounting bracket; brackets and hole patterns are model-specific and can change between series and generations. For a GE PEB9159DJ2BB countertop microwave, mounting brackets are not a standard replacement item the way they are on many over-the-range installs; use the clearances and installation method shown in the owner's manual.
What to expect by microwave type
Mounting hardware depends heavily on how the microwave is designed to be installed.
- Countertop models (like PEB9159DJ2BB): typically sit on a counter with required airflow clearances
- Built-in models: often require an approved trim kit and follow that kit’s instructions
- Over-the-range models: use a wall bracket and top cabinet bolts; brackets are commonly model-specific
- Convection-capable units: may have additional airflow and spacing requirements
Quick checks before you reuse any bracket
If you are replacing a microwave and hoping to reuse existing hardware, confirm these items first.
- Installation type matches (countertop vs built-in vs over-the-range)
- Overall width and cabinet opening match your space
- Venting and clearance requirements match (side, top, rear)
- The new unit’s mounting points line up with the old bracket/template
- The door swing and handle clearance work in your location
Clearances that matter for PEB9159DJ2BB
Our GE PEB9159DJ2BB manual calls out recommended clearances for safe airflow and operation.
| Clearance area | Typical requirement for this model | Why it matters |
|---|---|---|
| Each side | 3 inches | Prevents overheating and improves airflow |
| Top | 3 inches | Protects electronics and cabinet surfaces |
| Rear | 1 inch | Keeps cord and airflow space from being pinched |
Why it matters
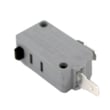
Using the wrong bracket or forcing a fit can twist the cabinet, misalign the door, and lead to door-switch problems (a common no-start symptom). If your microwave will not run unless the door is held “just right,” inspect the latch alignment and consider the microwave door interlock switch WB24X10146 if testing confirms a failed switch.
Last updated: February 2026
How do I reset my GE microwave touchpad?
To reset the touchpad on your GE PEB9159DJ2BB countertop microwave, disconnect power for about 30 seconds, then restore power and try the keypad again. This clears many temporary control glitches caused by a brief power surge or a stuck control state.
Quick reset steps
- Press CANCEL/OFF once to stop any active cooking cycle.
- Unplug the microwave from the outlet.
- Wait 30 seconds.
- Plug the microwave back in.
- Set the clock if needed, then test a simple cook cycle (for example, 10 to 20 seconds).
If the touchpad still does not respond
These checks help separate a control issue from a door or power issue:
- Confirm the outlet has power (try a small lamp or another device).
- Make sure the 3-prong plug is fully seated in the outlet.
- Open and close the door firmly; a door that is not fully latched can prevent operation.
- If the display is lit but the oven will not start, press CANCEL/OFF, re-enter the cook time, then press START/PAUSE.
- If the microwave is completely dead after the reset, a blown internal fuse is a common cause.
Parts that commonly relate to “won’t start” symptoms
If the microwave has power issues or will not run with the door closed, these model-matched parts are often involved:
| Symptom | Common area to check | Example model-matched part |
|---|---|---|
| Dead, no display | Internal power protection | Microwave fuse WB27X11138 |
| Won’t start, door must be slammed | Door latch and interlock system | Microwave door interlock switch WB24X10146 |
| Runs but acts erratic after power events | Control electronics | Microwave electronic control board WB27X29822 |
Why it matters
A simple power reset fixes many touchpad problems without replacing parts. If the issue returns quickly, it often points to a door interlock problem, a failing fuse, or a control board issue. For control and troubleshooting details specific to this model, use the owner's manual.
Last updated: February 2026
What is the average lifespan of a GE microwave?
Most GE microwaves average about 9 years of service life. For your GE PEB9159DJ2BB countertop microwave, lifespan depends most on daily run time, ventilation, and keeping the cavity and door seals clean; our owner's manual covers safe-use habits that help prevent early failures.
Typical lifespan and what changes it
In normal home use, we see these patterns most often:
- Light use (reheat/defrost): often reaches the full expected lifespan
- Heavy use (multiple long cook cycles daily): wears components sooner
- Poor airflow or blocked vents: increases heat stress on internal parts
- Frequent door slamming: accelerates door-switch and latch wear
- Food splatter buildup: can lead to arcing and interior damage
Common “end-of-life” symptoms (and parts that often relate)
If the microwave is otherwise in good condition, these issues are commonly repairable:
- Dead display or no power (often involves a fuse such as microwave fuse WB27X11138)
- Runs but does not heat (commonly tied to high-voltage components)
- Stops when the door moves or will not start (door interlock system such as microwave door interlock switch WB24X10146)
- Turntable not rotating (motor/coupler issues)
- Sparking near the waveguide area (inspect the waveguide cover)
Quick lifespan checklist (best practices)
Use these habits to get the most years out of a countertop microwave:
- Keep the interior clean and dry; wipe after messy cooking
- Never run the microwave empty
- Use microwave-safe cookware only; avoid metal and foil contact
- Make sure vents are not blocked and the unit has breathing room
- Close the door gently so the interlock switches stay aligned
Repair vs. replace: a simple guide
| If your microwave is… | Usually makes sense to… |
|---|---|
| Under ~5 years old and otherwise solid | Repair common electrical/door issues |
| Around 7 to 10 years old | Compare repair cost to replacement value |
| Over 10 years old with multiple symptoms | Replace (unless repair is minor) |
Why it matters
Microwaves rely on door interlocks, fusing, and high-voltage heating components working together. Good cleaning and gentle door use reduce stress on the interlock switches, cooling airflow, and electrical protection parts, which directly impacts lifespan.
Last updated: February 2026