




What are the commonly replaced parts in a dishwasher?
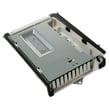
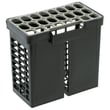
In a GE dishwasher like model CDD420P2T0S1, the most commonly replaced parts are the ones that handle sealing, water flow, washing action, heating, and draining. When these parts wear out or clog, you typically see leaks, poor cleaning, no-heat drying, or standing water.
Most common dishwasher parts people replace
- Door gasket or door seal (leaks around the door)
- Door latch or door switch (won’t start or stops mid-cycle)
- Water inlet valve (won’t fill or fills slowly)
- Drain pump or drain hose (won’t drain, water left in tub)
- Circulation pump or wash motor (weak spray, poor cleaning)
- Spray arms (clogged jets, not cleaning upper or lower rack)
- Heating element (poor drying, cooler wash water)
Symptoms to part quick-check
| What you notice | Most likely parts to check first | What to do next |
|---|---|---|
| Water on floor at the front | Door gasket, door seal, latch alignment | Inspect gasket for tears; clean sealing surfaces |
| Dishes still dirty | Spray arms, filter area, circulation pump | Clear clogs; verify strong spray action |
| Standing water after cycle | Drain pump, drain hose, air gap/disposal inlet | Check for kinks and clogs; clean drain path |
| Won’t start but has power | Door latch/switch, control, user interface | Confirm door closes firmly; try a reset |
Why these parts fail most often
These components do the most work and see the most stress: heat cycles, detergent exposure, food debris, and hard-water scale. Over time, seals flatten, spray jets clog, pumps wear, and electrical controls can fail.
Tips to reduce repeat failures
- Clean the filter area and remove debris from the sump regularly
- Run hot water at the sink before starting a cycle for better wash performance
- Use the right detergent amount; too much can cause buildup
- Load so spray arms spin freely; avoid blocking the detergent cup
- If the dishwasher won’t run or shows a code, use GE electronic dishwasher error codes to narrow the failure faster
Last updated: February 2026
Is it worth repairing a GE dishwasher?
Yes, repairing a GE dishwasher like model CDD420P2T0S1 is worth it when the problem is a common wear item or minor failure and the total repair cost stays well below the price of a comparable new dishwasher; replacement makes more sense when the unit is around 10 years old or the repair involves multiple major components.
Quick decision checklist
- If the dishwasher is under ~10 years old, repairs usually pay off.
- If the estimate is under ~50% of replacement cost, repair is typically the better value.
- If the issue is draining, filling, drying, or not starting, many fixes are straightforward.
- If you have repeated leaks, heavy corrosion, or multiple failures, replacement is usually smarter.
- If the repair involves several major parts at once (for example, electronic control plus motor issues), replacement often wins.
Common problems that are usually worth fixing
These symptoms often point to serviceable issues like clogs, switches, seals, or a single failed component:
- Dishwasher will not start (door latch, user interface, power supply issue)
- Not draining (blocked filter, drain hose restriction, drain pump problem)
- Not cleaning (spray arm blockage, circulation issue, loading or detergent problems)
- Not drying (heater circuit issue, rinse aid, venting)
- Error code displayed (helps narrow the failure quickly)
For GE-specific code help, use GE electronic dishwasher error codes or GE dishwasher error codes.
Repair vs. replace: simple comparison
| Situation | Usually repair | Usually replace |
|---|---|---|
| Age | Under ~10 years | Around 10+ years |
| Cost | Under ~50% of new | Over ~50% of new |
| Scope | One clear failure | Multiple major failures |
| Condition | No rust, tub is sound | Persistent leaks, heavy corrosion |
Why it matters
A dishwasher repair is most cost-effective when it restores reliable washing with one targeted fix. Once you are stacking major repairs, the risk of another breakdown rises and the total cost can approach replacement.
Last updated: February 2026
How do you do a hard reset on a GE dishwasher?
For the GE CDD420P2T0S1 dishwasher, a hard reset is done by removing power long enough to reboot the control. Turn the dishwasher off at the breaker (or unplug it) for about 2 to 5 minutes, restore power, then start a new cycle with the door fully latched.
Hard reset steps (power-cycle reset)
- Press Cancel/Reset (if your control panel has it) to stop the current cycle.
- Turn OFF the dishwasher circuit breaker (or unplug the unit).
- Wait 2 to 5 minutes.
- Turn power ON again.
- Close the door firmly until it latches.
- Select a cycle and press Start.
Quick reset vs hard reset
| Reset type | What you do | What it fixes best |
|---|---|---|
| Quick reset | Press Start/Reset or Cancel/Reset (hold about 3 to 5 seconds if needed) | Stuck cycle, simple control glitch |
| Hard reset | Cut power for 2 to 5 minutes | Persistent glitches, control lockups, some error-code conditions |
If it still will not run after the reset
These checks solve the most common “has power but won’t start” situations on GE dishwashers:
- Confirm the door latch is fully engaged (a slightly open door prevents starting).
- Make sure Control Lock is off (if equipped).
- Cancel any Delay Start selection.
- Verify the breaker is not tripped and the outlet (if used) has power.
- If the unit beeps or shows an error, use GE electronic dishwasher error codes to match the code to the next step.
Why it matters
A hard reset clears a temporary control-board state (like a stalled cycle or keypad confusion) so the dishwasher can reinitialize and run normally. It is a safe first step before replacing parts or scheduling service.
Last updated: February 2026
How to replace GE dishwasher filter?
On the GE CDD420P2T0S1 dishwasher, replacing the filter is usually a quick twist-lock job: remove the lower rack, lift out the old filter from the sump area, then set the new filter in place and turn it clockwise until it locks before reinstalling the rack.
Steps to replace the dishwasher filter
- Turn off the dishwasher and let it cool if it was recently running.
- Pull out and remove the lower dish rack for clear access.
- Locate the filter assembly in the bottom of the tub (sump area).
- Unlock and remove the old filter (most GE fine filters lift out after a counterclockwise twist).
- Seat the new filter fully, then twist clockwise until it locks.
- Reinstall the lower rack and run a short rinse cycle to confirm normal wash and drain.
What you should notice after replacement
| Check | Normal result | If not normal |
|---|---|---|
| Filter locks in place | Firm, no wobble | Reseat and twist until fully engaged |
| Water drains at end of cycle | Tub bottom mostly clear | Check for debris in sump and drain path |
| Cleaning performance | Fewer particles, better spray | Clean spray arms and verify hot water supply |
Common mistakes to avoid
- Installing the filter crooked; it can leak debris back into the sump.
- Leaving broken glass, labels, or food scraps under the filter.
- Overtightening; twist until it stops and feels locked, not forced.
- Skipping routine cleaning; many filters need periodic rinsing even when not replaced.
Why it matters
A properly seated filter helps protect the circulation pump, keeps the spray arms from clogging, and improves cleaning results. If your GE dishwasher is showing unusual behavior after service, checking for a stored fault can help; use GE electronic dishwasher error codes for guidance.
Last updated: February 2026
What is the most common problem with GE dishwashers?
The most common problems we see on GE dishwashers like model CDD420P2T0S1 are draining problems, not starting, and leaks. In many cases, the fix starts with cleaning the filter area, checking the drain path, and confirming the door is latching and the cycle is being started correctly.
Most common issues (and what they usually mean)
- Not draining: clogged filter area, blocked drain hose/air gap, or a drain pump issue
- Won’t start or stops mid-cycle: door latch not engaging, control lock or demo mode, or a control problem
- Leaking: door seal wear, loose hose connections, or an overfill condition
- Not cleaning well: spray arms blocked, filter area dirty, low water temperature, or loading issues
- Not drying: rinse aid empty, heater or venting issue, or plastic items holding water
Quick checks you can do first (no tools)
- Reset power: turn the dishwasher off at the breaker for 1 minute, then restore power.
- Check the tub bottom: remove debris around the filter/sump area so water can flow to the pump.
- Confirm the drain path: make sure the sink/disposer drain is clear and the drain hose is not kinked.
- Verify the door closes firmly: a weak latch or misaligned door can prevent starting.
- Look for an error code: GE electronic models often display codes that point to the failing system.
Symptom-to-likely-cause guide
| Symptom | Most likely cause | Best first step |
|---|---|---|
| Water left in bottom | Clog in filter/sump or drain hose | Clean filter area; check hose routing |
| Has power but won’t run | Door latch issue or demo/lock mode | Re-close door; check settings |
| Puddles at front | Door seal or door alignment | Inspect seal; check for gaps |
| Dishes gritty | Filter area dirty or spray arm blockage | Clean filter area; clear spray arm holes |
Why it matters
Drain and start problems can look like “the dishwasher is dead,” but they are often caused by a simple blockage or a door-latch condition. Catching those early helps prevent odors, standing water, and repeat cycle failures.
Helpful DIY resources
- Use GE electronic dishwasher error codes to match a displayed code to the most likely failure.
- If the unit powers up but won’t run, follow dishwasher has power but wont run could be demo mode.
Last updated: February 2026
Why is my GE dishwasher leaking from the bottom corner of the door?
A bottom-corner door leak on your GE CDD420P2T0S1 dishwasher almost always happens because water is escaping past the door seal area: the door gasket is dirty or deformed, the door isn’t closing squarely (latch or hinges), or spray is being deflected toward the corner by loading or a wash arm issue.
Quick checks we recommend first
- Clean the sealing surfaces: wipe the door gasket and the tub lip with warm water and a mild detergent; remove grit, detergent buildup, and food soil.
- Inspect the gasket for damage: look for tears, flattened sections, or areas pulling away near the leaking corner.
- Confirm the door closes evenly: close the door slowly and check that the gap looks uniform along both sides.
- Check loading and obstructions: make sure a pan handle or rack isn’t preventing full closure or pushing the door outward.
- Reduce oversudsing: use dishwasher detergent only (not dish soap) and avoid overfilling; excess suds can push water out at the corners.
Most common causes (and what to do)
| Likely cause | What you’ll notice | What to do next |
|---|---|---|
| Dirty or warped door gasket | Drips start early in the cycle; leak tracks from the corner | Clean and recheck; replace gasket if torn or permanently flattened |
| Door latch not pulling door tight | Door feels “loose” when latched; leak increases with heavier spray | Inspect latch strike alignment; tighten mounting screws if accessible |
| Hinge wear or door alignment issue | Door sits slightly low on one side; corner leak matches the low side | Check hinges for play; look for bent hinge arms or loose fasteners |
| Spray deflection from loading or wash arm | Leak happens only with certain loads | Re-load so tall items don’t block rotation; verify arms spin freely |
Why it matters
Even a small corner leak can wet the insulation and toe-kick area, leading to odors, poor drying, and damage to nearby flooring or cabinets. Fixing the seal or alignment early prevents repeat leaks.
If you see a code or the unit stops mid-cycle
If the dishwasher displays an error or behaves oddly along with the leak, use our GE code references to narrow the failure quickly: GE electronic dishwasher error codes.
Last updated: February 2026
Can I replace dishwasher parts myself?
Yes, for the GE CDD420P2T0S1 dishwasher, we can usually replace many common wear parts ourselves if we shut off power and water first and work carefully. Jobs involving wiring, leak points, or tight cabinet access take more skill, but they are still DIY-friendly with the right checks.
What you can usually replace yourself
These repairs are typically straightforward with basic hand tools:
- Filters and screens (cleaning or swapping)
- Spray arms (clogs, cracks, poor rotation)
- Door gasket and bottom door seal (leaks at the front)
- Dishrack wheels/rollers and rack stops (rack not sliding)
- Detergent dispenser issues caused by buildup (often cleaning first)
Repairs that are more advanced (but still possible)
These often involve electrical testing, water connections, or removing the dishwasher:
- Drain pump or drain hose (no-drain problems)
- Water inlet valve (not filling, weak fill)
- Float switch or door latch switch (won’t start symptoms)
- Heating circuit components (poor drying, long cycles)
- Electronic control or user interface (dead panel, error codes)
Safety checklist before you start
Use this quick checklist every time:
- Turn off the breaker; confirm the control panel is off
- Shut off the dishwasher water supply valve
- Protect the floor; keep towels ready for residual water
- Take photos of wire and hose routing before disconnecting anything
- Run a short test cycle after reassembly and check for leaks
Quick “DIY or call a pro?” guide
| Symptom | Most common DIY path | When to stop and get help |
|---|---|---|
| Won’t start | Check door closure, latch feel, power reset | Burning smell, tripped breaker repeatedly |
| Not draining | Clean filter area, check drain hose routing | Water under unit, pump wiring damage |
| Leaking | Inspect door seal, tub edge, hose clamps | Leak from under motor area or electrical box |
| Not cleaning | Clean spray arms, load correctly, maintain filter | Loud grinding, wash motor not running |
Why it matters
Dishwashers combine electricity, water, and heat in a tight space. Doing the simple maintenance and part swaps yourself can restore cleaning and drying performance and prevent leaks, but the safety steps and post-repair leak check protect your kitchen and the dishwasher.
For model-specific troubleshooting steps and code meanings, use our GE electronic dishwasher error codes guide.
Last updated: February 2026





