- Kenmore refrigerator water filters
- Whirlpool refrigerator water filters
- Samsung refrigerator water filters
- GE refrigerator water filters
- LG refrigerator water filters
- Frigidaire refrigerator water filters
- KitchenAid refrigerator water filters
- Maytag refrigerator water filters
- Kenmore Elite refrigerator water filters
- Estate refrigerator water filters
- GE Profile refrigerator water filters
- Amana refrigerator water filters
- Bosch refrigerator water filters
- Dacor refrigerator water filters
- Electrolux refrigerator water filters
Dishwasher has power but won't run? Could be demo mode


You finally got the dishwasher of your dreams, even though you did have to buy the display model because it was the only one left. But now the darn thing won’t run. You start a cycle and the time counts down, but nothing else happens. What’s wrong? It could be that the dishwasher is still in the Sales Demo Mode. Most dishwashers with electronic controls have a demonstration mode to show the control console’s display features. When the dishwasher is in demo mode, the control console lights up and the timer counts down, but the dishwasher doesn’t really work. Sales Demo Mode doesn’t affect just new dishwashers either. The demo mode can turn on if you (or a curious child) press the right sequence of buttons. It’s even possible for the dishwasher to enter demo mode on its own because of a power surge or a control malfunction. If you find your dishwasher in demo mode, look up your dishwasher type to see how to disable the mode. This list covers a variety of Kenmore, KitchenAid, JennAir, Whirlpool, GE, Bosch and Electrolux models. If your model isn't covered in this list, contact the dishwasher manufacturer for the procedure to disable the demo mode.
Kenmore dishwashers
Kenmore HE (2012 and newer): If you have a Kenmore high-efficiency dishwasher that has a digital display and was made in 2012 or later, you can exit demo mode by pressing and holding the NORMAL WASH button for 5 seconds while pressing START 3 times.
Kenmore HE (older than 2012): Follow these steps to disable the demo mode on a Kenmore high-efficiency dishwasher made before 2012 that has a digital display on the top edge of the door.
Press START/RESUME to wake the control.
Select 3 different buttons (except the START/RESUME and CANCEL buttons).
Press the buttons in this order: 1, 2, 3, 1, 2, 3, 1, 2, 3, with no more than a 1-second delay between button presses.
Close the door. The dishwasher runs through a 10-minute diagnostic test cycle and then disables the demo mode.
Kenmore HE with LCD touch screen: To disable demo mode on a Kenmore high-efficiency dishwasher with a touch screen made in 2012 or later, follow these steps.
Unplug the dishwasher for 30 seconds to reset the control and then plug it back in. The Demo/Try It screen appears on the control panel upon power-up.
Find the Settings icon (it looks like a gear) in the top left corner of the display and the Information icon (i) in the top right corner.
Press those icons in this order within 5 seconds: INFORMATION, SETTINGS, INFORMATION, SETTINGS, INFORMATION.
Kenmore Ultra Wash HE with Smart display: On a Kenmore Ultra Wash high-efficiency dishwasher with smart display, press the following buttons within 5 seconds to get it out of the demo mode: HEATED DRY, HI TEMP, HI TEMP, HEATED DRY, HI TEMP, HI TEMP.
Kenmore Ultra Wash: To get a Kenmore Ultra Wash dishwasher out of demo mode, press the following buttons within 5 seconds: HI TEMP, HEATED DRY, HEATED DRY, HI TEMP, HEATED DRY, HEATED DRY.
Kenmore 630 series: For Kenmore dishwashers that begin with model number 630, follow these steps to disable the demo mode.
Turn the dishwasher off if it's on.
Press and hold the CHINA and QUICK buttons, then press POWER. Then release all 3 buttons.
Press QUICK until C4 appears in the display.
Press POWER to exit the demo mode.
Kenmore QuietGuard: You can cancel demo mode on a Kenmore QuietGuard dishwasher by pressing the following buttons within 5 seconds: HI TEMP SCRUB, AIR DRY, AIR DRY, HI TEMP SCRUB.
Kenmore Ultra Wash QuietGuard: Press CANCEL/DRAIN and then start the Quick Rinse cycle. Allow the Quick Rinse cycle run completely to disable the demo mode on a Kenmore Ultra Wash QuietGuard dishwasher.
Whirlpool dishwashers
Whirlpool Ultra Wash: To get a Whirlpool Ultra Wash dishwasher out of demo mode, press the following buttons within 5 seconds: HI TEMP, HEATED DRY, HEATED DRY, HI TEMP, HEATED DRY, HEATED DRY.
Whirlpool HE: For a Whirlpool high-efficiency dishwasher with a digital display on the top edge of the door, follow this procedure to disable the demo mode.
Press START/RESUME to wake the control.
Select 3 different buttons (except the START/RESUME and CANCEL buttons).
Press the buttons in this order: 1, 2, 3, 1, 2, 3, 1, 2, 3, with no more than a 1-second delay between button presses.
Close the door. The dishwasher runs through a 10-minute diagnostic test cycle and then disables the demo mode.
Whirlpool Sheer Clean: Press CANCEL/DRAIN and then start the Quick Rinse cycle. Allow the cycle to run completely to disable the demo mode in a Whirlpool Sheer Clean dishwasher.
GE dishwashers
All General Electric dishwashers: For all GE dishwasher models, hold the START and HEATED DRY buttons for 5 seconds to disable the demo mode.
KitchenAid dishwashers
KitchenAid HE: Follow these steps to disable demo mode on a KitchenAid high-efficiency dishwasher with a touch screen made in 2012 or later.
Unplug the dishwasher for 30 seconds to reset the control and then plug it back in. The Demo/Try It screen appears on the control panel upon power-up.
Find the Settings icon (it looks like a gear) in the top left corner of the display and the Information icon (i) in the top right corner.
Press the icons in this order within 5 seconds: INFORMATION, SETTINGS, INFORMATION, SETTINGS, INFORMATION.
KitchenAid Superba: You can cancel demo mode for a KitchenAid Superba dishwasher by pressing the following buttons within 5 seconds: HI TEMP SCRUB, AIR DRY, AIR DRY, HI TEMP SCRUB.
KitchenAid dish drawer: To disable the demo mode on a KitchenAid Dish Drawer, press the following buttons within 5 seconds: HI TEMP SCRUB, PRO DRY, PRO DRY, HI TEMP SCRUB, PRO DRY, PRO DRY.
Bosch dishwashers
Bosch EcoSense: Follow these steps to turn off the demo mode on a Bosch EcoSense dishwasher.
Turn the dishwasher off if it's on.
Press and hold the CHINA and QUICK buttons. Press POWER then release all 3 buttons.
Press QUICK until C4 appears in the display.
Press POWER to exit the demo mode.
Bosch Evolution with digital display: Use this procedure to exit the demo mode on a Bosch Evolution dishwasher with a digital display.
Press and hold START/PAUSE (display will show 0:01).
Press the forward selection (>) button and the DELAY button simultaneously (display will show 0:00).
Release all 3 buttons.
Press POWER within 10 seconds to turn off the dishwasher and exit demo mode.
Bosch Evolution without digital display: To disable the demo mode on a Bosch Evolution dishwasher without a digital display, follow these steps.
Press and hold START.
Press the forward selection (>) button and the DELAY button at the same time.
Release all 3 buttons.
Press ON/OFF within 10 seconds to turn off the dishwasher and exit the demo mode.
Bosch Integra: Follow these steps to exit the demo mode on a Bosch Integra dishwasher.
Press and hold START/RESET.
Press the backward selection (<) button and forward selection (>) button at the same time.
Release all 3 buttons.
Press ON/OFF within 10 seconds to turn off the dishwasher and disable the demo mode.
Electrolux dishwashers
Electrolux with digital display: For an Electrolux dishwasher with a digital display, enter the demo menu and turn off the demo mode using this procedure.
Press and hold the OPTIONS button and forward selection (>) button for 5 seconds to enter the Demo Menu.
Press the forward selection (>) button until DEMO ON appears in the display.
Press SET to turn off the demo mode. DEMO OFF appears in the display.
Press and hold the OPTIONS button and the forward selection (>) button for 5 seconds to exit the Demo Menu.
Jenn-Air dishwashers
Jenn-Air HE: Follow these steps to disable the demo mode on a Jenn-Air high-efficiency dishwasher with a touch screen made in 2012 or later.
Unplug the dishwasher for 30 seconds to reset the control and then plug it back in. The Demo/Try It screen appears on the control panel upon power-up.
Find the Settings icon (it looks like a gear) in the top left corner of the display and the Information icon (i) in the top right corner.
Press the icons in this order within 5 seconds: INFORMATION, SETTINGS, INFORMATION, SETTINGS, INFORMATION.
Most common symptoms to help you fix your dishwashers
Choose a symptom to see related dishwasher repairs.
Main causes: broken door spring, damaged or broken door hinge…
Main causes: damaged or stuck spray arm, leaking door seal, damaged door hinge, leaky heating element water seal, cracke…
Main causes: broken door latch, tripped circuit breaker, broken heating element, faulty vent fan, sensor failure, contro…
Main causes: improper loading, low water temperature, improper detergent dosage, detergent dispenser failure, spray arm …
Main causes: clogged kitchen sink drain, clogged drain hose, drain check valve damaged, drain pump failure, control syst…
Main cause: damaged rack height adjuster…
Main causes: glass or popcorn kernel stuck in the chopper blade, drain line vibrating against the cabinet, debris in was…
Main causes: not using rinse aid, rinse aid dispenser failure, broken heating element, malfunctioning vent, drying fan f…
Main causes: light switch beside the sink turned off, lack of power, bad dishwasher door switch, control system failure,…
Most common repair guides to help fix your dishwashers
These step-by-step repair guides will help you safely fix what’s broken on your dishwasher.

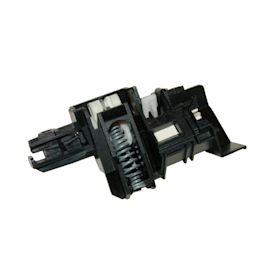
How to replace a dishwasher door latch assembly
If the dishwasher door doesn't click shut, a broken door latch is a likely cause. Follow these instructions to replace i…
Repair difficulty
Time required
30 minutes or less

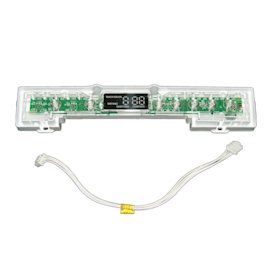
How to replace a dishwasher user interface control
The user interface control houses the selection buttons and display. If it fails, you can't select the cycle and setting…
Repair difficulty
Time required
30 minutes or less

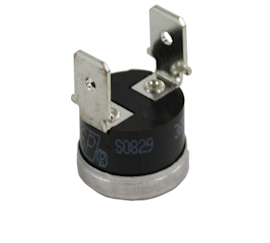
How to replace a dishwasher thermal fuse
A completely dead control panel often indicates that the thermal fuse on the electronic control board is blown; follow t…
Repair difficulty
Time required
15 minutes or less
Effective articles & videos to help repair your dishwashers
Use the advice and tips in these articles and videos to get the most out of your dishwasher.

Get tips on completing essential holiday cleaning tasks to brighten your home.…

Learn about all the convenient features on our Sears PartsDirect website that make your parts purchases easier.…

Get answers to frequently asked questions about Sears and Sears PartsDirect.…
