 Owner’s manual



Are all washers 27 inches wide?
No. Many full-size washers are about 27 inches wide, but not all; compact models are commonly closer to 24 inches, and some high-capacity designs run wider. For your GE GTW720BPN0DG washer, use the dimensions listed in the GTW720BPN0DG owner's manual to confirm the exact cabinet width.
Washer width is mainly driven by capacity and whether the unit is compact or full-size.
- Compact washers: typically about 24 inches wide
- Standard full-size washers: typically about 27 inches wide
- Oversize/high-capacity washers: often 28 to 29 inches wide
- Stackable laundry centers and combos: vary widely by design
Even when the cabinet width fits, you still need room for hoses, the drain standpipe, and service access.
- Measure the tightest point (doorway, hallway turns, closet opening)
- Plan for rear clearance for water hoses and the drain hose
- Leave space so the washer can be leveled and won’t rub walls during spin
- If installing in an alcove or closet, follow the minimum clearances in the manual
The installation instructions for this GE top-load platform specify these minimum clearances:
| Location | Minimum clearance |
|---|---|
| Left side | 0 in |
| Right side | 0 in |
| Front | 2 in |
| Rear | 3 in |
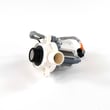
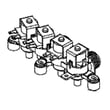
Choosing a washer by “27-inch standard” alone can lead to delivery problems and vibration issues. Correct width plus proper clearances helps prevent hose kinks, improves airflow in closets, and makes future repairs (like replacing a washer water inlet valve assembly WH13X26637 or GE washer drain pump assembly WH23X28418) much easier.
If you’re shopping for parts or confirming compatibility, we list model-specific parts for GTW720BPN0DG on this page, and you can also search by model number on Sears PartsDirect.
Last updated: February 2026
How to run self clean on GE washer?
On the GE GTW720BPN0DG washer, we run a self-clean by starting an empty Bulky Items cycle with 1 cup (250 ml) of liquid bleach in the basket, then pressing Start and letting the cycle finish without interruption. See the steps in the GTW720BPN0DG owner's manual.
- Remove all laundry and make sure the washer basket is empty.
- Open the lid; pour 1 cup (250 ml) liquid bleach (or a washing machine cleaner) directly into the basket.
- Close the lid.
- Select Bulky Items.
- Press Start.
- Let the cycle complete; do not interrupt it.
The washer display shows the estimated time remaining while the Bulky Items cycle runs. If you pause or lose power, the cycle can resume, but we recommend running a complete Bulky Items cycle before washing clothes again.
A few common control and lid-related conditions can prevent starting:
- Lid message: If 3 cycles were started without opening the lid, the washer requires you to open and close the lid before it will start again.
- Controls locked: If the controls are locked, the washer may blink when you press buttons.
- Lid lock active: The lid can remain locked during certain parts of operation.
| Symptom on display | What it usually means | What we do next |
|---|---|---|
| “Lid” | Lid needs to be opened between cycles | Open and close the lid, then restart Bulky Items |
| Controls locked indicator | Buttons/knob won’t change settings | Turn off Control Lock, then retry |
| Lid Lock indicator | Lid is locked during operation | Wait for it to unlock, then continue |
Running the monthly self-clean (Bulky Items) cycle helps reduce detergent buildup and odors inside the tub, and it keeps wash performance consistent on a high-efficiency top-load washer like the GE GTW720BPN0DG.
If you are ordering maintenance or repair items for this washer, we list model-matched parts on this page, and you can also search by model number on Sears PartsDirect.
Last updated: February 2026
What does NF mean on my washer?
On a GE GTW720BPN0DG washer, an “NF” message is commonly treated as a fill problem: the washer is not getting enough water in the time allowed to start or continue the cycle. On this model you may also see “H2O SUPPLY” when water is not entering the washer; both point you to the same checks. See the GTW720BPN0DG owner's manual for the exact display wording and the recommended steps.
- Make sure both hot and cold water faucets are fully open.
- Confirm the fill hoses are not kinked, crushed, or frozen.
- Check that the hose connections at the faucets and washer are tight and not leaking.
- Clean the inlet screens in the hose ends (sediment can restrict flow).
- Verify your home has normal water pressure at the laundry faucets.
- If the display shows a water-supply message, wait out the lockout period; this model can enter a 4-minute lockout when it detects no water coming in.
If the faucets and hoses check out, the most common repair is replacing the inlet valve that controls water flow into the tub.
| Symptom you notice | Most likely area | Part to consider for GTW720BPN0DG |
|---|---|---|
| No water enters at all | Water supply or inlet valve | Washer water inlet valve assembly WH13X26637 |
| Water enters very slowly | Inlet screens, supply pressure, inlet valve | Washer water inlet valve assembly WH13X26637 |
| Washer fills but then stops and won’t continue | Intermittent supply, valve, control sensing | Start with supply checks; then valve |
A fill error stops the cycle early, can leave detergent undissolved, and can trigger repeated restarts. Fixing the water-supply restriction protects the control system and gets wash performance back to normal.
We match parts by model and revision. Order replacement parts for your GE GTW720BPN0DG from the parts list for this model, or search by model number on Sears PartsDirect.
Last updated: February 2026


