Owner’s manual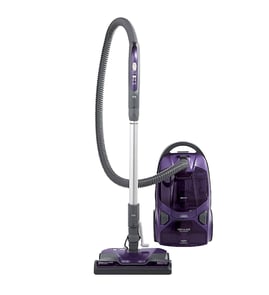

Can the canister to my Dyson be washed?
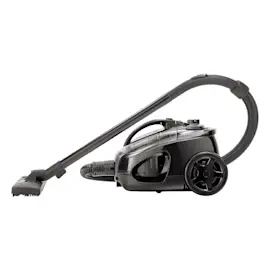
Yes, you can clean the Dyson DC22 canister (bin), but we recommend washing only where the manual allows and keeping water away from seals, filters, and electrical connections. For routine cleaning, wipe the bin with a damp cloth and let it fully dry before reinstalling; see the owner's manual.
What to do (safe cleaning steps)
- Turn the vacuum off and unplug it before any cleaning.
- Empty the bin into a trash bag to reduce dust blowback.
- Wipe the bin/canister with a damp microfiber cloth (no soaking).
- Avoid detergents, polishes, and scented sprays; they can leave residue that traps dust.
- Use a soft brush to loosen lint and fine dust from the cyclone/shroud area.
- Let all cleaned parts air-dry completely before reassembly.
What not to do
- Do not put the bin in a dishwasher.
- Do not submerge the bin unless your DC22 manual specifically says that part is washable.
- Do not reinstall parts while damp.
Quick guide: wipe vs. wash
| Cleaning method | Best for | Risk level | Typical dry time |
|---|---|---|---|
| Damp cloth wipe | Routine dust, fingerprints | Low | Minutes |
| Rinse (only if allowed) | Stubborn grime | Medium | 24 hours |
| Dishwasher | None | High | Not recommended |
Why it matters
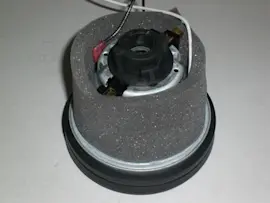
Moisture left in the bin or cyclone area can cause clogs, odors, and poor suction. Keeping the bin clean and fully dry helps your DC22 maintain airflow and reduces strain on the suction motor.
For more maintenance and troubleshooting tips (including suction problems), use our vacuum repair-guides landing page.
Last updated: February 2026
What is the average lifespan of a Dyson vacuum?
A Dyson vacuum typically lasts 7 to 10 years with normal household use and routine maintenance. For a Dyson DC22 canister vacuum, lifespan depends most on keeping airflow clear (filters, hoses, bin seals) and preventing overheating from clogs; the owner's manual covers the maintenance schedule and cleaning steps.
Typical lifespan ranges (what to expect)
- 7 to 10 years: common for corded vacuums with consistent care
- 5 to 7 years: heavy use, frequent fine dust, or repeated clogs/overheating
- 10+ years: light use plus regular filter and blockage maintenance
| Usage pattern | What usually wears first | What extends life most |
|---|---|---|
| Light (1 to 2 times/week) | Hoses, seals, brush components | Regular filter care, gentle handling |
| Average (2 to 4 times/week) | Brush roll/belts, filters | Clearing clogs early, cleaning bin and cyclones |
| Heavy (daily, pets) | Brush roll/belts, motor stress from restrictions | Strict clog checks, frequent cleaning, avoid overfilling |
Maintenance that most affects lifespan
- Empty the bin before it gets packed; packed debris restricts airflow.
- Clean or wash filters on the schedule recommended for the DC22.
- Check for clogs in the wand, hose, and floor tool when suction drops.
- Remove hair and string from the brush roll to reduce drag.
- Keep gaskets and seals clean so the vacuum does not lose suction.
Why it matters
Most “vacuum failures” are airflow problems. When suction is restricted, the motor runs hotter and works harder, which shortens the life of the vacuum. Consistent cleaning and quick clog removal are the biggest factors in reaching the 7 to 10 year range.
Helpful DIY resources
- Use our tips for caring for a vacuum cleaner to build a simple maintenance routine.
- If your floor tool stops agitating, follow vacuum brush roll on spinning to troubleshoot common causes.
Last updated: February 2026
Is it cheaper to repair or replace my Dyson?
For a Dyson DC22 canister vacuum, it’s usually cheaper to repair when the problem is a clog, dirty filters, a worn brush roll, or a belt issue. Replacement makes more sense when the suction motor is failing, multiple major parts are worn out, or repair costs approach the price of a comparable new vacuum.
Quick decision checklist
- Repair if the vacuum still runs and the issue is low suction, brush roll not spinning, or shutting off from overheating.
- Repair if you can restore performance with cleaning and routine maintenance (filters, bin, hoses).
- Replace if you smell burning, hear loud grinding from the motor area, or it repeatedly trips power.
- Replace if the vacuum needs multiple major repairs at once (motor plus power head plus wiring).
- Replace if parts and labor together are close to the cost of a replacement vacuum you’d be happy with.
Typical cost and effort comparison
| Scenario | What’s usually involved | Typical outcome |
|---|---|---|
| Loss of suction | Clear blockage, clean filters, check seals | Often a low-cost fix |
| Brush roll not spinning | Remove debris, inspect belt/brush roll | Often a moderate-cost fix |
| Shuts off during use | Clear airflow path, clean filters, cool-down reset | Often a no-parts fix |
| Won’t turn on | Check cord, switch, thermal cutout, motor | Can range from simple to major |
| Motor failure | Motor replacement and internal service | Often the tipping point to replace |
What we recommend checking first (DC22)
Use the owner's manual to follow the model-specific maintenance steps, then work through these common causes:
- Empty the bin and check for clogs in the wand, hose, and inlet.
- Wash or replace filters on schedule; restricted airflow causes overheating and shutdowns.
- Inspect the power head for hair/thread buildup around the brush roll.
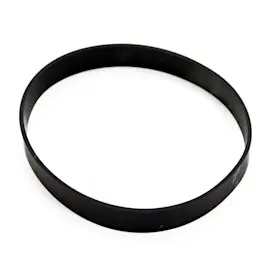
- Look for a stretched, cracked, or slipping drive belt.
- Confirm all connections and seals are seated; air leaks reduce suction.
Why it matters
Most “repair vs replace” decisions come down to whether the problem is airflow and agitation (usually repairable) or motor and electrical (often higher cost). Fixing airflow issues also prevents repeat shutdowns and protects the motor.
For step-by-step troubleshooting paths by symptom, use our vacuum repair-guides landing page.
Last updated: February 2026