- Kenmore refrigerator water filters
- Whirlpool refrigerator water filters
- Samsung refrigerator water filters
- GE refrigerator water filters
- LG refrigerator water filters
- Frigidaire refrigerator water filters
- KitchenAid refrigerator water filters
- Maytag refrigerator water filters
- Kenmore Elite refrigerator water filters
- Estate refrigerator water filters
- GE Profile refrigerator water filters
- Amana refrigerator water filters
- Bosch refrigerator water filters
- Dacor refrigerator water filters
- Electrolux refrigerator water filters
Top DIY repair help
View All Repair Categories
Appliances
Lawn & Garden
Power Tools
Home Improvement
Sports & Leisure
Heating & Cooling
Quick Links
How to replace a vacuum suction motor
less than a minute readMay 20Lyle Weischwill
Repair time and Difficulty
15 minutes or less
Tools Required
- Phillips screwdriver
- Work gloves
This DIY repair guide shows how to replace the suction motor in a canister vacuum. The motor, which is in the canister base, turns the fan that creates the vacuum's suction. If the motor stops working, the vacuum either won't have suction or won't run at all. If the problem is no suction, clear clogs from the hose and nozzle; if there's still no suction or if the motor doesn't run, replace the suction motor with the manufacturer-approved replacement part.
Use these steps to replace the suction motor in Kenmore, Whirlpool, Panasonic and Miele canister vacuum cleaners.
Instructions
- 1. Remove the exhaust filter
Pull the release tab on the exhaust filter cover and lift the exhaust filter cover off the vacuum cleaner. Remove the exhaust filter from the housing.
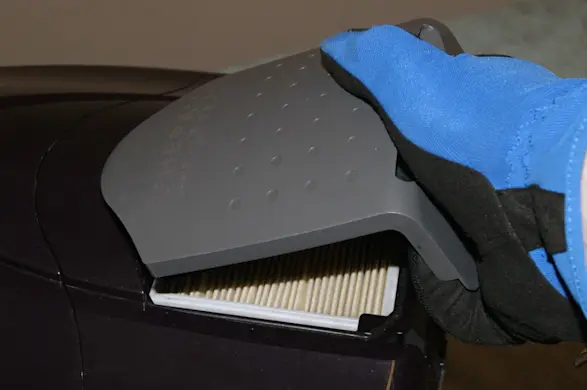
PHOTO: Remove the exhaust filter cover. 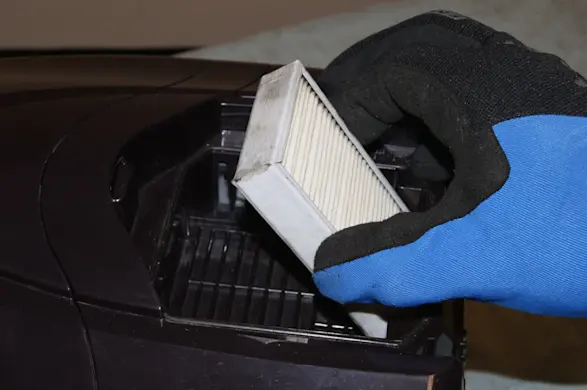
PHOTO: Remove the exhaust filter.
- 2. Remove the canopy hood
Pull the plastic release tab on the front of the canister and lift the canopy hood. Remove the hood from the canister.
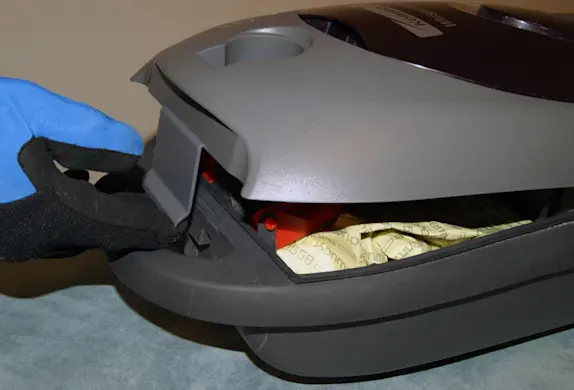
PHOTO: Remove the canopy hood.
- 3. Remove the motor cover
Remove the 4 screws that secure the motor cover and remove the cover.
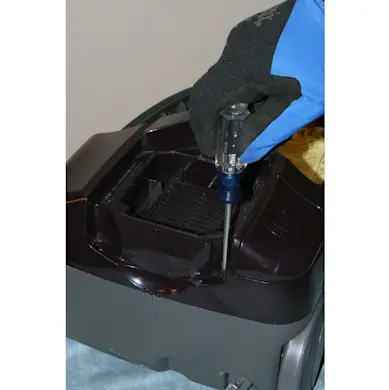
PHOTO: Remove the motor cover screws. 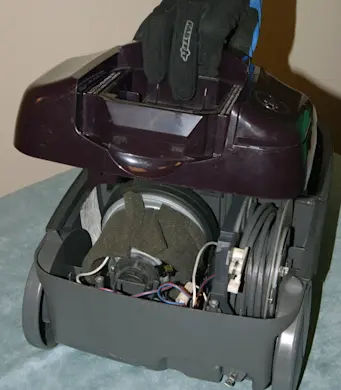
PHOTO: Remove the motor cover.
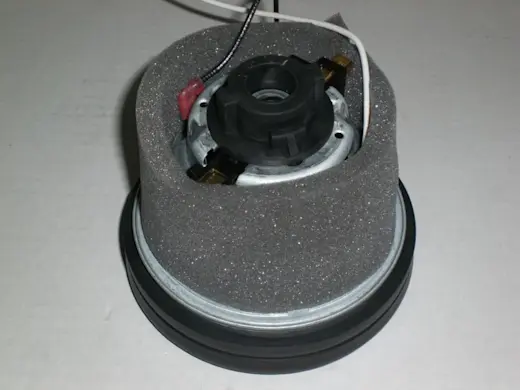
- 4. Remove the motor
With the wires still attached, carefully lift the suction motor out of the canister. Remove the foam padding that surrounds the motor.
Note the location of the wires and then disconnect them. Remove the motor and set aside for disposal.
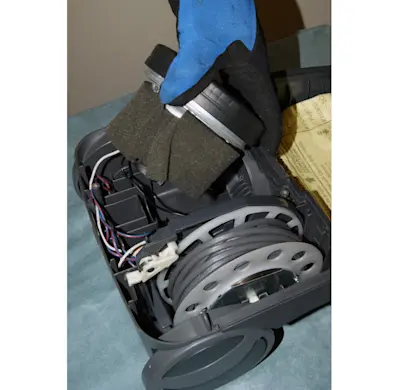
PHOTO: Pull out the motor. 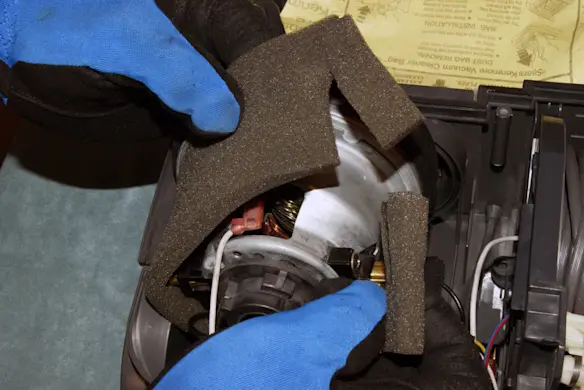
PHOTO: Remove the foam cover. 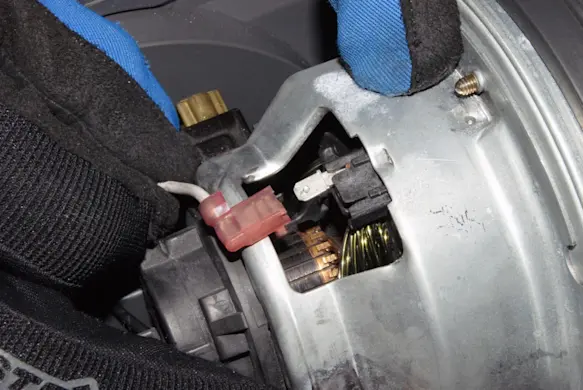
PHOTO: Disconnect the motor wires. Tip: Take a digital photo of the connections before removing the wires.
- 5. Install the new motor
Connect the wires to the new motor. Wrap the foam padding around the motor and then slide the motor into the canister.
- 6. Reinstall the motor cover and canister hood
Reinstall the motor cover, insert the screws and tighten firmly. Snap the hood into place on the canister.
- 7. Reinstall the exhaust filter
Reinstall the exhaust filter in the housing at the back of the canister. Snap the exhaust filter cover into place.