 Installation guide
 Owner’s manual



Are Kenmore microwaves good?
Yes. Kenmore microwaves are a good choice for most kitchens because they typically deliver solid everyday performance and features for the price. For the Kenmore Elite 72186012010 microwave/hood combo, long-term satisfaction depends most on correct installation, proper venting, and using the unit safely as outlined in the 72186012010 installation guide.
What “good” usually means for a Kenmore microwave
When customers say a microwave is “good,” they usually mean it heats evenly, runs reliably, and is easy to live with.
- Value: Kenmore models often offer strong features per dollar.
- Convenience: Over-the-range units add a hood fan and light to save space.
- Longevity: Many units last well with clean filters, good airflow, and gentle door use.
- Serviceability: Common wear items (filters, bulbs, switches) are replaceable.
Model-specific checks that affect performance
Your installation and electrical setup matter as much as the brand.
- Use a dedicated 120V, 60Hz, 20A fused supply as specified.
- Confirm the microwave is properly grounded (3-prong grounding plug).
- Keep the door sealing surfaces clean so the door closes correctly.
- Do not operate the unit if the door, hinges, latches, or seals are damaged.
Quick “good vs. not good” checklist
| What you notice | What it usually points to | What to do next |
|---|---|---|
| Runs but does not heat well | Heating circuit issue | Use why is my microwave not heating for troubleshooting steps |
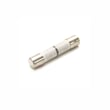
| Dead display or no power | Fuse or power supply problem | Check power source; consider us pressed steel microwave fuse 3B74133Q |
| Loud hum, burning smell, arcing | Unsafe condition | Stop using and have it serviced |
Why it matters
A microwave/hood combo is both a cooking appliance and a ventilation appliance. Correct mounting support, clearances, and grounding help prevent nuisance failures and protect key components like the control panel, door interlocks, and high-voltage system.
Last updated: February 2026
How many cubic feet is a Kenmore Model 72186012010 microwave?
The Kenmore Elite 72186012010 microwave/hood combo has a 1.7 cubic foot oven capacity. Use this capacity to judge whether your cookware fits comfortably and to compare similar over-the-range microwaves when shopping for accessories or planning a replacement.
How to confirm you have the right model
We recommend matching the model number on the unit to ensure you are using the correct specs and parts list.
- Check the model label on the oven front (behind the door area on many units)
- Confirm the model reads 72186012010 (not 721.86012, 721.86013, or 721.86019)
- Use the diagrams in the 72186012010 installation guide to locate the model label
- If your unit is a close model variant, parts and dimensions can still differ
Capacity vs. physical size (quick reference)
Capacity (cubic feet) is the inside cooking volume; it is different from the outside dimensions used for installation.
| Spec type | What it tells you | Where it matters most |
|---|---|---|
| Capacity (cu. ft.) | Interior cooking space | Dish size, meal prep, accessory fit |
| Width/height/depth | Exterior size of the microwave | Cabinet opening, mounting, venting |
For installation planning, the installation instructions list these exterior dimensions:
- Height: 16-7/16 in.
- Width: 29-15/16 in.
- Depth: 15-3/8 in.
Why it matters
A 1.7 cu. ft. Kenmore Elite microwave/hood combo typically fits most dinner plates and medium casserole dishes, but taller cookware can still interfere with the turntable or rack. Knowing the capacity helps prevent poor fit and uneven heating.
Last updated: February 2026
How to reset a Kenmore Elite microwave?
To reset your Kenmore Elite microwave/hood combo model 72186012010, unplug it (or turn off the breaker) for about 1 minute, then restore power and set the clock. This clears most control glitches and returns the unit to normal operation; see the 72186012010 owner's manual for model-specific steps.
Quick reset options (most common)
- Power reset (recommended): Unplug for 60 seconds, then plug back in.
- Breaker reset: Turn the microwave circuit breaker OFF for 60 seconds, then ON.
- Control lock check: If the keypad seems “dead,” disable Control Lock (often a 3-second press on a key such as Stop/Clear or Lock).
- Stop/Clear reset: Press Stop/Clear once to cancel a cooking cycle and clear many temporary errors.
What to do after you reset
After power is restored, we recommend these steps:
- Set the clock and confirm the display is normal.
- Run a 30-second water test (microwave-safe cup with water) to confirm heating.
- Start the hood fan and cooktop light to confirm hood functions.
- Confirm the turntable rotates and the door closes firmly.
| Symptom after reset | What it usually means | Best next step |
|---|---|---|
| Display is blank | No power to unit | Check outlet, breaker, and cord seating |
| Runs but does not heat | High-voltage circuit issue | Use our guide why is my microwave not heating |
| Goes dead when starting | Fuse or door switch issue | Consider us pressed steel microwave fuse 3B74133Q and door switch checks |
| Fan/light work, keypad erratic | Control issue | Review keypad functions in the manual |
Why it matters
A reset is the fastest way to clear a “stuck” control board state after a power flicker or interrupted cycle. If the microwave repeatedly loses power or won’t heat after a reset, the problem is typically electrical (fuse, door interlock switch, or high-voltage components) and needs targeted troubleshooting.
Last updated: February 2026
What is the standard height for a microwave hood?
For the Kenmore Elite 72186012010 microwave/hood combo, the standard install height is 30 inches minimum from the cooking surface (range top) to the bottom of the upper cabinet area where the unit mounts. This clearance helps protect cabinets and provides safe, usable cooking space; confirm your exact layout in the installation guide.
Standard clearances to follow
Most over-the-range microwave/hood combos, including model 72186012010, are planned around these common clearances:
- 30 inches minimum from cooking surface to the bottom of the cabinet area before installation
- 30-inch minimum cabinet opening width
- Mount to a flat vertical wall with proper framing support
- Secure the unit with lag screws into at least one wall stud
- Use a dedicated 120V, 60Hz, 20A electrical supply in the upper cabinet area
Quick reference table
| Measurement | Typical standard for this setup | Why it matters |
|---|---|---|
| Cooking surface to microwave mounting area | 30 in. minimum | Heat clearance and safe operation |
| Cabinet opening width | 30 in. minimum | Ensures the microwave fits and vents correctly |
| Electrical supply | 120V, 60Hz, 20A | Prevents nuisance trips and overheating |
How to measure it correctly
Use a tape measure and check these points before drilling:
- Measure from the top of the range/cooktop straight up to the planned bottom of the microwave
- Verify the upper cabinet depth and opening width match the template requirements
- Locate wall studs (typically 16 inches apart) and plan to anchor the mounting plate into a stud
- Confirm the outlet location in the upper cabinet matches the cord reach shown in the installation guide
Why it matters
Correct microwave hood height affects ventilation performance, cabinet protection, and safe cooking access. Too low can overheat cabinets and restrict cookware clearance; too high reduces capture of smoke and steam.
Last updated: February 2026


