Installation guide
 Owner’s manual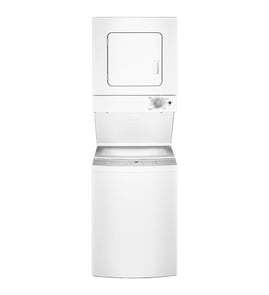


How many cubic feet is a Kenmore model 2661532110 washer?
The washer capacity for Kenmore stacked laundry center model 2661532110 is 3.9 cubic feet. You can confirm this in the specifications section of the 2661532110 owner's manual, which lists the washer tub capacity in cu. ft.
Quick spec
| Model | Appliance type | Washer capacity |
|---|---|---|
| 2661532110 | Kenmore stacked laundry center | 3.9 cu. ft. |
How we recommend verifying capacity on your unit
Use the model-specific spec so you are matching the correct tub and basket design.
- Check the Specifications pages for “Capacity” or “Washer capacity (cu. ft.)”
- Match the full model number 2661532110 exactly
- Use the capacity value in cubic feet (not “small/medium/large” load wording)
- If you are comparing laundry centers, compare washer capacity separately from dryer drum size
Why it matters
Washer capacity affects load size, cleaning performance, and out-of-balance spinning. A 3.9 cu. ft. basket handles larger mixed loads than compact laundry center washers, but still performs best when items are loaded loosely.
If you are troubleshooting performance instead of capacity
Capacity is often blamed when the real issue is loading, leveling, or a lid safety problem.
- Level the unit to reduce vibration during spin (leveling steps are in the 2661532110 installation guide)
- Load bulky items evenly to prevent banging and off-balance stops
- If the washer will not start or spin, check the lid switch and lid lock system
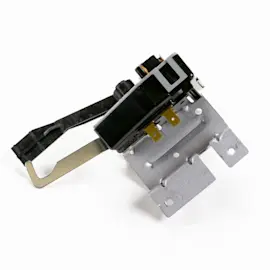
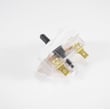
- For lid lock related symptoms, the washer lid lock WH44X10288 is a common related part on this model
Last updated: February 2026
How to hard reset a Kenmore dryer?
To hard reset the dryer section on your Kenmore stacked laundry center model 2661532110, disconnect power by unplugging the unit (or switching the breaker off) for about 1 to 5 minutes, then restore power and try a normal cycle. This clears many temporary control glitches and unresponsive button issues.
Hard reset steps (safe and effective)
- Turn the dryer OFF.
- Unplug the laundry center; if you cannot access the plug, switch the circuit breaker OFF.
- Wait 1 to 5 minutes.
- Restore power.
- Close the dryer door firmly and start a timed dry cycle.
- If the panel is still unresponsive, repeat once and then move to the checks below.
For model-specific safety notes and access locations, follow the 2661532110 installation guide.
If the dryer still will not start after a reset
A reset only clears the control; it will not fix a failed switch, airflow restriction, or motor issue.
Common next checks:
- Confirm the dryer door fully closes; a failed door switch can prevent starting (see dryer door switch WE4M415).
- Make sure the Start button actually clicks; a worn start switch can act dead (see dryer push-to-start switch WE4M416).
- Clean the lint screen and verify strong airflow at the outside vent.
- Inspect the venting for crushed ducting; keep the run short and as straight as possible.
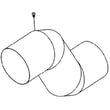
- If the drum will not turn, check for a broken belt (see dryer drum belt WE03X29897).
Quick symptom-to-likely-cause table
| What you notice | Most likely cause | What to check next |
|---|---|---|
| No response at all | No power, door switch, start switch | Breaker, outlet, WE4M415, WE4M416 |
| Hums but will not tumble | Belt issue, motor issue | WE03X29897, motor pulley area |
| Runs but clothes stay damp | Airflow restriction, heating problem | Lint screen, venting, heater circuit |
Why it matters
A hard reset is a fast first step, but dryers depend on door-switch safety circuits and proper exhaust airflow. Good airflow prevents long dry times and helps protect internal components from overheating.
Last updated: February 2026
How to remove front panel of Kenmore washer?
On the Kenmore 2661532110 stacked laundry center, the service information and wiring diagram are located at the access panel; removing the front panel is mainly about safely disconnecting power, then removing the fasteners that secure the panel so you can tilt it out and lift it off the lower tabs.
Before you start (safety and setup)
- Unplug the laundry center (do not rely on the control being off).
- Turn off both hot and cold shutoff valves.
- If you need to move the unit, protect the leveling legs to avoid vibration issues later.
- Keep screws organized by step so reassembly is straightforward.
- Use gloves; sheet-metal edges behind panels can be sharp.
For model-specific panel locations and fastener callouts, use the 2661532110 installation guide.
Typical front panel removal steps (unitized laundry center)
- Disconnect power and confirm the unit is fully off.
- Access the lower/front access area; on many unitized Kenmore-style centers, the service info is behind this access panel.
- Remove the retaining screws along the bottom edge and/or inside the access opening (locations vary by revision).
- Tilt the panel outward from the top edge, then lift up to release it from the lower tabs/clips.
- If the panel will not release, check for hidden screws near the corners or behind trim pieces.
What you can do once the panel is off
| What you are checking | What it usually tells you |
|---|---|
| Wiring diagram/service sheet | Diagnostic steps and component locations |
| Drain area and hoses | Leaks, clogs, loose clamps |
| Belt and drive area | Slipping, squealing, no-agitate/no-spin symptoms |
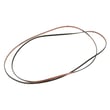
If you are chasing a no-spin or burning-rubber smell, the washer drive belt WH01X20436 is a common wear item on this style of laundry center.
Why it matters
Removing the front panel the right way prevents bent panels, stripped screw holes, and damaged wiring. It also gives you access to the service information that speeds up troubleshooting and helps you confirm the correct Kenmore parts for model 2661532110.
Last updated: February 2026
How to unclog drain hose on Kenmore washer?
For the Kenmore 2661532110 stacked laundry center, we unclog the washer drain hose by safely disconnecting power, draining any standing water, then clearing the blockage from the hose and the drain pump inlet. Reinstall the hose with the factory hose stopper in place to help prevent siphoning (per the 2661532110 installation guide).
Safety first
- Unplug the laundry center (or switch off the breaker).
- Turn off both water supply valves.
- Keep a shallow pan and towels ready; drain hoses can release water quickly.
- If the unit is gas, avoid moving it aggressively; keep the gas line from kinking.
Step-by-step: unclog the drain hose
- Remove water from the tub: Bail water into a bucket, or use a wet/dry shop vac at the standpipe end of the drain hose.
- Access the drain hose connection: Pull the unit forward enough to reach the rear connections.
- Disconnect the hose: Loosen the clamp and remove the drain hose from the home drain (standpipe or wall drain).
- Clear the clog:
- Run hot water through the hose (outside or in a tub).
- Use a small drain snake or flexible brush to pull out lint, coins, or debris.
- Check the hose ends for a sock or lint plug.
- Check the pump path: If the hose is clear but it still will not drain, inspect the pump inlet area for debris and verify the impeller turns freely.
- Reinstall correctly: Insert the hose into the home drain only up to the hose stopper and secure it with the provided tie method described in the 2661532110 installation guide.
Correct drain hose setup (prevents repeat clogs)
| Item to check | What “correct” looks like | Why it helps |
|---|---|---|
| Hose stopper | Stays on the hose | Reduces siphoning and backflow |
| Insertion depth | Only up to the stopper | Prevents the hose from sealing the standpipe |
| Securing method | Tied to standpipe or water hose | Prevents the hose from popping out |
When a part is the real problem
A clog often damages the pump. If you hear humming but get no drain flow, the washer drain pump can be the failure point. For this model, the replacement is the washer drain pump WH23X10040.
Why it matters
A restricted drain hose makes the washer drain slowly or not at all, which can leave clothes soaking wet, trigger drain-related errors, and strain the drain pump and control system.
Last updated: February 2026
Is it worth repairing a Kenmore washing machine?
Yes, repairing a Kenmore washer is worth it when the fix restores reliable operation for less than the cost of replacing the unit, especially on a stacked laundry center like model 2661532110 where installation, venting, and drain setup add extra replacement cost. Use the 2661532110 owner’s manual to confirm symptoms and safe checks.
Quick decision checklist
- The washer fills, drains, and spins normally after basic checks (power, lid closed, load balance).
- The problem is isolated to a common wear part (belt, lid lock, drain pump) rather than multiple systems.
- The tub and basket are in good shape (no severe rust, cracks, or repeated leaks).
- The repair cost is reasonable compared to a new laundry center plus installation.
- You can complete the repair safely (unplug power, shut off water, verify venting and drain setup).
Common repairs that are usually worth doing on 2661532110
Many “won’t start” or “won’t spin” complaints come from safety interlocks or drive components.
| Symptom | Often involved | Example part for this model |
|---|---|---|
| Won’t start or stops mid-cycle | Lid lock or lid switch | Washer lid lock WH44X10288 or washer lid switch assembly WH12X10334 |
| Won’t drain | Drain pump or blockage | Washer drain pump WH23X10040 |
| Agitates/spins poorly | Drive belt or pulley issues | Washer drive belt WH01X20436 |
Why installation factors matter for “worth it”
With a stacked laundry center, replacement is not just swapping a washer. Your setup must meet key requirements like proper drain height and capacity, and correct dryer venting. For example, the drain standpipe height needs to be within the specified range and the standpipe must allow an air gap to prevent siphoning; venting should use appropriate metal ducting for best performance. Those extra requirements can make repair the smarter path when the failure is a single part.
What we recommend before you decide
- Confirm the exact failure mode (won’t start, won’t drain, won’t spin, leaking, loud noise).
- Check for error codes and match them to the washer section: Kenmore 417 laundry center -washer error codes.
- Price the likely part and compare it to replacement cost including delivery, hookups, and any vent or drain changes.
Last updated: February 2026
Where to find the model number on a Kenmore laundry center?
On Kenmore stacked laundry center model 2661532110, the model number is printed on a rating label attached to the appliance cabinet. The most common spots are under the washer lid, along the washer cabinet side near the bottom, or (on front-load versions) on the washer door jamb.
Most common label locations to check
- Under the washer lid on the top frame or rim
- Inside the washer opening near the tub rim
- On the side of the washer cabinet near the bottom edge
- On the back of the unit near the service/access panel area
- On front-load washer versions, inside the door jamb
What the model number looks like (and why it matters)
The model number is usually a short string of numbers and sometimes letters. For this unit, you are looking for 2661532110. Having the exact model number helps us match the correct Kenmore parts, wiring diagrams, and installation requirements.
| What you need | Example for this unit | Used for |
|---|---|---|
| Model number | 2661532110 | Finding the right parts list and manuals |
| Serial number | (varies) | Manufacturing date and service history |
Tips to find it fast
- Use a flashlight and check for a silver or white sticker.
- Wipe dust off the cabinet edge; labels can blend in.
- If the unit is in a tight closet, check the cabinet edges first before pulling it out.
- If you are already removing panels for service, follow the wire-labeling guidance in the 2661532110 installation guide to keep reconnection safe and accurate.
Why it matters
Kenmore laundry centers often share similar looks across multiple series, but parts like a lid lock, control board, or dryer door switch can vary by model. Using the exact model number prevents ordering the wrong replacement.
Last updated: February 2026