Free standard ground shipping within the 48 contiguous states with any water filter subscription. Find my filter

Open Hamburger Menu
Sears Parts Direct
Tips to find your model number

GE GTD65GBSJ4WS dryer gas Parts

Here are the diagrams and repair parts for GE GTD65GBSJ4WS dryer gas, as well as links to manuals and error code tables, if available.

GE GTD65GBSJ4WS dryer gas
By Schematic
By Part
SELECT DIAGRAM
?

This is the number corresponding to the part on the diagram / schematic

Browse Parts forGTD65GBSJ4WS Dryer Gas

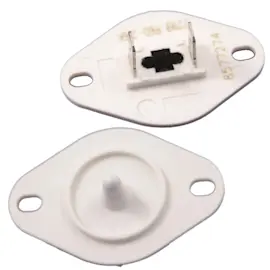
  • Dryer High-limit Thermostat for GE GTD65GBSJ4WS - Part WE04X26138

    Drum diagram

    Dryer High-limit Thermostat

    In Stock
    $8.68
    10% OFF Phone Price : $9.68Info Icon
    Minus Item
    Qty
    Plus Item
  • Dryer Drum Assembly for GE GTD65GBSJ4WS - Part WE21X23869

    Drum diagram

    Dryer Drum Assembly

    Part #WE21X23869
    This item is not returnable
    Delayed Shipping IconSpecial order manufacturer
    This part is a special-ordered from the manufacturer and will ship to you once it arrives at our warehouse.
    Delayed Shipping IconOversize item
    This part exceeds standard shipping size or weight limits, so an additional oversize shipping charge will apply. Oversize shipping surcharges are not eligible for any discounts or promotions. It will be shown in your order total at checkout.
    In Stock
    $408.44
    $12.00 OFF Phone Price : $420.44Info Icon
    Minus Item
    Qty
    Plus Item
  • Dryer Drum Bearing Bracket for GE GTD65GBSJ4WS - Part WE1M300

    Drum diagram

    Dryer Drum Bearing Bracket

    In Stock
    $47.92
    11% OFF Phone Price : $53.92Info Icon
    Minus Item
    Qty
    Plus Item
  • Dryer Blower Wheel for GE GTD65GBSJ4WS - Part WH16X34317

    Backsplash, blower & motor assembly diagram

    Dryer Blower Wheel

    Part #WE16X23857

    Replaced by #WH16X34317

    Info Icon
    Manufacturer substitution
    This part replaces WE16X23857. Substitute parts can look different from the original.
    In Stock
    $62.87
    Minus Item
    Qty
    Plus Item
  • Dryer Drum Front Bearing, Upper for GE GTD65GBSJ4WS - Part WE03X23956

    Front panel & door diagram

    Dryer Drum Front Bearing, Upper

    Part #WE03X23956
    This item is not returnable
    In Stock
    $38.48
    13% OFF Phone Price : $44.48Info Icon
    Minus Item
    Qty
    Plus Item
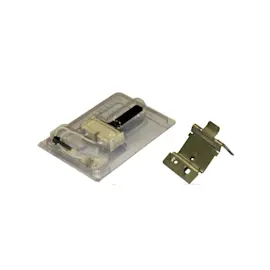
  • Dryer Door Catch for GE GTD65GBSJ4WS - Part WE01X25316

    Front panel & door diagram

    Dryer Door Catch

    Part #WE01X25316
    This item is not returnable
    In Stock
    $34.28
    15% OFF Phone Price : $40.28Info Icon
    Minus Item
    Qty
    Plus Item
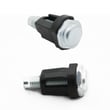
  • Cap Nut for GE GTD65GBSJ4WS - Part WE2M96

    Backsplash, blower & motor assembly diagram

    Dryer Cap Nut

    Part #WE2X329

    Replaced by #WE2M96

    Info Icon
    Manufacturer substitution
    This part replaces WE2X329. Substitute parts can look different from the original.
    In Stock
    $38.88
    Minus Item
    Qty
    Plus Item
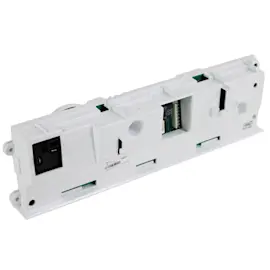
  • Dryer Electronic Control Board for GE GTD65GBSJ4WS - Part WE22X35978

    Backsplash, blower & motor assembly diagram

    Dryer Electronic Control Board Assembly

    Part #WE04X29097

    Replaced by #WE22X35978

    Info Icon
    Manufacturer substitution
    This part replaces WE04X29097. Substitute parts can look different from the original.
    This item is not returnable
    In Stock
    $340.61
    Minus Item
    Qty
    Plus Item
  • Dishwasher Door Switch for GE GTD65GBSJ4WS - Part WD21X10261

    Backsplash, blower & motor assembly diagram

    Interlock Switch

    Part #WD21X0557

    Replaced by #WD21X10261

    Info Icon
    Manufacturer substitution
    This part replaces WD21X0557. Substitute parts can look different from the original.
    In Stock
    $26.36
    19% OFF Phone Price : $32.36Info Icon
    Minus Item
    Qty
    Plus Item
  • Dryer Door Seal for GE GTD65GBSJ4WS - Part WE1M825

    Dryer Door Seal

    In Stock
    $9.32
    10% OFF Phone Price : $10.32Info Icon
    Minus Item
    Qty
    Plus Item

GE Dryer Gas GTD65GBSJ4WS FAQs

For the GE GTD65GBSJ4WS gas dryer, there is no “reset” button on the heating element; the practical reset is a power reset, then confirming airflow and heat controls are working. Turn the dryer off, shut off power for 1 minute, restore power, and run a timed dry cycle to check for heat.

Safe reset steps (power reset)

  • Unplug the dryer (or switch the dryer breaker off).
  • Wait 60 seconds.
  • Restore power.
  • Start Timed Dry on High heat for 3 to 5 minutes.
  • Check for warm air at the exhaust and normal drum tumbling.

If it still will not heat: what to check next

On a gas dryer, “no heat” is usually airflow restriction or a failed heat-safety/control part, not something that can be reset.

  • Clean the lint screen and confirm it is seated correctly; replace a damaged screen such as the GE dryer lint screen WE03X23881.
  • Inspect and clear the vent duct to the outside (crushed hose, lint clog, blocked hood).
  • Listen for ignition: you may hear a click and a brief whoosh when the burner lights.
  • If the dryer tumbles but never heats, common suspects include the igniter and thermostats.
  • If heat starts then stops quickly, overheating from poor airflow can trip the high-limit thermostat.
Symptom Most likely area Example part for GTD65GBSJ4WS
No ignition at all Ignition system Igniter WE04X25996
Heats briefly then stops Overheat protection / airflow Dryer high-limit thermostat WE04X26138
Poor temperature control Temperature sensing Dryer thermistor WE4M448

Why it matters

A restricted vent can make drying slow and can overheat the burner area, which can shut heat down and damage components. Restoring proper airflow often fixes “no heat” complaints and helps protect parts like the thermistor and high-limit thermostat.

Last updated: February 2026

On the GE GTD65GBSJ4WS gas dryer, the thermal fuse is typically mounted on the blower housing inside the cabinet, close to where the exhaust air leaves the drum area. You usually reach it by removing the front panel (and sometimes the drum) to access the blower housing.

What to look for (common placement)

In this GE-style cabinet layout, the thermal fuse is most often:

  • Attached to the blower housing (near the lint chute and exhaust outlet)
  • A small, flat plastic or metal-bodied fuse with 2 wire terminals
  • Located near other safety or temperature-sensing parts (thermostat or thermistor)
  • Positioned where it can sense overheating exhaust airflow

Quick access checklist (safe DIY steps)

Before opening the dryer, we recommend these basics:

  • Unplug the dryer from the outlet
  • Shut off the gas supply valve to the dryer
  • Let the dryer cool completely if it recently ran
  • Take a photo of wire connections before removing any terminals
  • Vacuum lint buildup around the lint chute and blower area while you are in there

Why the location matters

A thermal fuse opens when airflow or temperature conditions become unsafe. Because it is protecting against overheating exhaust conditions, manufacturers commonly place it on or near the blower housing where airflow problems show up first.

If you are diagnosing a no-heat or no-run condition, these model-matched parts are commonly inspected along with the thermal fuse:

Part What it affects When it is suspect
Dryer high-limit thermostat WE04X26138 Overheat protection Dryer overheats, heat cuts out
Dryer thermistor WE4M448 Temperature sensing Erratic temps, long dry times
Dryer heating element control thermistor WE4M398 Temperature control feedback Poor heat regulation
GE dryer lint screen WE03X23881 Airflow Lint bypass, weak airflow

If the thermal fuse is blown, fix the cause first

Replacing a blown fuse without correcting airflow usually leads to repeat failure. Focus on:

  • Crushed or excessively long vent hose
  • Clogged vent duct to the outside
  • Lint buildup in the lint chute or blower wheel area
  • Blocked exterior vent hood flap

Last updated: February 2026

On the GE GTD65GBSJ4WS gas dryer, we typically find the model and serial tag (where GE lists identifying numbers used to match parts) on the door opening area, either on the inside of the dryer door or on the door frame. Use that tag information to select the correct replacement part.

Where to look on the dryer

Check these common label locations first:

  • Inside the dryer door (open the door and look along the inner panel)
  • Door frame around the opening (especially the upper or side edge)
  • Front panel just inside the opening (near the lint screen housing on some builds)
  • Rear panel label (less common, but worth a quick check)

What numbers matter for ordering parts

For GE dryers, the tag usually includes multiple identifiers. Here is how we use them:

What you see on the tag What we use it for Example for your dryer
Model number Confirms the exact dryer version GTD65GBSJ4WS
Serial number Helps identify production run (can affect part revisions) Varies
Part number Usually not printed as a single “part number” for every component Not applicable

Quick tips to avoid ordering the wrong part

Before you buy a replacement, we recommend:

  • Write down the full model number exactly as shown (letters and numbers)
  • Take a clear photo of the tag for reference
  • Match the symptom to the correct component (belt, switch, igniter, thermistor)
  • If the dryer will not start, check the door switch first (example: dryer door switch WE04X28977)
  • If the drum will not tumble, check the belt and idler system (example: dryer drum belt WE03X29897)

Why it matters

GE can use different part revisions across production runs, even within the GTD65GBSJ4WS model family. Using the model and serial information from the tag helps us match the correct GE dryer parts the first time.

Last updated: February 2026
Most common symptoms to help you fix your dryers

Choose a symptom to see related dryer repairs.

Main causes: bad gas valve coils, broken heating element, tripped safety thermostat or fuse, bad operating thermostat, c...

Main causes: clogged exhaust system, heating system failure, deposits on moisture sensor, control system failure...

Main causes: clogged exhaust vent, bad motor relay, loose dryer door catch, bad door switch, control system failure, fau...

Main causes: door switch failure, lack of power, broken belt, blown thermal fuse, bad drive motor, control system failur...

Main causes: damaged door strike, worn door catch...

Main causes: lack of electrical power, bad power cord, wiring failure, bad control board, blown thermal fuse, bad door s...

Main causes: bad timer or electronic control board, door switch failure...

Main causes: bad drum support roller, damaged idler pulley, broken blower fan blade, worn drum glide bearing, bad drive ...

Most common repair guides to help fix your dryers

These step-by-step repair guides will help you safely fix what’s broken on your dryer.

How to replace an electronic control board in an electric dryer

How to replace an electronic control board in an electric dryer

The electronic control board manages the components and controls the cycle times in your electric dryer. Follow these st...

Repair time and Difficulty

 45 minutes or less
How to replace an igniter in a gas dryer

How to replace an igniter in a gas dryer

The igniter in a gas dryer glows white hot during the to light the gas that heats the air in the dryer. If the dryer air...

Repair time and Difficulty

 60 minutes or less
How to replace a dryer thermistor

How to replace a dryer thermistor

The thermistor senses the air temperature in the dryer. If your dryer overheats or doesn't heat at all, the thermistor ...

Repair time and Difficulty

 30 minutes or less

Effective articles & videos to help repair your dryers

Use the advice and tips in these articles and videos to get the most out of your dryer.

How to use your clothes dryer efficiently

How to use your clothes dryer efficiently

Get expert tips on using your dryer efficiently to save energy....

Are DIY appliance repairs safe?

Are DIY appliance repairs safe?

Find out how to stay safe when repairing your appliances....

Keeping your smart appliances secure from hackers

Keeping your smart appliances secure from hackers

Find out how to protect your smart appliances from malevolent invasions by hackers....