Get free shipping on your order, with any water filter subscription. Find my filter

Open Hamburger Menu
Sears Parts Direct
Tips to find your model number

GE GTW845CPN0DG washer Parts

Here are the diagrams and repair parts for GE GTW845CPN0DG washer, as well as links to manuals and error code tables, if available.

GE GTW845CPN0DG washer
By Schematic
By Part
SELECT DIAGRAM
?

This is the number corresponding to the part on the diagram / schematic

Browse Parts for GTW845CPN0DG Washer

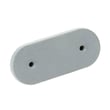
  • Lid Bumper Center for GE GTW845CPN0DG - Part WH02X34897

    Top panel & lid diagram

    Lid Center

    Part #WH01X24110

    Replaced by #WH02X34897

    Info Icon
    Manufacturer substitution
    This part replaces WH01X24110. Substitute parts can look different from the original.
    In Stock
    $37.50
    Minus Item
    Qty
    Plus Item
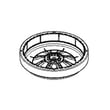
  • Lid Lock for GE GTW845CPN0DG - Part WH08X37938

    Top panel & lid diagram

    Washer Lid Lock

    Part #WH01X27954

    Replaced by #WH08X37938

    Info Icon
    Manufacturer substitution
    This part replaces WH01X27954. Substitute parts can look different from the original.
    In Stock
    $78.53
    7% OFF Phone Price : $84.53Info Icon
    Minus Item
    Qty
    Plus Item
  • Lid Lock for GE GTW845CPN0DG - Part WH08X37938

    Top panel & lid diagram

    Washer Lid Strike

    Part #WH02X24106

    Replaced by #WH08X37938

    Info Icon
    Manufacturer substitution
    This part replaces WH02X24106. Substitute parts can look different from the original.
    In Stock
    $78.53
    7% OFF Phone Price : $84.53Info Icon
    Minus Item
    Qty
    Plus Item
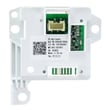
  • Main Board for GE GTW845CPN0DG - Part WH22X31618

    Controls & backsplash diagram

    Washer Electronic Control Board

    Part #WH22X29502

    Replaced by #WH22X31618

    Info Icon
    Manufacturer substitution
    This part replaces WH22X29502. Substitute parts can look different from the original.
    This item is not returnable
    In Stock
    $397.09
    Minus Item
    Qty
    Plus Item
  • Pm Owners And Install for GE GTW845CPN0DG - Part 49-3000295

    Controls & backsplash diagram

    Pm Owners And Install

    Part #49-3000295

    The manufacturer no longer makes this part, and there's no substitute part

  • Pm Quick Owners Manual for GE GTW845CPN0DG - Part 49-3000189

    Controls & backsplash diagram

    Pm Quick Owners Manual

    Part #49-3000189

    The manufacturer no longer makes this part, and there's no substitute part

  • Pm Mini Manual And Wiring for GE GTW845CPN0DG - Part 31-3000374

    Controls & backsplash diagram

    Pm Mini Manual And Wiring

    Part #31-3000374

    The manufacturer no longer makes this part, and there's no substitute part

  • Scr 8-18 Ab 13/4 S Hxw for GE GTW845CPN0DG - Part WR01X10634

    Controls & backsplash diagram

    Scr 8-18 Ab 13/4 S Hxw

    Part #WR01X10634

    The manufacturer no longer makes this part, and there's no substitute part

  • Scr 8-18 Hi/lo 5/8 for GE GTW845CPN0DG - Part WR01X10196

    Controls & backsplash diagram

    Scr 8-18 Hi/lo 5/8

    Part #WR01X10196

    The manufacturer no longer makes this part, and there's no substitute part

  • Washer Lid Lock Bezel for GE GTW845CPN0DG - Part WH01X26694

    Top panel & lid diagram

    Washer Lid Lock Bezel

    Part #WH01X26694

    The manufacturer no longer makes this part, and there's no substitute part

GE Washer GTW845CPN0DG FAQs

To reset your GE GTW845CPN0DG washer, unplug it for 2 minutes, plug it back in, then select a cycle and press Start. This power reset clears many control glitches and is also the recommended step when the washer won’t operate due to electronics needing a reset.

Quick reset steps (most common)

  • Press Start/Pause to stop the cycle.
  • Unplug the washer (or switch off the breaker) for 2 minutes.
  • Restore power.
  • Close the lid.
  • Re-select your cycle and options.
  • Press Start.

If the controls seem “locked” or unresponsive

Your washer can enter a short lockout where the controls do not respond. When messages like “CAnCELEd” start scrolling, the washer runs a 4-minute lockout; after that, you can start a new cycle. Unplugging during this lockout restarts the timer, so it is best to wait it out.

Common display messages and what to do

Display message What it means What to do
Lid Lid is open, or the washer requires the lid to be opened between cycles Open and close the lid, then press Start
CAnCELEd Cycle canceled or stopped after being paused too long or due to certain errors Wait 4 minutes, then select a new cycle and press Start
SEnSing Load sensing; lid may lock briefly Wait for sensing to finish; then continue normally

When a “reset” is really a drain issue

If the washer is paused with water in the tub, it may need to drain before it will behave normally. Select Drain & Spin to remove water. If it will not drain, check for a kinked hose or a pump problem; the GE washer drain pump assembly WH23X28418 and the washer pump drain hose WH41X24177 are common drain-related parts for this model.

Why it matters

A proper reset restores normal control operation, but it also helps you avoid repeat cancellations, lid-lock confusion, and long pauses caused by safety logic (lid status, sensing, and automatic drain behavior).

For cycle behavior, display messages, and Start/Pause details, follow the owner's manual.

Last updated: February 2026

On your GE GTW845CPN0DG washer, the correct way to force a drain and spin is to select the Drain & Spin cycle, then press Start/Pause to begin. If the washer is paused with water in the tub, switching to Drain & Spin will drain the basket and spin out the water.

Steps to drain and spin (control panel method)

  • Press Power to wake the washer.
  • If a cycle is running, press Start/Pause to pause it.
  • Turn the cycle selector to Drain & Spin.
  • Close the lid (the washer may not start with the lid open).
  • Press Start/Pause to start draining, then spinning.

If it still will not drain

These checks fix the most common “won’t drain” situations on top-load washers.

  • Make sure the lid is fully closed; the washer can stop and show a lid-related message if it is open.
  • Check the drain hose for a kink, pinch, or the washer sitting on it.
  • Confirm the drain hose height; the top of the drain outlet should be under 8 ft (2.44 m) above the floor.
  • If the washer is full of water and you hear a steady hum but no draining, the drain pump may be jammed or failing.
  • If the washer is badly out of balance, redistribute the load and run Drain & Spin again.

What to expect during Drain & Spin

Some sounds and pauses are normal while the washer transitions from draining to spinning.

What you notice What it usually means
Humming during drain Drain pump running
Gurgling near the end of drain Pump drawing air as water finishes draining
Spin ramps up slowly Motor increases speed in steps

Why it matters

Running Drain & Spin is the fastest way to remove standing water so you can unlock the lid, prevent overly wet laundry, and confirm whether the issue is a simple hose problem or a drain system failure (pump, hose, or control).

For cycle and lid-lock behavior details specific to this washer, use the owner's manual. If you suspect a failed pump, the model-matched replacement is the GE washer drain pump assembly WH23X28418.

Last updated: February 2026

For the GE GTW845CPN0DG washer, diagnostic or service mode is used to read stored fault codes and run component tests. The exact button and knob sequence varies by GE platform, so we recommend using the model’s GTW845CPN0DG owner’s manual to follow the correct entry steps for your control panel.

Before you start (quick safety and setup)

  • Empty the washer; close the lid.
  • Make sure the washer is plugged in and the outlet has power.
  • Turn the cycle knob to a normal starting position (for example, Normal).
  • If the display shows Controls or won’t respond, turn off Control Lock first.
  • If the display is scrolling “CAnCELEd”, wait out the 4-minute lockout before trying again.

Common GE top-load diagnostic entry patterns

Many GE top-load washers enter diagnostics using one of these patterns (your GTW845CPN0DG may use a variation):

  • Knob rotation sequence: press and hold Start/Pause, then rotate the cycle knob a set number of clicks.
  • Button hold sequence: press and hold a specific pair of option buttons for several seconds.
  • Power wake-up first: press Power to wake the display, then perform the sequence.

If you can’t get into diagnostics after 2 to 3 tries, use the error code list and steps in GE gtw top load washer error codes to identify what the washer is reporting and what to check next.

What you can do once you’re in diagnostics

Typical diagnostic functions include:

  • View stored error codes
  • Run a lid lock test
  • Run a drain pump test
  • Run a fill test (hot/cold)
  • Run a spin or motor test

Helpful part checks tied to common tests

Symptom during test What to check first Related part on this model
Won’t drain or drains slowly Kinked hose, clogs, pump operation GE washer drain pump assembly WH23X28418 and washer pump drain hose WH41X24177
Won’t fill House valves on, inlet screens, valve operation Washer water inlet valve assembly WH13X26637
Won’t lock or start Lid alignment, strike, lock mechanism Washer lid lock WH08X37938 and washer lid strike WH02X24106

Why it matters

Diagnostic mode helps us separate a control issue from a mechanical problem (like a blocked drain hose or a failing drain pump). That saves time, prevents unnecessary part replacement, and gets your GE washer back to normal operation faster.

Last updated: February 2026

Most common symptoms to help you fix your washers

Choose a symptom to see related washer repairs.

Main causes: clogged drain hose, house drain clogged, bad drain pump, water-level pressure switch failure, bad control b…

Main causes: broken lid switch or lid lock, bad pressure switch, broken shifter assembly, faulty control system…

Main causes: worn agitator dogs, bad clutch, broken motor coupler, shifter assembly failure, broken door lock, suspensio…

Main causes: water heater failure, bad water temperature switch, faulty control board, bad water valve, faulty water tem…

Main causes: lack of electrical power, wiring failure, bad power cord, electronic control board failure, bad user interf…

Main causes: no water supply, bad water valves, water-level pressure switch failure, control system failure, bad door lo…

Main causes: unbalanced load, loose spanner nut, worn drive block, broken shock absorber or suspension spring, debris in…

Main causes: leaky water inlet valve, faulty water-level pressure switch, bad electronic control board…

Main causes: bad lid switch or door lock, bad timer or electronic control board, wiring failure, bad water inlet valve a…

Repair guides for electric ranges

How to replace an oven temperature sensor on an electric range

How to replace an oven temperature sensor on an electric range

These step-by-step instructions guide you through replacing an oven temperature sensing probe.…

Repair time and Difficulty

 15 minutes or less
How to replace an electric range oven control board

How to replace an electric range oven control board

If the electronic oven control board isn't powering the bake and broil functions, you can replace it in less than half a…

Repair time and Difficulty

 15 minutes or less
How to replace a range surface element control switch

How to replace a range surface element control switch

The surface element control switch lets you turn the stovetop elements on and off, and to set the heat level. These step…

Repair time and Difficulty

 15 minutes or less

Effective articles & videos to help repair your washers

Use the advice and tips in these articles and videos to get the most out of your washer.

How auto-load sensing washers work (and when they don't)

How auto-load sensing washers work (and when they don't)

Your washer barely fills or seems stuck in sensing mode? Find out how auto-load sensing and Precise Fill features work, …

How to remove the main control board and user interface from a Maytag Epic Z front-load washer

How to remove the main control board and user interface from a Maytag Epic Z front-load washer

Get step-by-step instructions for removing the main electronic control board and the control panel from a Maytage Epic Z…

Using a wiring schematic to trace a current video

Using a wiring schematic to trace a current video

Find out what’s wrong with your appliance by following a circuit.…

Parts & More

Bottom-Mount Refrigerator
Dryer
Electric Range
Furnace
Gas Line Trimmer
Gas Range
Microwave/Hood Combo
Others
Outdoor Smoker
Parts
Power Screwdriver
Refrigerator
Room Air Conditioner
Top-Mount Refrigerator
Upright Freezer
Washer