Owner’s manual
 Error Codes




How many cubic feet is my Kenmore refrigerator model 79551813410?
The exact cubic-foot capacity for Kenmore model 79551813410 is listed on the model’s rating label and in the 79551813410 owner's manual. Most Kenmore 795-prefix (LG-built) side-by-side refrigerators are commonly in the 20 to 26 cu. ft. range, depending on the exact configuration.
Fast ways to find the exact capacity
- Check the rating label inside the fresh food section (often on a side wall near the crisper area).
- Look for wording like “Total capacity”, “Total volume”, or “cu. ft.”
- Confirm the full model number matches 79551813410 (no missing digits).
- Use the capacity to choose correctly sized accessories (bins, shelves) and to compare energy use.
Where capacity is typically shown
| Location | What you will see | Why it helps |
|---|---|---|
| Inside refrigerator compartment | Rating label with model/serial and capacity | Most direct source |
| 79551813410 owner's manual | Specifications or features section | Confirms factory specs |
| Product listing/spec sheet (if available) | Total capacity and compartment breakdown | Helpful for comparisons |
Why it matters
Capacity affects how much food you can store, how quickly the refrigerator recovers temperature after door openings, and which storage parts fit correctly (door bin, crisper drawer, and shelf layouts vary by capacity and interior design).
Related tip for this model family
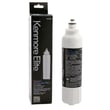
If you are also matching water system parts by model, use the exact model number when selecting a filter such as the Kenmore refrigerator water filter 9490 ADQ73613402.
Last updated: February 2026
How to replace an ice maker in a side by side refrigerator?
To replace the ice maker in your Kenmore side-by-side refrigerator model 79551813410, we shut the ice maker OFF, shut off the water supply, remove the ice bin, swap the ice maker assembly and then restore water and power. The ice maker starts once the freezer reaches 15°F (-9°C) or colder.
Safety and prep
- Unplug the refrigerator or turn off the breaker.
- Set the ice maker power switch to OFF (O).
- Shut off the household water supply valve.
- Remove and empty the ice bin.
- Keep hands clear of the ejector mechanism and heater area when power is connected.
For switch locations and model-specific diagrams, use the 79551813410 owner's manual.
Replacement steps (typical side-by-side)
- Remove the ice bin.
- Remove the screws securing the ice maker to the freezer wall.
- Unplug the ice maker wiring harness.
- Separate the fill tube or inlet cup from the old ice maker (if used).
- Position the new ice maker, reconnect the harness and reinstall screws.
- Reinstall the ice bin.
- Turn water back on; check for leaks.
- Restore power; set the ice maker switch to ON (I).
After installation: what to expect
| Check | Normal result | If not normal |
|---|---|---|
| Freezer temp | Ice maker runs at 15°F (-9°C) or below | Allow more cool-down time |
| Fill sound | Brief valve buzz during fill | Confirm water valve is fully open |
| Air in line | First batch may be delayed | Dispense water in short cycles to purge air |
If it still will not make ice
- Confirm the switch is ON (I).
- Make sure the shutoff arm moves freely, or the sensor path is clear.
- Verify water pressure meets the refrigerator requirements.
- Check for kinked tubing behind the refrigerator.
Why it matters
Correct shutdown and restart prevents leaks and avoids “no ice” problems caused by trapped air, low water pressure, or a freezer that is not cold enough.
Last updated: February 2026
What are the dimensions of a Kenmore elite?
For Kenmore Elite model 79551813410, the exact exterior dimensions depend on the specific configuration listed in the product specifications; we use the 79551813410 owner's manual to confirm the correct measurements and installation clearances for your exact unit.
How to get the right dimensions for your exact Kenmore Elite
Use these steps so you measure the cabinet correctly (not just the doors or handles):
- Check the specifications/installation section in the 79551813410 owner's manual.
- Measure width, height, and depth of the refrigerator cabinet.
- Measure depth with handles (handles often add about 1 to 2 inches).
- Measure depth with doors open 90° if you need drawer clearance.
- Confirm required air clearance around the unit for proper airflow.
Typical size range (helpful when planning space)
Most full-size Kenmore Elite side-by-side refrigerators are commonly in this range:
| Measurement | Typical range (side-by-side) | What to measure |
|---|---|---|
| Width | 32 to 36 in. | Cabinet edge to edge |
| Height | 68 to 71 in. | Floor to top of hinge cover |
| Depth | 30 to 35 in. | Cabinet only (then add handles) |
Why it matters
Accurate dimensions prevent fit problems with cabinetry, door swing, and water line routing. They also help avoid airflow restrictions that can cause warm temperatures, frost buildup, or higher energy use.
Related planning tips for this model
- If the refrigerator has an ice maker or water dispenser, allow room for the water line behind the unit.
- Plan for filter access and replacement; this model uses a refrigerator water filter such as Kenmore refrigerator water filter 9490 ADQ73613402.
- Leave enough space to remove bins and shelves without scraping adjacent cabinets.
Last updated: February 2026
What is the error code er 1f on a Kenmore Elite refrigerator?
On Kenmore model 79551813410, the ER 1F (often shown as ER IF) error points to a problem with the freezer ice fan (the fan that pushes cold air to the ice maker area). Restoring airflow by clearing ice buildup or fixing the fan circuit typically clears the code; see the 79551813410 owner's manual for model-specific steps.
What to check first (fast, common fixes)
- Power reset: Unplug the refrigerator (or turn off the breaker) for 5 minutes, then restore power.
- Ice buildup: Check for frost or ice blocking the fan area or air ducts; defrost if needed.
- Door sealing: Make sure the freezer door closes fully; warm, humid air can cause frost that interferes with airflow.
- Air vents: Keep packages away from vents so air can move freely.
- Fan noise: Listen for a grinding, squealing, or no-fan sound from the freezer when the compressor is running.
Likely causes and what they mean
| What you notice | Most likely cause | What we recommend |
|---|---|---|
| Code appears after heavy frost | Fan or duct is iced over | Defrost and improve door sealing/closing |
| No airflow to ice maker, fan silent | Failed fan motor or wiring issue | Test/replace the fan motor assembly |
| Fan runs but code returns | Sensor/board not reading fan feedback | Check connections; consider control diagnostics |
Parts that are commonly involved
If the fan itself is not running or is noisy, the most common repair is replacing the freezer evaporator fan motor: refrigerator freezer evaporator fan motor EAU62064602.
Why it matters
That ice fan is what keeps the ice maker compartment cold. When airflow drops, ice production slows or stops, temperatures can drift, and frost can build up faster, which can lead to more cooling complaints.
Last updated: February 2026
What's the average lifespan of a Kenmore refrigerator?
Most Kenmore refrigerators average 10 to 15 years of service life. For your Kenmore 79551813410 side-by-side refrigerator, you can often reach the high end of that range by keeping airflow and temperatures stable, and staying current on routine maintenance listed in the 79551813410 owner's manual.
Typical lifespan and what changes it
A refrigerator’s lifespan is mostly driven by heat management, door sealing, and how hard the sealed system has to work.
Common factors that extend life:
- Keep condenser area clean and well ventilated
- Maintain proper temperatures (fresh food about 37°F, freezer about 0°F)
- Replace water filters on schedule to protect the water system
- Fix door seal gaps quickly to prevent long run times
- Address unusual noises early (fan, damper, or compressor strain)
Common factors that shorten life:
- Dirty condenser coils or blocked toe-kick airflow
- Frequent door opening or overpacking that blocks vents
- Ice buildup from defrost or drain issues
- Power interruptions and repeated warm-ups
Maintenance checklist we recommend
Use this as a simple routine for Kenmore side-by-side models like 79551813410:
- Every 3 to 6 months: Replace the water filter (use the correct filter for your model)
- Every 6 to 12 months: Vacuum dust from the condenser area
- Monthly: Inspect door gaskets for tears, gaps, or sticky spots
- As needed: Clear drain issues if you see water pooling or ice under drawers
Helpful parts for common upkeep
| Symptom | What it often points to | Example part for this model |
|---|---|---|
| Slow water flow, bad taste/odor | Clogged filter | Kenmore refrigerator water filter 9490 ADQ73613402 |
| Water puddles inside or under unit | Drain restriction | Refrigerator drain tube 5251JA3003D |
Why it matters
A refrigerator that runs longer and hotter than it should wears out the compressor and fans faster. Simple steps like keeping the condenser area clean and maintaining a good door seal reduce run time and help your Kenmore 79551813410 last closer to its expected lifespan.
Last updated: February 2026
Where is the model number on a Kenmore side by side refrigerator?
On Kenmore model 79551813410, the model and serial number are printed on an identification label located on the interior liner of the refrigerator compartment (inside the fresh food section). Use that label any time you order parts, schedule service, or look up specifications in the 79551813410 owner's manual.
How to find it quickly
- Open the refrigerator (fresh food) door, not the freezer door.
- Look along the inside walls (the interior liner), typically near the upper side wall.
- Check near the crisper area if you do not see it up high.
- Use a flashlight; the label can be small and easy to miss.
- Write down both the model number and serial number exactly as shown.
What you should record (and why)
The identification label usually includes both numbers. Here is how we recommend saving them:
| Item | What it’s used for | Tip |
|---|---|---|
| Model number | Matching the correct parts diagrams and replacement parts | Copy it exactly (all digits) |
| Serial number | Dating the unit and confirming production details | Take a clear photo for reference |
Why it matters
Kenmore refrigerators often have multiple versions that look similar. Using the exact model number (like 79551813410) helps us match the right Kenmore parts the first time, such as a water filter, ice maker components, or a door bin.
Last updated: February 2026
Why is the ice maker not working on my Kenmore side by side refrigerator?
If the ice maker on your Kenmore 79551813410 isn’t making ice, the most common causes are the ice maker being switched OFF, the shutoff arm or sensor being blocked, the water supply valve being closed, or low water pressure (often from a reverse osmosis system). Use the 79551813410 owner's manual steps below to restore ice production.
Quick checks we recommend first
- Confirm the ice maker power switch is set to ON (I).
- Make sure the ice bin is fully seated; some models pause ice making when the bin is out.
- Check that the shutoff arm moves freely, or that the electronic sensor path is clear.
- Verify the household water shutoff valve to the refrigerator is fully open.
- Look for a kinked water supply line behind the refrigerator.
- If you recently installed the refrigerator or reconnected the water line, allow up to 24 hours for ice production to start and the bin to refill.
Water supply and filter issues (very common)
A weak water supply can stop the ice maker from filling properly.
| What you notice | Likely cause | What to do |
|---|---|---|
| No ice and no water at dispenser | Water supply off or line kinked | Open shutoff valve; straighten tubing |
| Slow water dispensing | Low pressure or restriction | Check for kinks; confirm valve is fully open |
| Ice production dropped over time | Filter is exhausted | Replace the Kenmore refrigerator water filter 9490 ADQ73613402 |
| Ice maker problems with RO system | Pressure too low | Bypass RO temporarily or correct pressure setup |
Normal timing and sounds (so you don’t chase the wrong problem)
- After the bin runs empty, it can take up to 90 minutes to see more ice.
- It can take about 24 hours to completely refill the bin.
- A brief buzzing sound can be normal when the ice maker water valve fills the mold.
Why it matters
Ice makers depend on steady freezer temperature and consistent water pressure. A partially closed valve, kinked line, blocked sensor, or exhausted filter can interrupt the fill cycle and stop ice production even when the refrigerator is cooling normally.
Last updated: February 2026
Why is the water dispenser not working on my Kenmore side by side refrigerator?
On Kenmore side-by-side refrigerator model 79551813410, the water dispenser usually stops working because the control panel is locked, a door is ajar, the dispenser is set to ice instead of water, air is trapped after a filter change, or the home water supply pressure is too low. Use the checks below, then follow the flushing steps in the 79551813410 owner's manual.
Quick checks (most common fixes)
- Press and hold Lock for 3 seconds to unlock the dispenser.
- Confirm the dispenser is set to Water (not cubed or crushed ice).
- Make sure all refrigerator doors are fully closed; water will not dispense with a door open.
- If the water filter was just replaced or removed, flush the system (steps below).
- Check the house shutoff valve is fully open and the supply line is not kinked.
Flush trapped air after a filter change
The manual recommends flushing 2.5 gallons (9.5 L) to clear trapped air and contaminants.
- Dispense in cycles: 30 seconds ON, then 60 seconds OFF.
- Repeat until you reach about 2.5 gallons total.
- If flow improves slowly, keep cycling; air can take several minutes to purge.
If your filter is due, replace it with the correct model filter, then flush again. For this model, a common replacement is the Kenmore refrigerator water filter 9490 ADQ73613402.
Water pressure requirements (important)
Low pressure can cause slow flow or no dispensing, especially with reverse osmosis systems.
| Setup | Minimum pressure | Normal range |
|---|---|---|
| With water filter installed | 40 psi | 40 to 120 psi |
| Without water filter | 20 psi | 20 to 120 psi |
When to suspect a failed part
If the dispenser is unlocked, set to Water, doors are closed, and pressure is good, a component in the water circuit is often the cause.
- Water inlet valve: may hum but not open; can also restrict flow.
- Frozen water line in the door: thaw carefully; avoid overheating plastic.
- Water reservoir: can crack or restrict flow if damaged.
Model-matched parts to consider:
Why it matters
A non-working dispenser is often a simple setting or air-in-line issue, but ignoring low water pressure or a failing inlet valve can also lead to weak ice production and repeated dispenser problems.
Last updated: February 2026