 Owner’s manual
 Error Codes



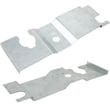
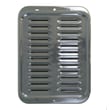
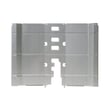
How to remove the top of a Kenmore gas range?
On Kenmore gas range model 36275321003, the cooktop (top) is designed to lift up for access on models with standard twin burners. We turn all controls off, remove the grates (and drip pans if equipped), then lift the cooktop by the two front burner wells; support rods may hold it up. See the owner's manual for the exact lift points and cautions for your configuration.
Steps to lift the cooktop safely
- Turn all surface burner controls OFF and let everything cool.
- Lift off the burner grates.
- Remove drip pans (if your range has them).
- Grasp the two front burner wells and lift the cooktop up.
- If your range has dual support rods, let them hold the cooktop while you clean.
- Lower the cooktop gently when finished (avoid pinching fingers).
What to remove (and what not to)
| Part you see on top | Remove it first? | Notes |
|---|---|---|
| Burner grates | Yes | Lifts off. |
| Drip pans (if equipped) | Yes | Lifts off. |
| Surface burners (on some models) | Sometimes | Burners can lift out after the cooktop is raised for cleaning. |
| Screws | No (for lifting the top) | The lift-up cooktop is meant to raise without removing screws. |
Why it matters
Lifting the cooktop gives you access to clean grease and spillovers underneath. Keeping that area clean helps prevent flare-ups and supports proper burner ignition and an even flame.
Quick safety reminders
- Do not operate a burner without all burner parts (and drip pans if equipped) in place.
- Clean burner ports regularly; clogged ports cause uneven or “jumpy” flames.
- If your model uses standing pilots, lower the cooktop gently to avoid blowing out pilot flames.
Last updated: February 2026
How to change Kenmore spark electrode igniter?
To change a spark electrode igniter on your Kenmore gas range model 36275321003, we shut off power, remove the burner parts to access the electrode, swap the wire onto the new electrode, then reassemble so the burner head sits correctly over the electrode for reliable ignition. See the owner's manual for burner-part removal and ignition details.
Before you start (safety and access)
- Turn all surface burner knobs OFF.
- Disconnect electrical power to the range (electronic ignition can spark unexpectedly).
- Let the grates, burner caps, and burner heads cool completely.
- Lift off the grate, then remove the burner cap and burner head to expose the electrode.
- Keep hands and tools away from the electrode area if any burner is set to LITE (all burners can spark).
Step-by-step: replacing the spark electrode
- Remove the grate, burner cap, and burner head.
- Note how the burner head aligns to the electrode (the slot/hole must line up during reassembly).
- Disconnect the electrode wire connector from the old electrode.
- Install the new electrode in the same position and secure it with the mounting screw.
- Reconnect the wire; make sure the connector is fully seated and tight.
- Reinstall the burner head and cap; confirm the burner head is positioned over the electrode.
- Restore power and test ignition.
Quick ignition check after replacement
Most electronic-ignition burners should light quickly once gas is present.
| What you see/hear | What it usually means | What we do next |
|---|---|---|
| Clicking and burner lights | Normal ignition | Turn knob off LITE and set flame |
| Clicking but no flame | Gas not reaching burner or burner ports clogged | Re-seat cap/head; clean ports |
| Weak/uneven flame | Dirty burner head or misalignment | Clean and align burner head |
Cleaning tip that prevents repeat problems
For proper ignition, keep the small opening near the electrode area clear. A sewing needle or a wire twist tie works well to clear a clog; then dry the burner head thoroughly before reinstalling.
Why it matters
A correctly installed electrode and properly aligned burner head prevent delayed ignition, uneven flames, and nuisance clicking. It also helps the range light within a few seconds when you turn a knob to LITE.
Last updated: February 2026
What are the parts of a gas stove?
A Kenmore gas range like model 36275321003 is built around a cooktop burner system (grates, burner heads, burner caps, and ignition electrode) plus an oven system (bake burner, broil burner, racks, and vents), with knobs and controls to regulate gas and temperature. See the 36275321003 owner's manual for your exact configuration.
Main parts you will see on the cooktop
These are the components you remove most often for cleaning and spillovers:
- Grates: support cookware over the flame
- Burner caps: sit on top of the burner head; must match the correct burner size
- Burner heads: contain the flame ports (slits/holes) that must stay clear for even flame
- Electrode (spark igniter): creates the spark for ignition (exposed when the burner head is removed)
- Drip pans (on some models): catch spills under the burner area
Oven and airflow parts (often overlooked)
Your range also relies on these parts for safe, consistent baking and broiling:
- Bake burner (bottom oven heat source)
- Broil burner (top oven heat source)
- Air adjustment shutters (help set proper air to the burner flames)
- Oven air vents (must never be blocked; they supply inlet and outlet air for proper combustion)
Quick reference: cooktop vs. oven
| Area | What it does | Common issue when dirty/misplaced |
|---|---|---|
| Cooktop burners | Lights and controls surface flame | Clogged ports cause uneven flame or poor ignition |
| Burner caps/heads | Shapes flame and directs ignition | Wrong size or misalignment causes hard lighting |
| Oven burners | Heats for bake/broil | Incorrect air mix can cause abnormal flame |
| Oven vents | Maintains proper combustion airflow | Blocking vents can affect performance |
Why it matters
Running a burner without all parts installed (caps, heads, and drip pans if equipped) can lead to poor ignition, uneven flame, and messy spillovers that clog burner openings. Keeping burner ports clear and parts seated correctly helps your Kenmore range heat evenly and light reliably.
Last updated: February 2026
How long should a Kenmore gas stove last?
A Kenmore gas range like model 36275321003 typically lasts 15 years with normal household use. Consistent cleaning, correct burner flame, and safe operation habits help you reach that lifespan and avoid premature failures.
Typical lifespan and what affects it
Most gas ranges reach their full service life when heat, ignition, and gas flow stay stable.
- Heavy daily cooking shortens lifespan faster than occasional use
- Grease buildup around burners and the oven cavity increases wear
- Poor combustion (yellow flames) stresses components and can signal a service issue
- Power surges or loose wiring can damage ignition and controls
- Using the wrong accessories (like stove-top grills on sealed burners) can cause incomplete combustion
Quick checks that protect performance
Use these checks a few times a year (and anytime performance changes):
- Surface burners: ignition should spark and light within a few seconds; flames should be mostly blue
- Oven burner: after setting above 300°F, ignition typically occurs after a short delay and then cycles to hold temperature
- Flame quality: yellow flames indicate a problem; LP gas can show small yellow tips on outer cones
- Ventilation: keep airflow clear and run your vent hood when cooking
- Safe cookware use: follow the wok and grate guidance in the owner's manual
Common parts that wear out over time
These parts do not set the range’s lifespan by themselves, but replacing them when they fail can keep the range running reliably:
| Symptom | Likely area | Example part on this model page |
|---|---|---|
| Oven will not heat or heats unevenly | Oven burner system | Bake burner WB16K10035 |
| Burner flame is weak/uneven | Orifice or supply tube | Range surface burner orifice WB28K10023 |
| Oven light not working | Bulb/socket | 40a15bulb 40A15 or range light socket WB08T10026 |
Why it matters
A 15-year gas range lifespan assumes safe combustion and stable ignition. When flames turn yellow, burners take longer to light, or heat becomes inconsistent, addressing it early prevents bigger failures and keeps cooking performance predictable.
Last updated: February 2026




