Get free shipping on your order, with any water filter subscription. Find my filter

Open Hamburger Menu
Sears Parts Direct
Tips to find your model number

GE S3700G1WW washer Parts

Here are the diagrams and repair parts for GE S3700G1WW washer, as well as links to manuals and error code tables, if available.

GE S3700G1WW washer
By Schematic
By Part
SELECT DIAGRAM
?

This is the number corresponding to the part on the diagram / schematic

Browse Parts for S3700G1WW Washer

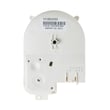
  • Washer Timer for GE S3700G1WW - Part WH12X10350

    Controls & backsplash diagram

    Washer Timer

    In Stock
    $154.74
    7% OFF Phone Price : $166.74Info Icon
    Minus Item
    Qty
    Plus Item
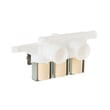
  • Washer Water Inlet Valve for GE S3700G1WW - Part WH13X10027

    Controls & backsplash diagram

    Washer Water Inlet Valve

    In Stock
    $90.89
    6% OFF Phone Price : $96.89Info Icon
    Minus Item
    Qty
    Plus Item
  • Washer Lid Hinge Bushing for GE S3700G1WW - Part WH01X10025

    Cabinet, cover & front panel diagram

    Washer Lid Hinge Bushing

    In Stock
    $20.47
    23% OFF Phone Price : $26.47Info Icon
    Minus Item
    Qty
    Plus Item
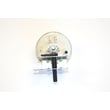
  • Washer Water-level Pressure Switch for GE S3700G1WW - Part WH12X10065

    Controls & backsplash diagram

    Washer Water-level Pressure Switch

    In Stock
    $50.83
    11% OFF Phone Price : $56.83Info Icon
    Minus Item
    Qty
    Plus Item
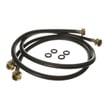
  • Ge Washer Fill Hose, 2-pack for GE S3700G1WW - Part WH41X10207

    Controls & backsplash diagram

    Inlet Hose48

    Part #WH41X10094

    Replaced by #WH41X10207

    Info Icon
    Manufacturer substitution
    This part replaces WH41X10094. Substitute parts can look different from the original.
    This item is not returnable
    In Stock
    $24.46
    20% OFF Phone Price : $30.46Info Icon
    Minus Item
    Qty
    Plus Item
  • Ge Washer Fill Hose, 2-pack for GE S3700G1WW - Part WH41X10207

    Controls & backsplash diagram

    Inlet Hose48

    Part #WH41X10095

    Replaced by #WH41X10207

    Info Icon
    Manufacturer substitution
    This part replaces WH41X10095. Substitute parts can look different from the original.
    This item is not returnable
    In Stock
    $24.46
    20% OFF Phone Price : $30.46Info Icon
    Minus Item
    Qty
    Plus Item
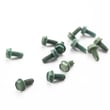
  • Laundry Appliance Screw, #8-32 X 3/8-in, 12-pack for GE S3700G1WW - Part WZ5X158D

    Cabinet, cover & front panel diagram

    Screw

    Part #WZ05X0158

    Replaced by #WZ5X158D

    Info Icon
    Manufacturer substitution
    This part replaces WZ05X0158. Substitute parts can look different from the original.
    In Stock
    $37.28
    14% OFF Phone Price : $43.28Info Icon
    Minus Item
    Qty
    Plus Item
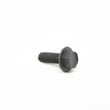
  • Washer Screw for GE S3700G1WW - Part WH2X1201

    Suspension, pump & drive components diagram

    Scr 1/4-20 B

    Part #WH02X1201

    Replaced by #WH2X1201

    Info Icon
    Manufacturer substitution
    This part replaces WH02X1201. Substitute parts can look different from the original.
    In Stock
    $8.38
    11% OFF Phone Price : $9.38Info Icon
    Minus Item
    Qty
    Plus Item
  • Washer Leveling Leg for GE S3700G1WW - Part WH2X1187

    Cabinet, cover & front panel diagram

    Leveling Leg

    Part #WH02X1187

    Replaced by #WH2X1187

    Info Icon
    Manufacturer substitution
    This part replaces WH02X1187. Substitute parts can look different from the original.
    This item is not returnable
    In Stock
    $22.66
    21% OFF Phone Price : $28.66Info Icon
    Minus Item
    Qty
    Plus Item
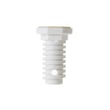
  • Hinge Bushing for GE S3700G1WW - Part WH1X2741

    Cabinet, cover & front panel diagram

    Hinge Bushing

    Part #WH01X2741

    Replaced by #WH1X2741

    Info Icon
    Manufacturer substitution
    This part replaces WH01X2741. Substitute parts can look different from the original.
    In Stock
    $9.01
    10% OFF Phone Price : $10.01Info Icon
    Minus Item
    Qty
    Plus Item

GE Washer S3700G1WW FAQs

Your GE washer’s model number is printed on the appliance ID label; for the washer parts page you are on, the model is S3700G1WW. On most GE top-load washers, you will find the label under the lid or on the cabinet opening, and you can match that number to parts and installation details.

Where to look on a GE washer

Check these common GE locations first:

  • Under the washer lid, around the tub opening
  • On the underside of the lid itself
  • Along the top rim of the cabinet (lid opening)
  • On the back of the washer near the control panel area
  • Near the rating plate area (often around the backsplash/control console area)

What to write down (and why)

Record both numbers exactly as shown.

Item What it’s used for Example format
Model number Ensures you get the correct parts diagrams and replacement parts S3700G1WW
Serial number Helps identify production run details for service and compatibility Letters and numbers

Tips to avoid mix-ups

These quick checks prevent ordering the wrong GE washer parts:

  • Copy the model number character-for-character (including any letters)
  • Take a clear photo of the label before you start shopping or troubleshooting
  • If the label is worn, look for a second label on the back panel
  • Use the model number to confirm fit before ordering items like a lid switch, timer, or drain pump

Why it matters

GE often uses similar-looking cabinets across multiple washer series; the model number is what ties your washer to the correct diagrams, installation requirements, and parts such as the washer lid switch assembly WH12X10334.

For installation-related identification details (like where the rating plate is referenced and other setup requirements), use the S3700G1WW installation guide.

Last updated: February 2026

A GE washer like model S3700G1WW typically lasts 10 to 14 years with normal household use. Lifespan depends most on load size, leveling, water quality, and how quickly you address leaks, draining problems, or excessive vibration.

What affects lifespan the most

  • Overloading (stresses the drive system, tub, and suspension)
  • Out-of-level installation (increases vibration and wear)
  • Slow draining (overworks the drain pump and can leave residue)
  • Leaks at the tub (can damage bearings and the drive shaft)
  • Lid switch issues (can stop cycles and lead to repeated restarts)

Quick maintenance that adds years

Use these habits to reduce wear on the tub, bearings, and suspension:

  • Keep loads balanced; wash bulky items in smaller batches
  • Level the washer and re-check if it starts walking
  • Use the right detergent amount to reduce buildup
  • Run a monthly cleaning cycle (hot water, empty tub)
  • Inspect hoses and the tub area for early signs of dripping

Common “end-of-life” symptoms and what they usually point to

Symptom Common cause What to check next
Loud roaring during spin Worn tub bearing Bearing noise gets worse fast; plan repair soon
Tub wobble or banging Worn suspension Look for sagging or broken suspension parts
Won’t drain or drains slowly Drain pump issue or blockage Check pump and hoses for debris
Won’t run/spin with lid closed Lid switch problem Test lid switch operation

Why it matters

Knowing the typical 10 to 14 year lifespan helps you decide whether to repair now (often smart for a single failed part) or plan a replacement if multiple major systems are wearing out.

For model-specific installation and setup details that reduce vibration and wear, use the installation guide.

Last updated: March 2026

For GE washer model S3700G1WW, the most commonly replaced parts are the lid switch, drain pump, suspension components, and drive/pulley and hub hardware. These parts directly affect filling, spinning, draining, and vibration control.

Most common replacement parts for S3700G1WW

How to match the right part to the symptom

What the washer is doing Parts to focus on Typical clue
Won’t spin but fills/agitate Lid switch assembly Lid must “click” and register closed
Won’t drain or leaves water Drain pump assembly Pump hums or drains very slowly
Shakes hard in spin Suspension rod and spring assembly Tub leans or bounces excessively
Water level is wrong Pressure switch, pressure hose Fills too high or stops too soon

Before you order: 5 quick checks

  • Confirm the symptom happens on more than one cycle
  • Unplug the washer and check for loose connectors at the lid switch area
  • Look for coins, socks, or debris restricting the drain path
  • Verify the washer is level and the floor is solid
  • Note any unusual noises (squeal vs. roar helps narrow the cause)

Why it matters

Replacing the correct part the first time prevents repeat breakdowns and protects major components like the tub, shaft, and bearing.

For safe access and reassembly guidance, follow the installation guide.

Last updated: March 2026
Most common symptoms to help you fix your washers

Choose a symptom to see related washer repairs.

Main causes: clogged drain hose, house drain clogged, bad drain pump, water-level pressure switch failure, bad control b…

Main causes: broken lid switch or lid lock, bad pressure switch, broken shifter assembly, faulty control system…

Main causes: worn agitator dogs, bad clutch, broken motor coupler, shifter assembly failure, broken door lock, suspensio…

Main causes: water heater failure, bad water temperature switch, faulty control board, bad water valve, faulty water tem…

Main causes: lack of electrical power, wiring failure, bad power cord, electronic control board failure, bad user interf…

Main causes: no water supply, bad water valves, water-level pressure switch failure, control system failure, bad door lo…

Main causes: unbalanced load, loose spanner nut, worn drive block, broken shock absorber or suspension spring, debris in…

Main causes: leaky water inlet valve, faulty water-level pressure switch, bad electronic control board…

Main causes: bad lid switch or door lock, bad timer or electronic control board, wiring failure, bad water inlet valve a…

Repair guides for electric wall ovens

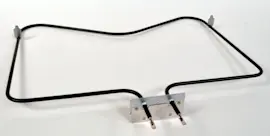
How to replace a wall oven broil element

How to replace a wall oven broil element

Follow these step-by-step instructions to replace the broiler element in an electric oven.…

Repair time and Difficulty

 15 minutes or less
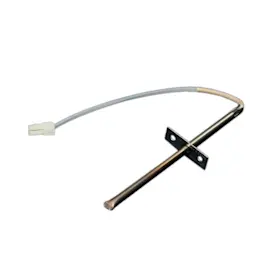
How to replace a temperature sensor on an electric wall oven

How to replace a temperature sensor on an electric wall oven

These step-by-step instructions guide you through replacing a temperature sensing probe on an electric wall oven.…

Repair time and Difficulty

 15 minutes or less
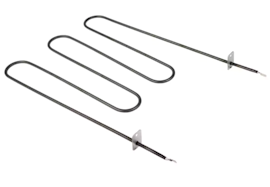
How to replace a wall oven hidden bake element

How to replace a wall oven hidden bake element

These step-by-step instructions guide you through replacing the hidden bake element.…

Repair time and Difficulty

 30 minutes or less

Effective articles & videos to help repair your washers

Use the advice and tips in these articles and videos to get the most out of your washer.

How auto-load sensing washers work (and when they don't)

How auto-load sensing washers work (and when they don't)

Your washer barely fills or seems stuck in sensing mode? Find out how auto-load sensing and Precise Fill features work, …

How to remove the main control board and user interface from a Maytag Epic Z front-load washer

How to remove the main control board and user interface from a Maytag Epic Z front-load washer

Get step-by-step instructions for removing the main electronic control board and the control panel from a Maytage Epic Z…

Using a wiring schematic to trace a current video

Using a wiring schematic to trace a current video

Find out what’s wrong with your appliance by following a circuit.…

Parts & More

Bottom-Mount Refrigerator
Canister Vacuum
Dishwasher
Electric Range
Furnace
Gas Cooktop
Gas Leaf Blower
Gas Range
Gas Walk-Behind Mower
Parts
Refrigerator
Room Air Conditioner
Side-By-Side Refrigerator
Top-Mount Refrigerator
Washer