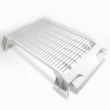
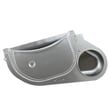
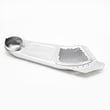
Owner’s manual


How to remove front of LG dryer to clean?
To remove the front on an LG DLE7400VE dryer for cleaning, we unplug the dryer first, then remove the top panel and front panel fasteners so the front panel can lift off while we support its weight and disconnect any wiring (such as the door switch harness). Use the DLE7400VE owner's manual for the exact screw locations and cautions.
Safety first (before you touch any screws)
- Unplug the dryer to prevent electric shock.
- Wear gloves; cabinet edges can be sharp.
- Avoid pulling on wires; disconnect harnesses by the connector.
- Keep track of screw locations so panels realign correctly.
- If you smell burning or see damaged wiring, stop and have the dryer serviced.
Front panel removal steps (typical for this LG platform)
- Unplug the dryer.
- Remove the lint screen, then remove the screws in the lint screen housing (common access point for top-panel screws).
- Release and lift the top panel (usually screws at the back, then slide/lift).
- Remove screws securing the control panel (if it overlaps the front panel on your revision) and set it aside without straining the wire harness.
- Remove the screws along the upper inside edge of the front panel.
- Support the front panel, then remove the remaining lower/side mounting screws.
- Tilt the front panel forward, disconnect the door switch harness, then lift the panel up and off the lower tabs.
Important caution from LG
LG notes that certain cabinet face screws should not be removed during door-related procedures because it can lead to damage and a service call. Follow the screw callouts in the DLE7400VE owner's manual when you’re unsure which screws are structural versus panel fasteners.
What to clean while the front is off
- Lint buildup around the blower housing and base
- The door opening and seal area (wipe with a damp cloth)
- The exhaust duct connection area (check for lint restriction)
- The drum perimeter where lint collects near seals and rollers
Quick “what you’ll see” guide
| Area | What it affects | What to look for |
|---|---|---|
| Blower area | Airflow, dry time | Packed lint, rattling debris |
| Drum support | Noise, smooth tumbling | Flat spots, wobble |
| Belt path | Drum turning | Cracks, glazing, slack |
Why it matters
Cleaning inside the cabinet helps maintain airflow and drying performance. LG also recommends checking vent ductwork for lint buildup and cleaning it at least yearly; restrictions can cause long dry times and trigger airflow alerts.
Last updated: February 2026
How to reset LG dryer heating element?
LG dryers such as model DLE7400VE do not have a “reset” button for the heating element itself. When heat stops, the practical reset is restoring proper power and airflow, then running a timed heat cycle to confirm warm exhaust after about 3 minutes (steps in the DLE7400VE owner’s manual).
What to do first (safe, fast checks)
- Unplug the dryer or switch both dryer breakers OFF before touching anything.
- Clean the lint screen and make sure it clicks fully into place; the dryer will not run without it.
- Check the vent path (dryer outlet to outside hood) for lint buildup, crushed flex duct, or a stuck damper.
- Restore power and run a heat cycle; on electric models, exhaust should feel warm after ~3 minutes.
- If the dryer runs but still does not heat, check the home breaker or fuses again (an electric dryer can run without heat if one leg is out).
“Reset” for airflow-related heat problems (Flow Sense)
If your dryer is limiting heat because airflow is restricted, clearing the restriction is the reset. The airflow indicator may take multiple consecutive cycles to recognize improvement.
Airflow targets (typical)
| Check | What “good” looks like | What to fix if not |
|---|---|---|
| Outside vent hood | Strong, steady airflow | Clear lint, replace hood, remove screen cover |
| Duct run | Short, smooth, not crushed | Replace long or kinked flex with rigid/semirigid |
| Lint screen | Clean mesh, no film | Wash with warm water and a soft brush, dry fully |
When it points to a failed heating part
If airflow is good and power is correct but there is still no heat, a failed heating component is likely. Common suspects on electric LG dryers include:
- Heating element
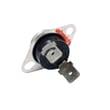
- High-limit thermostat
- Thermistor
- Blower thermostat
For this model, the heating element is available as LG dryer heating element 5301EL1001H.
Why it matters
Restricted venting is the most common cause of “no heat” symptoms and long dry times; it also triggers temperature limits that make the dryer seem like it needs a reset.
Last updated: February 2026
What are the most common issues with DLE7400VE?
The most common issues we see with the LG DLE7400VE dryer are no heat or weak heat, long dry times, unusual squealing or thumping noises, and the drum not turning. These problems usually trace to airflow restrictions, heating components, or drum-drive wear items; use the DLE7400VE owner's manual for cycle and error-code guidance.
Common symptoms and what typically causes them
- No heat or not enough heat: failed heater circuit parts, temperature sensing issues, or restricted venting
- Takes too long to dry: clogged lint path, crushed vent hose, blocked exterior hood, or weak airflow
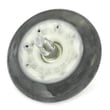
- Squealing, grinding, or thumping: worn belt, idler pulley, or drum support rollers
- Drum won’t turn but motor hums: broken belt or a seized roller/idler
- Stops mid-cycle or overheats: poor airflow, thermostat opening, or lint buildup around the blower housing
Quick checks we recommend first (fast, no parts)
- Clean the lint screen and confirm it seats correctly.
- Check the entire vent run for kinks, lint buildup, or a stuck exterior damper.
- Run a timed dry cycle and verify strong airflow at the outside vent.
- Confirm the door closes firmly and the switch clicks.
- If an error code appears, match it to the code list and follow the steps.
Parts that commonly fix these issues on this model
| Symptom | Common part involved | Example part for DLE7400VE |
|---|---|---|
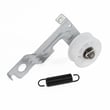
| Drum not turning, squeal | Belt or idler pulley | LG dryer drum belt 4400EL2001F, LG dryer idler pulley 4561EL3002A |
| Thumping or rumble | Drum support rollers | Dryer drum support roller assembly 4581EL2002H |
| No heat or poor heat | Heating circuit | LG dryer heating element 5301EL1001H, dryer high-limit thermostat 6931EL3003D |
Why it matters
Dryer performance problems often start with airflow. Fixing venting and lint buildup first prevents repeat thermostat trips, protects the heating element, and shortens dry times.
For code-based troubleshooting, use our LG dryer error codes guide alongside the manual.
Last updated: March 2026