 Installation guide
 Owner’s manual



Is there a reset on a Kenmore microwave?
Yes. On Kenmore microwave model 40180086700, the most reliable “reset” is a power reset: unplug the microwave (or turn off the breaker) for about 10 seconds, then restore power and set the clock again. This clears many control glitches without changing normal settings.
Quick reset options (from easiest to most effective)
- Stop/Clear reset: Press STOP/CLEAR twice, then re-enter your cooking instructions.
- Power reset: Unplug for 10 seconds, then plug back in.
- Breaker reset: If it is hardwired or plugged in above the range, switch the circuit breaker OFF, wait 10 seconds, then ON.
- Clock reset after outage: If the display prompts you to set the time, set the clock and reprogram any custom cooking settings.
- Circuit check: Make sure the microwave is on its own 20-amp circuit to prevent voltage drop issues.
What you should see after a reset
| Situation | What it means | What to do next |
|---|---|---|
| Display comes back normally | Control recovered | Set clock, test heating with a cup of water |
| Display says to set clock/time | Recent power loss | Set clock, retry cooking program |
| No display or dead unit | Power supply issue | Check outlet, breaker, fuse, then service if needed |
If “resetting” doesn’t fix the problem
A reset helps with keypad or control logic issues. If the microwave runs but does not heat, the problem is usually in the high-voltage heating circuit, not the settings.
- If it runs but won’t heat, use our troubleshooting steps in why is my microwave not heating.
- If it goes completely dead or trips the breaker, follow the electrical checks in the 40180086700 owner’s manual.
- If the door won’t start the unit consistently, inspect the latch and interlock system; common related parts include the microwave door latch DE64-00760A and microwave door interlock switch 3405-001034.
Why it matters
Resetting the control is a fast way to rule out a temporary software or power glitch before you spend time diagnosing parts like the control panel, door switches, or high-voltage components.
Last updated: February 2026
What is the code e12 on a Kenmore microwave?
On Kenmore microwave/hood combo model 40180086700, error code E12 points to a problem with the gas sensor (humidity sensor) circuit or its wiring. Reset power at the breaker for 1 minute, restore power, then watch the display for about 1 minute to see if E12 returns.
What to do first (safe checks)
- Turn the microwave off by switching the circuit breaker OFF for 1 minute, then ON.
- If E12 comes back, unplug power (or turn breaker off) before any inspection.
- Check for a loose connector at the sensor and control wiring harness (no pinched or burned wires).
- Make sure the door closes firmly; a misaligned latch can cause odd behavior during sensing cycles.
- If the unit recently had steam-heavy cooking, let it cool and dry out, then retry a simple heat test.
Parts commonly involved
E12 is most often tied to the sensor circuit and the control reading it.
| Symptom | Most likely area | What it affects |
|---|---|---|
| E12 appears quickly after Start | Sensor circuit or wiring | Auto cook and sensing functions |
| E12 appears intermittently | Loose connection | Random faults during operation |
| E12 plus other control issues | Control assembly | Display, keypad, sensor inputs |
If you need to replace the sensor, match it to the model-specific part listing, such as the microwave humidity sensor DE32-60011A.
Why it matters
A failed sensor circuit can prevent automatic cooking features from working correctly and can stop a cycle early. Fixing the sensor or wiring restores normal sensing performance and helps avoid repeated shutdowns.
Where to confirm the reset and troubleshooting steps
We recommend following the electrical safety and troubleshooting guidance in the 40180086700 owner's manual.
Last updated: February 2026
How to change over stove Kenmore microwave light bulb?
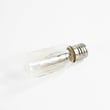
For Kenmore microwave/hood combo model 40180086700, we replace the cooktop (over-the-stove) light by shutting off power, removing the bulb cover screws, swapping in a 20-watt appliance bulb, then reinstalling the cover and restoring power. See the steps in the 40180086700 owner's manual.
Cooktop (night) light replacement steps
- Unplug the microwave or turn off power at the main breaker.
- Locate the cooktop light cover underneath the microwave.
- Remove the bulb cover mounting screws.
- Remove the old bulb.
- Install a 20-watt appliance bulb (screw-in type).
- Reinstall the bulb cover and mounting screws.
- Restore power and test the light.
If you meant the inside (cavity) light instead
The inside oven light on model 40180086700 uses a different access method and a different bulb wattage.
| Light location | Typical access | Bulb type (per manual) |
|---|---|---|
| Cooktop / night light (under microwave) | Remove bulb cover screws | 20-watt appliance bulb |
| Oven (inside) light | Remove vent grille, remove bulb holder screw | 40-watt appliance bulb |
Quick checks if the new bulb still does not work
- Confirm power is fully restored (breaker on, plug seated).
- Make sure the bulb is an appliance-rated bulb and fully seated.
- Check for a loose or damaged bulb socket connection.
- If the light is controlled by a keypad setting, verify the light mode is turned on.
- If the microwave is acting dead or resetting, check the home fuse/breaker first.
Why it matters
Using the correct bulb wattage helps prevent heat damage to the lens/cover and keeps the cooktop area properly lit for safe range use.
Last updated: February 2026
How many cubic feet is a Kenmore Model 40180086700 microwave?
The Kenmore 40180086700 microwave/hood combo has a capacity of about 1.7 cubic feet. For the exact capacity listing and other key specs for your specific unit, we recommend confirming in the 40180086700 use and care guide.
How to confirm the capacity on your model
We use the model-specific documentation to verify specs like oven capacity.
- Open the 40180086700 use and care guide
- Go to the Table of Contents
- Look for “Oven Specifications”
- Confirm the capacity (cu. ft.) listed for your exact model number
- If your label shows a close variant (same series), match it to the models listed in the guide
Model number note (why this matters)
The use and care guide covers a family of models (including 401.80086). Your full model number 40180086700 is a specific version within that family, so checking the spec table ensures you are using the correct capacity and electrical ratings.
Quick reference
| Item | What to expect |
|---|---|
| Capacity | About 1.7 cu. ft. |
| Product type | Microwave/hood combo |
| Where to verify | Oven Specifications section in the manual |
Why it matters
Capacity affects what cookware fits, how evenly food heats, and which cooking times and sensor programs work best. Using the correct cu. ft. rating also helps when comparing replacement units or planning cabinet clearance.
Last updated: February 2026
Are Kenmore microwaves good?
Kenmore microwaves are a good choice for most kitchens because they’re built for dependable everyday cooking and typically offer strong features for the price. For Kenmore model 40180086700 specifically, following the care, cleaning, and operating guidance in the 40180086700 use and care guide helps you get the best performance and longest service life.
What “good” usually means for a microwave/hood combo
A microwave/hood combo has to do two jobs: heat food consistently and vent cooking smoke/steam. In real-world use, “good” usually comes down to:
- Even heating at common power levels
- Reliable door operation and safety interlocks
- Vent fan performance and lighting convenience
- Easy maintenance (filters, lights, cleaning)
- Reasonable repairability when a wear item fails
What to expect from the 40180086700 in day-to-day use
Your manual highlights features and maintenance items that directly affect satisfaction, including the vent fan, turntable control, child lock, and routine cleaning tasks like grease filter cleaning and charcoal filter replacement.
Maintenance items that most affect performance
| Item | What it impacts | Typical attention needed |
|---|---|---|
| Grease filter | Venting airflow and odor control | Clean regularly (more often with heavy cooking) |
| Charcoal filter (recirculating setups) | Odor reduction | Replace on a schedule based on cooking frequency |
| Interior cleaning | Prevents odors and arcing risk | Wipe spills promptly |
| Door closing/latching | Safe operation and consistent cooking | Keep latch area clean and undamaged |
Why it matters
Most “bad microwave” experiences come from avoidable issues: restricted airflow from dirty filters, skipped cleaning, or door/latch problems that stop the oven from running. Keeping up with the basics preserves heating performance and reduces nuisance shutdowns.
When to consider repair vs. replace
If the unit runs but does not heat, the issue is often in the high-voltage circuit. That repair can involve high-voltage components and should be handled carefully.
- If it doesn’t heat but everything else works, use why is my microwave not heating to narrow likely causes.
- If the venting is weak, start with filter cleaning and correct venting setup per the manual.
- If the door won’t close or the unit won’t start, inspect the latch area for damage and alignment.
Last updated: February 2026
Where is the fuse on a Kenmore microwave?
On the Kenmore 40180086700 microwave/hood combo, the fuse is typically located inside the cabinet behind the control panel area, on or near the noise filter/line filter where the power cord wiring enters. Unplug the microwave before checking it, and follow the access steps in the 40180086700 installation guide.
What to check first (before opening the microwave)
- Confirm the outlet has power by testing it with another small appliance.
- Reset the kitchen circuit breaker, or replace a blown house fuse (the manual notes fuses can blow if the microwave shares a circuit).
- Make sure the microwave is on its own 20-amp circuit to prevent voltage drop and nuisance fuse issues.
- If the display is blank after a power event, restore power and reset the clock per the 40180086700 owner’s manual.
Safe access basics (important)
Microwaves contain high-voltage components that can store a dangerous charge even when unplugged. If you are not experienced with appliance electrical repair, we recommend having a service technician handle internal fuse diagnosis.
Typical fuse access path (over-the-range units)
| Step | What you do | What you are looking for |
|---|---|---|
| 1 | Unplug microwave (or switch off breaker) | No power to the unit |
| 2 | Remove the top grille | Screws securing the control panel |
| 3 | Remove control panel mounting screw(s) and tilt panel out | Fuse holder near incoming power wiring |
| 4 | Test fuse with a multimeter | Continuity through the fuse |
Why the fuse blows (common causes)
- Power surge or outage (the manual references power interruptions and resetting power)
- Shorted door interlock circuit or switch issue
- Internal component failure (less common, but possible)
- Loose or damaged wiring connection
Parts that are often involved
If the fuse is blown, we also check for the underlying cause before replacing it. Door safety circuits are a frequent culprit.
- Microwave door interlock switch 3405-001034 (door safety switch)
- Microwave door latch DE64-00760A (latch that actuates the switches)
Why it matters
Replacing only the fuse without correcting the root cause can lead to repeated fuse failures, no heat symptoms, or a microwave that will not run safely.
Last updated: February 2026
How big is a Kenmore microwave model 40180086700 in inches?
The Kenmore microwave/hood combo model 40180086700 has outer dimensions of 29 7/8 inches wide x 16 13/16 inches high x 16 inches deep. Use these measurements to confirm fit over your range; for mounting clearances and cabinet bolt locations, use the 40180086700 use and care guide.
Dimensions at a glance
- Width: 29 7/8 in.
- Height: 16 13/16 in.
- Depth: 16 in.
- Typical class: 30-inch over-the-range microwave footprint
| Measurement | Size (inches) | Why you measure it |
|---|---|---|
| Width | 29 7/8 | Fits between cabinets and aligns over the cooktop |
| Height | 16 13/16 | Checks clearance to upper cabinet and backsplash trim |
| Depth | 16 | Confirms how far the unit projects from the wall |
What to verify before installation
- Confirm the mounting bracket position and top cabinet bolt pattern in the 40180086700 installation guide.
- Measure your cabinet opening at the front and back; cabinet faces and light rails can reduce usable space.
- Check your venting setup (recirculating vs. outside vent) so the duct path and damper area clear framing.
- Make sure the door can open fully without hitting adjacent cabinets or a wall.
- If you are replacing an older unit, compare width and depth first; those most often affect fit.
Why it matters
Over-the-range microwaves are often “30-inch” units, but small differences in height, depth, and mounting points can cause installation problems. Using the published outer dimensions for model 40180086700 helps prevent cabinet and venting surprises.
Last updated: February 2026


