 Owner’s manual




How to force GE washer to drain and spin?
On the GE GTW725BSN0WS washer, the quickest way to force a drain and spin is to select the Drain & Spin cycle, close the lid, and press Start. If the washer is paused, press Start again to resume, or reselect the cycle.
- Press Power to wake the controls.
- Turn the cycle selector knob to Drain & Spin.
- Choose a Spin setting (Max, More, Normal, or No Spin).
- Close the lid (the washer will not start most cycles with the lid open).
- Press Start.
If the washer was already running and you turned the knob, the washer will stop and change to the new selection; press Start to begin the new cycle.
These checks are the most common causes on this GE top-load platform:
- Lid not recognized as closed/locked: open and close the lid firmly, then press Start.
- Out-of-balance load: redistribute items evenly and run Drain & Spin again.
- Paused too long: if the washer sits paused with water in it, it can cancel and drain automatically; restart with Drain & Spin.
- Drain path restriction: check the standpipe and drain hose for kinks or clogs.
- Pump issue: if you hear humming but no water moves, the drain pump may be jammed or failing.
| Symptom | What to inspect | Example compatible part |
|---|---|---|
| Hums but won’t drain | Pump impeller jam, pump failure | GE washer drain pump assembly WH23X28418 |
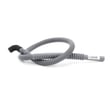
| Drains slowly or leaks at pump area | Hose restriction, loose clamp, damaged hose | Washer pump drain hose WH41X24177 |
Running Drain & Spin first helps protect the washer from trying to spin with a tub full of water, and it can quickly confirm whether the issue is load balance, a lid-lock condition, or a drain system problem.
For cycle behavior details (including pause behavior and when the washer auto-drains), use the GTW725BSN0WS owner’s manual.
Last updated: January 2026
How to run a diagnostic on a GE washing machine?
On the GE GTW725BSN0WS washer, the owner’s manual does not provide a single, step-by-step “diagnostic mode” key sequence. What you can do reliably is use the built-in display messages and troubleshooting guidance in the GTW725BSN0WS owner’s manual to identify what the washer is detecting (lid, water supply, pause, cancel, balance) before you move into deeper testing.
These checks work on GTW725BSN0WS using normal controls and the display:
- Watch the display for scrolling status or help messages (examples include Lid, H2O SUPPLY, PAUSE, CAnCELEd, bALAnCINg).
- Confirm the lid is fully closed; the washer will not start most cycles with the lid open.
- If the washer is paused, press Start again to resume.
- If water remains in the tub, run Drain & Spin to clear it.
- If the washer is out of balance, redistribute the load and rerun Drain & Spin.
If you are stuck in a message loop or the controls are not responding, try this sequence:
- Press Power to put the washer into idle.
- Wait 30 seconds.
- Press Power again.
- Re-select the cycle and press Start.
If the display indicates a lid-related issue and the washer will not start, inspect the lid strike and lock area. A worn strike or failing lock can prevent normal operation; compatible replacements for this model include the washer lid strike WH02X24106 and the washer lid lock WH08X37938.
GE top-load washers can use different code families depending on the platform. For code definitions and common fixes, we recommend using our GE gtw top load washer error codes reference alongside the symptoms you see on GTW725BSN0WS.
| What you see | What it usually points to | What to do first |
|---|---|---|
| H2O SUPPLY | Water not entering | Open both supply valves; check hoses |
| Lid | Lid not opened/closed as expected | Open/close lid; check strike/lock |
| Spin light blinking | Out-of-balance detected | Redistribute load; run Drain & Spin |
Running the right checks first prevents unnecessary part replacement. Many “no start,” “won’t spin,” or “won’t fill” complaints are caused by a lid lock/strike issue, water supply valves being off, or an unbalanced load, not a failed control board.
Last updated: January 2026
What is the life expectancy of a GE washing machine?
A GE washing machine typically lasts 10 to 14 years. For the GE GTW725BSN0WS top-load washer, lifespan is driven less by the model number and more by how often it runs, how heavily it’s loaded, and whether routine cleaning and hose replacement are kept up per the GTW725BSN0WS owner’s manual.
- Load size and balance: chronic overloading and out-of-balance spinning shortens bearing, suspension, and drive life.
- Detergent use: too much detergent can cause oversudsing and residue buildup.
- Monthly tub cleaning: running a cleaning cycle helps prevent odor and buildup.
- Water supply hoses: replacing hoses on schedule helps prevent leaks and water damage.
- Installation and leveling: an unlevel washer vibrates more and wears faster.
- Run a monthly cleaning cycle (the manual describes using the Bulky Items cycle with bleach).
- Use HE detergent and measure carefully.
- Load items loosely and distribute around the basket (avoid packing items tightly).
- Turn off water faucets when away for extended periods.
- Replace inlet hoses every 5 years.
| Washer type | Typical life expectancy | Notes |
|---|---|---|
| Top-load (like GTW725BSN0WS) | 10 to 14 years | Often longer with good leveling and balanced loads |
| Front-load | 10 to 14 years | Door boot and drainage upkeep matter more |
Knowing the typical 10 to 14-year lifespan helps you decide whether to invest in maintenance and repairs (for example, addressing draining issues early can prevent strain on components like the GE washer drain pump assembly WH23X28418).
Last updated: January 2026
What is the most common problem with GE washers?
Across GE washers like model GTW725BSN0WS, the most common service issues we see are drain and spin problems (water left in the tub, wet clothes, or a cycle that stops before spinning). These are often tied to a drain restriction, a lid lock not sensing closed, or a control-related fault; see the GTW725BSN0WS owner’s manual for the model’s built-in troubleshooting messages.
- Won’t drain or drains slowly: standing water, “Drain & Spin” doesn’t clear the tub.
- Won’t spin or leaves clothes wet: out-of-balance events, load not redistributing.
- Lid won’t lock or “Lid” message: washer won’t start another cycle until the lid is opened and closed.
- Won’t fill or “H2O SUPPLY” message: valves off, low water pressure, or fill system issue.
- Noisy operation or heavy vibration: suspension wear, unlevel washer, or overloaded/bulky loads.
- Redistribute the load and run Drain & Spin; out-of-balance loads can prevent full-speed spin.
- Confirm the lid is fully closed; this model will not start most cycles with the lid open.
- Verify both hot and cold supply valves are fully open if you see “H2O SUPPLY.”
- Check the drain hose for kinks or a clogged standpipe.
- If the washer pauses, press Start again after closing the lid.
If basic checks don’t help, these parts are frequently involved on top-load GE designs:
| Symptom | Common suspect | Example compatible part for GTW725BSN0WS |
|---|---|---|
| Won’t drain / drains poorly | Drain pump or drain path restriction | GE washer drain pump assembly WH23X28418 |
| Won’t start / lid errors | Lid lock not sensing closed | Washer lid lock WH08X37938 |
| Won’t spin / shifts oddly | Shifter system issue | Washer shifter assembly WH03X31937 |
Drain and spin issues can look like a “bad washer,” but they are often caused by a correctable condition (load balance, lid lock sensing, or a drain restriction). Catching it early helps prevent repeat cycle stops, excess vibration, and water left in the basket.
Last updated: January 2026
Where to find model number on a GE washer?
On the GE GTW725BSN0WS top-load washer, the model and serial number label is located under the lid. Open the lid and look around the top rim of the wash opening (near the tub opening) for the sticker; confirm the exact characters before ordering parts.
- Under the washer lid (primary location for GTW725BSN0WS)
- Along the top edge of the cabinet opening, just under the lid
- On the back of the control panel area (less common on this style)
- Inside the lid itself (occasionally)
Having the full model number helps us match the correct diagrams, compatible replacement parts, and troubleshooting info.
- Write down the full model number and serial number
- Take a clear photo of the label for reference
- Use the full model number (including any suffix letters/numbers)
- Match parts by model first, then verify by part description
The location is called out in the GTW725BSN0WS owner’s manual.
| What you need | Where to find it | Why it matters |
|---|---|---|
| Model number | Under the lid | Ensures correct part fit |
| Serial number | Under the lid | Helps identify production details |
GE often uses similar-looking washer designs across multiple model series. One character difference in the model number can change the correct lid lock, control board, or drain pump used in the washer.
Last updated: January 2026


