 Owner’s manual






Where is the filter on my GE Deep Fill washing machine?
On the GE GFW850SSN2WW front-load washer, the “filter” most people mean is the drain pump filter (coin trap). It sits behind the small lower access door on the front of the washer; you open that door, drain any water, then unscrew and remove the filter for cleaning (see the GFW850SSN2WW owner's manual).
Where to find it on this model
The pump filter is located:
- On the front of the washer
- Behind the small lower access door (near the bottom edge)
- Next to the emergency drain area (you will typically drain water before removing the filter)
If you are looking for a “fill filter,” that is different: the inlet screens are at the water valve connections on the back of the washer and in the hose ends.
How to clean the drain pump filter safely
Before you start, unplug the washer.
- Open the lower access door
- Put towels down and place a shallow pan under the opening
- Drain the water slowly (expect up to about a cup in normal situations)
- Turn the pump filter counterclockwise slowly and remove it
- Clean lint, coins, and debris; rinse the filter
- Reinstall the filter snugly (do not overtighten) and close the access door
Quick “what you’ll see” guide
| What you notice | What it usually means | What to do |
|---|---|---|
| Lots of water comes out | Water was trapped in the pump area | Drain slowly into a pan, use towels |
| Lint, hair, small items | Normal buildup over time | Clean filter and housing, reinstall |
| Washer won’t drain well | Filter or pump path is restricted | Clean filter; check for blockage |
Why it matters
A clogged pump filter can cause slow draining, standing water, odors, and drain-related errors. Keeping the filter area clean helps protect the drain pump and keeps cycles finishing normally.
Parts that commonly relate to “filter” and draining
If cleaning the filter does not restore draining, these parts are commonly involved on this model:
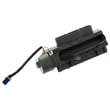
- Pump filter with seal WH23X38617 (damaged seal or missing filter can cause leaks)
- GE washer drain pump assembly WH11X39237 (pump not moving water)
For additional parts for your GE GFW850SSN2WW, order from the parts list for this model or search by model number on Sears PartsDirect.
Last updated: February 2026
What is the life expectancy of a GE washing machine?
A GE washing machine typically lasts 10 to 14 years. For your GE GFW850SSN2WW front-load washer, consistent care (especially keeping the door gasket clean and dry) and replacing wear items on time helps you reach the full expected lifespan; see the maintenance guidance in the GFW850SSN2WW owner's manual.
What affects washer lifespan the most
We see these factors make the biggest difference on front-load washers like the GFW850SSN2WW:
- Load habits: frequent overloading strains the drive system and suspension
- Moisture control: leaving the door closed after cycles promotes odor and gasket issues
- Water quality: hard water increases detergent buildup and residue
- Hose condition: fill hoses should be replaced every 5 years to reduce failure risk
- Routine cleaning: detergent drawer, door boot, and pump filter area need periodic cleaning
Maintenance checklist (simple, high impact)
Use this routine to extend life and reduce common failures (leaks, vibration, draining problems):
- Wipe the door boot and glass after the last load of the day
- Use the washer’s venting or leave the door slightly open between loads
- Run a monthly cleaning cycle (washer cleaner or manufacturer-recommended method)
- Check and clean the pump filter area if you notice slow draining or debris
- Inspect inlet hoses for bulges or cracking; replace on schedule
Common “end-of-life” symptoms and likely parts
If performance changes, these are the most common repair areas on this model family:
| Symptom | What it often points to | Example part for this model |
|---|---|---|
| Door won’t lock or cycle won’t start | Door lock or latch issue | GE washer door lock WH01X29528 |
| Won’t drain, stops mid-cycle | Drain pump or restriction | GE washer drain pump assembly WH11X39237 |
| Won’t fill or fills slowly | Water inlet valve or screens | GE washer water inlet valve WH23X29553 |
| Leaks at the door | Worn or torn door boot | Washer door boot WH05X29514 |
Why it matters
A washer that is cleaned, leveled, and not overloaded runs cooler and with less vibration. That reduces stress on the motor, suspension, door seal, and controls, which are the systems that most often determine whether you get 10 years or closer to 14.
You can order replacement parts for your GE GFW850SSN2WW from the parts list for this model, or search by model number on Sears PartsDirect.
Last updated: February 2026
How often should you run ultrafresh vent?
Run UltraFresh Vent on your GE GFW850SSN2WW after the last load of the day so the basket and door area dry between uses. Skip it on days you do not wash; it is designed for between-wash freshness, not continuous daily operation.
Recommended schedule
- Run UltraFresh Vent once after your final cycle of the day (1 load or many).
- Do not run it on days the washer was not used.
- Start it only with an empty basket (remove all garments first).
- Expect the door to remain locked during operation.
- If odor persists, run Self Clean; on some models it can start UltraFresh Vent afterward.
What to expect on this model
UltraFresh Vent intermittently spins at low speed for up to 8 hours to help dry the tub and door gasket area. If garments are detected in the basket, the washer can switch to a different care option (such as Tumble Care or 1 Step Wash + Dry, depending on options). For the exact button sequence and indicator behavior, use the GFW850SSN2WW owner's manual.
Quick reference
| Situation | What to do | Why it helps |
|---|---|---|
| Washed today | Run UltraFresh Vent once after the last load | Reduces moisture between uses |
| No laundry today | Skip UltraFresh Vent | No moisture load to dry |
| Strong odor | Run Self Clean (repeat if needed) | Removes residue that causes odor |
Why it matters
Front-load washers can hold moisture around the door glass and door boot. Using UltraFresh Vent between uses reduces lingering moisture and helps prevent odor.
Parts that can contribute to odor or moisture problems
- Washer door boot WH05X29514 (gasket area can trap moisture and residue)
- Pump filter with seal WH23X38617 (debris buildup can cause odor)
You can order replacement parts from the parts list for this model, or search by model number on Sears PartsDirect.
Last updated: February 2026


