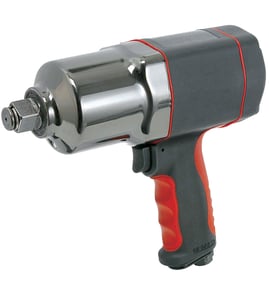

Will a 10 gallon air compressor run an impact wrench?
Yes. A 10-gallon air compressor will run a Chicago Pneumatic CP-742-TL-2 pneumatic air wrench for short, intermittent bursts, but it usually cannot keep up with continuous impact use because the tool’s air demand (CFM at 90 PSI) drains the tank quickly.
- CFM at 90 PSI: This is the main limiter for impact wrenches.
- Cut-in/cut-out PSI: Wider ranges can mean longer run time before pressure drops.
- Duty cycle and recovery time: Small compressors may run nearly nonstop and heat up.
Most 1/2-inch impact wrenches are happiest when the compressor can supply roughly 4 to 8+ CFM at 90 PSI (more is better for stubborn fasteners). A 10-gallon tank can work if you are doing lug nuts or occasional bolts, then pausing to let pressure recover.
| Use case | 10-gallon compressor outcome | What you will notice |
|---|---|---|
| Light, occasional bursts | Works | Short bursts feel strong, then fades |
| Repeated fasteners (lug nuts on multiple wheels) | Marginal | Frequent cycling, pressure drop |
| Continuous heavy work | Not a good fit | Tool slows, compressor runs hot |
- Set the regulator so the tool sees about 90 PSI under load (not just at idle).
- Use a 3/8-inch (or larger) air hose and high-flow fittings to reduce pressure loss.
- Drain the tank and use an air filter; water in the line reduces performance.
- Oil the tool if it is not oil-free; a dry motor hits weaker and wears faster.
- If the compressor struggles, work in short bursts and allow recovery time.
Impact wrenches are “air-hungry” tools. When the compressor cannot maintain CFM, the CP-742-TL-2 loses torque, takes longer to remove fasteners, and the compressor can overheat from constant cycling.
For finding replacement parts for the CP-742-TL-2, search by model number on Sears PartsDirect.
Last updated: February 2026
What does CP-742-TL-2 mean?
For the Chicago Pneumatic CP-742-TL-2 pneumatic air wrench, CP-742-TL-2 is the tool’s model identifier: CP refers to Chicago Pneumatic, and 742-TL-2 distinguishes the specific impact wrench design and revision so you can match the correct parts and diagrams.
In most Chicago Pneumatic tool model numbers, the characters work like this:
- CP: Chicago Pneumatic brand prefix
- 742: the tool series or platform (impact wrench family)
- TL: a configuration code (often tied to housing/anvil style, trigger type, or market variant)
- -2: a revision/version indicator (used to separate updates within the same series)
Using the full model number CP-742-TL-2 helps us narrow down the exact breakdown for your impact wrench so you avoid mismatched items such as:
- Motor or rotor components
- Hammer mechanism parts
- Anvil and drive parts
- Trigger and valve pieces
- Air inlet fittings and seals
| Item | What it’s used for | Example for your tool |
|---|---|---|
| Brand prefix | Identifies manufacturer line | CP = Chicago Pneumatic |
| Series number | Identifies tool family | 742 |
| Suffix letters | Identifies configuration | TL |
| Revision number | Identifies version | -2 |
- Check the nameplate/label on the tool body
- Look for the model near the air inlet or handle area
- Match the model exactly, including hyphens (CP-742-TL-2)
- If the label is worn, use our guide: how to find your appliance model number (and what it means for parts)
Small model suffixes and revision numbers can change internal components (especially the hammer case, anvil, and valve). Matching CP-742-TL-2 exactly keeps your repair accurate and prevents repeat teardown.
Last updated: February 2026
How many cfm do I need to run an impact wrench?
For a Chicago Pneumatic CP-742-TL-2 pneumatic air wrench, most users need about 4 to 8 CFM at 90 PSI for continuous use, depending on torque setting and how long you hold the trigger. Plan for extra compressor capacity so the tool does not starve for air under load.
We size air supply based on real-world use, not just “it spins.” Use these guidelines:
- Light, intermittent use (lug nuts, short bursts): 4 to 5 CFM @ 90 PSI
- General automotive use (frequent bursts): 5 to 7 CFM @ 90 PSI
- Heavy, repeated impacts (stubborn fasteners): 7 to 8+ CFM @ 90 PSI
- Best practice: choose a compressor rated 25% to 50% higher CFM than the wrench demand
Even with the same CP-742-TL-2, airflow at the tool can drop fast. Check these common restrictions:
- Hose size and length: 3/8-inch ID hoses flow much better than 1/4-inch, especially over 25 feet
- Quick-connect fittings: small couplers can choke airflow
- Regulator and filter: clogged filters and low-quality regulators reduce flow
- Tank pressure recovery: a small compressor may hit 90 PSI briefly, then fall behind
- Lubrication: dry air tools can drag internally and “feel weak” even with adequate PSI
| Use case | Recommended compressor output | Notes |
|---|---|---|
| Occasional DIY | 4 to 5 CFM @ 90 PSI | Short bursts, allow recovery time |
| Regular garage work | 5 to 7 CFM @ 90 PSI | Better consistency on lug nuts |
| Frequent heavy impacts | 7 to 10 CFM @ 90 PSI | Helps prevent torque drop-off |
If CFM is too low, the impact mechanism cannot hit consistently; you will see slower removal, lower torque, and more time on each fastener even if the regulator still shows 90 PSI.
- Use must have tools for appliance repair as a checklist-style guide for basic DIY tools and test gear that also apply to general repair work (like fittings, hoses, and measuring tools).
Last updated: February 2026
How much PSI is needed for a pneumatic impact wrench?
Chicago Pneumatic pneumatic impact wrenches such as model CP-742-TL-2 are set up to run at 90 PSI (6.3 bar) at the tool. Set pressure so the wrench maintains 90 PSI while the trigger is pulled (under load), not just when it is sitting idle.
- Regulate pressure to 90 PSI at the tool inlet
- Use a gauge at the end of the hose or at the tool to confirm pressure while hammering
- Keep fittings and quick-connects high-flow to reduce restriction
- Drain the compressor tank and use a moisture filter to keep air dry
- Oil the air tool as recommended for pneumatic motors (unless you run an inline oiler)
Pressure drop between the compressor and the wrench is common. These items cause the biggest losses:
- Long hose runs
- Small inside-diameter hose
- Restrictive couplers, swivels, or manifolds
- Clogged filter, water separator, or dirty inlet screen
- Compressor CFM output that cannot keep up under continuous hammering
| What to check | What to do | What “good” looks like |
|---|---|---|
| Pressure at the tool | Read a gauge while holding the trigger | Stays near 90 PSI |
| Restriction | Temporarily try a shorter or larger hose | Torque improves |
| Air supply | Watch compressor recovery during use | Fast recovery, minimal sag |
Running at the intended 90 PSI gives consistent torque, reduces internal wear, and prevents over-pressurizing the tool to compensate for airflow problems.
Related help: are diy appliance repairs safe
Last updated: February 2026