
What does 60 mean on a tumble dryer?
On an Electrolux EIMGD60JIW2 tumble dryer, “60” usually refers to error code E60, which points to a heating problem (the dryer is not heating correctly or is detecting a heat-related fault). Start by checking airflow and basic heat components before replacing parts.
- Clean the lint screen and confirm it is not coated with fabric softener residue.
- Check the exhaust vent for kinks, crushing, or heavy lint buildup.
- Run a timed dry cycle and confirm the drum turns and airflow at the outside vent is strong.
- Make sure the load size is reasonable; overloading can trigger heat and dry-time issues.
- If the dryer stops mid-cycle, let it cool 10 to 15 minutes and try again (overheat protection can trip).
If airflow is good but E60 keeps returning, these parts are common suspects:
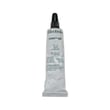
- Temperature sensing issues (thermistor): kenmore dryer thermistor 134711300
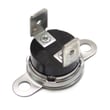
- Overheat protection opening (safety thermostat/limiter): limiter 137539200
- Gas heat not staying on (gas models): coil-seconda 5303931775
| What you notice | Most likely direction | Parts often involved |
|---|---|---|
| Dryer runs but no heat | Heat system not igniting/energizing | Gas coils, limiter, thermistor |
| Heat starts then quits | Overheating or weak ignition | Limiter, venting, gas coils |
| Long dry times, warm but not drying | Restricted airflow | Lint screen, venting (cleaning first) |
A heating fault can cause long dry times, poor drying performance, and overheating shutdowns. Fixing airflow first prevents repeat failures of heat-related parts like the limiter or thermistor.
Last updated: February 2026
What is the life expectancy of an Electrolux dryer?
Most Electrolux dryers, including model EIMGD60JIW2, typically last 10 to 15 years with normal household use. Consistent airflow maintenance (lint screen and venting) and addressing wear parts early are the biggest factors in reaching the high end of that range.
A dryer’s service life is driven more by heat, airflow, and moving-part wear than by the brand name alone.
- 10 to 15 years is the typical life expectancy for a full-size dryer
- Heavy loads, frequent cycles, and restricted venting shorten life
- Regular cleaning and timely part replacement extend life
- No-heat and long-dry-time issues often trace back to airflow or gas ignition components
These steps prevent overheating, reduce cycle time, and lower strain on the motor and drum support system.
- Clean the lint screen every load; replace a damaged screen such as the kenmore dryer lint screen 134793600
- Vacuum lint from the lint chute and blower area periodically
- Keep the exhaust vent short, smooth, and clear (check outside hood for blockage)
- Avoid overloading; it stresses the belt, rollers, and idler
- Stop using the dryer if you hear squealing, thumping, or grinding; replace wear parts early
If the dryer still heats and controls work, replacing a few mechanical parts often restores quiet, reliable operation.
| Symptom | Common wear area | Example part for EIMGD60JIW2 |
|---|---|---|
| Squealing or chirping | Idler pulley or idler arm | Dryer idler assembly 134793511 |
| Thumping or rumbling | Drum rollers | Dryer drum support roller 5304523152 |
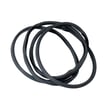
| Drum not turning | Belt or idler system | White-westinghouse dryer drum belt 134719300 |
| Hums but won’t run | Drive motor | Motor 5304529782 |
A dryer that is taking longer to dry or running hotter than normal wears out faster and can damage key components like the motor, belt, and blower housing. Keeping airflow strong and replacing drum support parts when noise starts is the most cost-effective way to extend the life of your EIMGD60JIW2.
For efficiency-focused upkeep tips, we recommend how to clean and maintain your clothes dryer.
Last updated: February 2026
How to clean moisture sensor on electrolux dryer?
On your Electrolux EIMGD60JIW2 dryer, clean the moisture sensor by wiping the sensor bars inside the drum with rubbing alcohol on a soft cloth; this removes dryer sheet residue so Auto/Timed Dry cycles can sense dryness correctly. Use a gentle wipe, not abrasive scrubbing.
Most Electrolux dryers use two metal sensor bars mounted inside the drum, typically near the lint filter housing. You’re cleaning the metal surfaces that the laundry brushes against during tumbling.
- Turn the dryer off and let the drum cool.
- Locate the two metal sensor bars inside the drum.
- Dampen a soft cloth with isopropyl (rubbing) alcohol.
- Wipe each bar firmly from end to end to remove waxy buildup.
- Let the alcohol air-dry for a minute.
- Run a small load on an Auto/Normal cycle to confirm drying improves.
Residue is common, but airflow and sensing parts also matter.
Quick checks
- Clean the lint screen every load; replace a damaged screen such as kenmore dryer lint screen 134793600.
- Confirm strong airflow at the outside vent; clear lint restrictions.
- If the dryer overheats or shuts down early, a temperature safety device such as limiter 137539200 can be involved.
- If cycles end too soon or run too long, the sensing circuit can be affected by a failed kenmore dryer thermistor 134711300.
A dirty moisture sensor can make the dryer think clothes are dry when they are still damp (or keep running after they are dry). Cleaning improves drying accuracy, helps prevent overdrying, and can reduce energy use.
| Symptom | Most common cause | What to do first |
|---|---|---|
| Clothes still damp on Auto Dry | Sensor bars coated with residue | Clean sensor bars with alcohol |
| Clothes overdry or shrink | Sensor not reading moisture well | Clean sensor bars; avoid heavy dryer sheet use |
| Dry times suddenly much longer | Vent restriction or lint buildup | Check venting and lint screen |
For more dryer efficiency and cleaning tips, use how to clean and maintain your clothes dryer.
Last updated: February 2026